
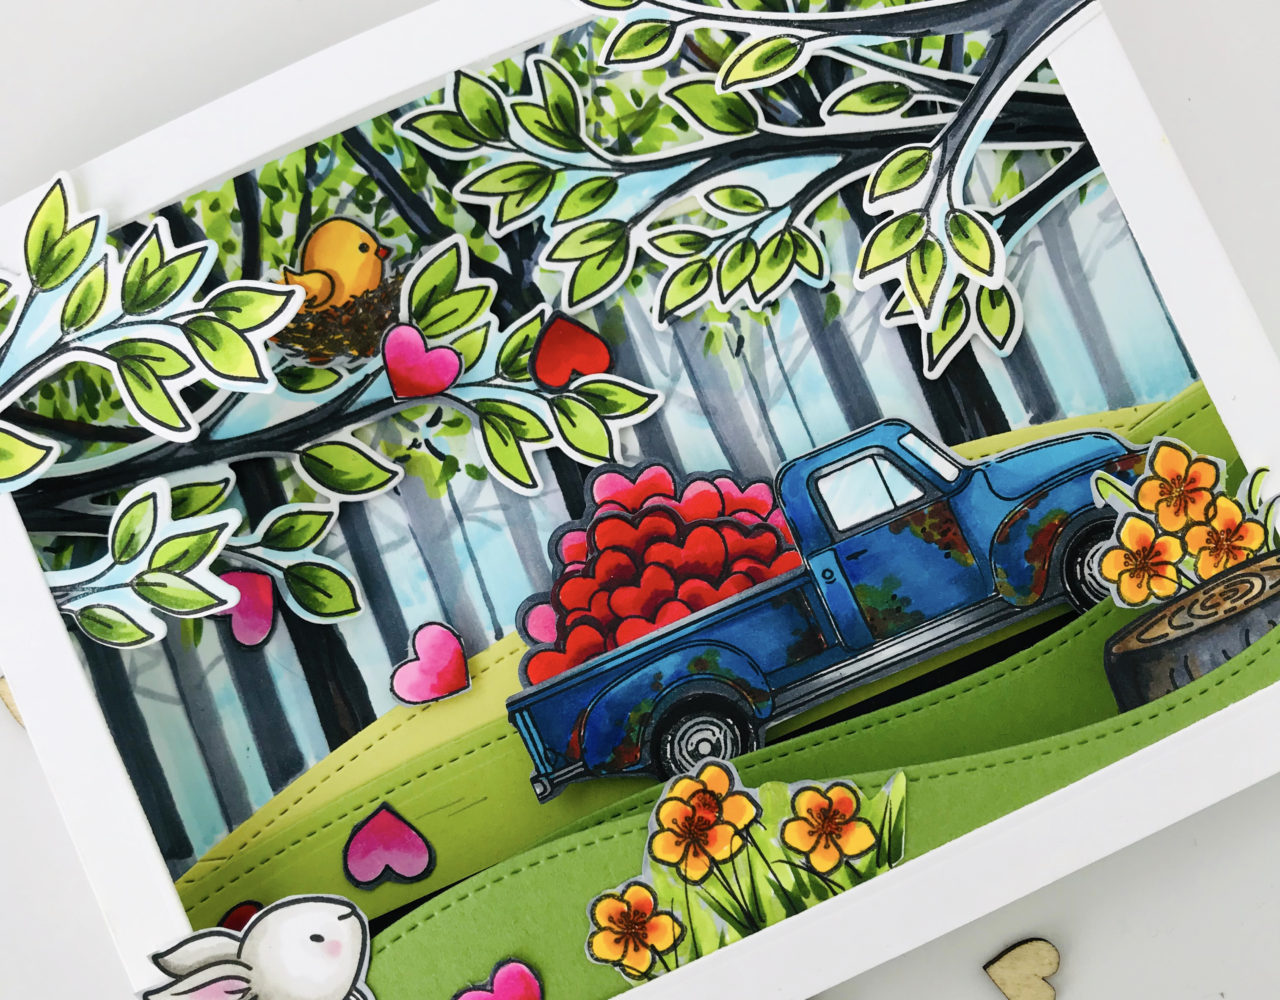
When you have lots of love to give, spread it all over the world…literally! My project today uses that amazing Little Pickup truck that I love from Honey Bee stamps . This may have been my very first Honey Bee Stamps set ever! I love it so much that I just got the matching dies, too. I have used the truck in different scenes already with the Christmas tree in the bed. Today, I’m using the mound of hearts in honor of Valentine’s Day next month! This is the first time I’ve used the hearts in the truck so this was lots of fun. I decided this time to create a diorama card filled with fun dimension and cute little images in the scene. I got a little help from some other Honey Bee sets including:
- Birds and the Bees stamp set and dies
- Brie Mine stamp set and dies (I did not use the dies for this card, but sharing the link here for your convenience)
- Snow Buddies stamp set and dies for the bunny in the corner
- Hill Border Dies
- Bill the Bear stamp set and dies
- Little Pickup stamp set and dies
Keep in mind, that you don’t have to have all of these sets to make a card like this. You can swap out any element and add something from a set you have. Each card can be unique and different and convey the feeling you want to share.
Diorama Card dimensions
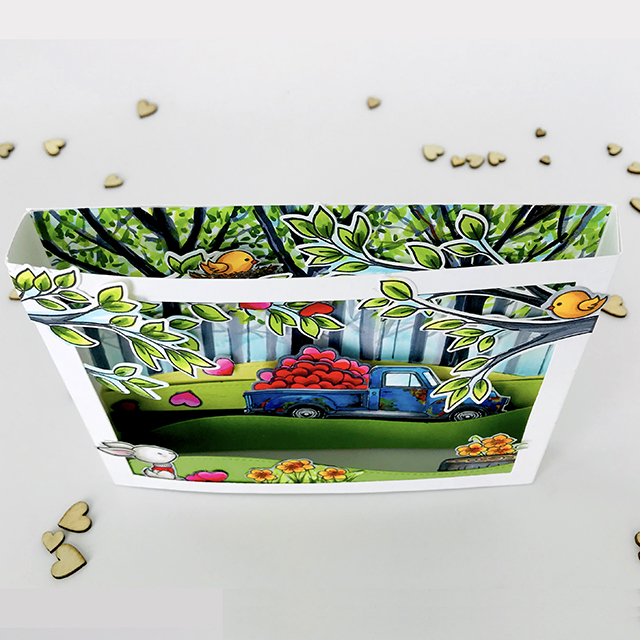
I created the diorama card by cutting two pieces of cardstock, 5″ tall by 7-3/4″ wide. I scored all four ends of the two pieces at 3/4″ from the 5″ cut edges to leave a 5″ tall X 6-1/4″ rectangle for my scene. I cut a large rectangle out of one of the pieces for the card front opening.
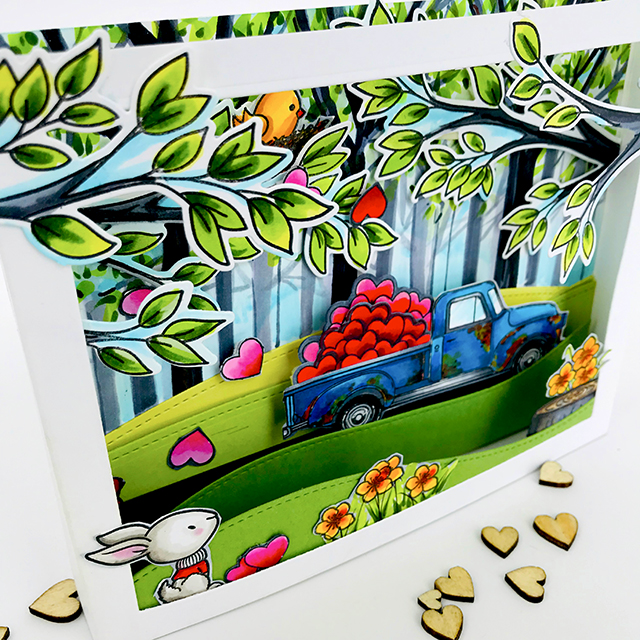
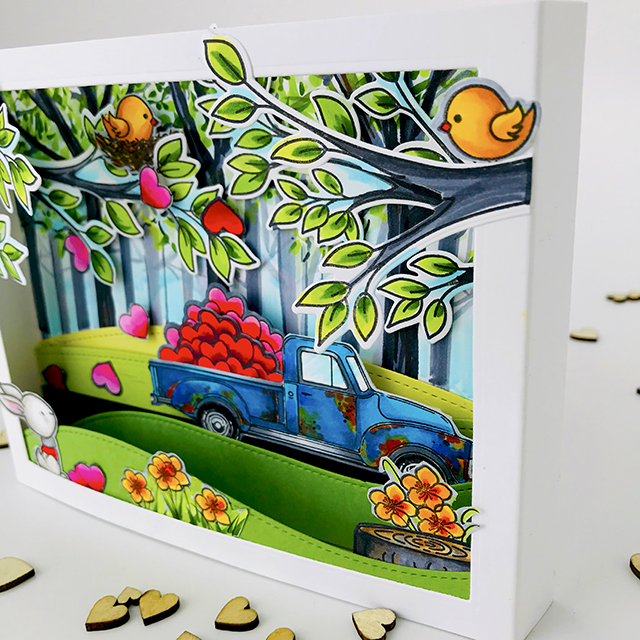
Next, I created the backdrop by drawing in tall trees in the background to create a backdrop for my Birds and the Bees low hanging branches coming out from the sides. I stamped and die cut a total for three of these adorable branches for this card. Two were used in the back layer and one was cut to create the two smaller branches hanging out of the back of the card front. A bird in a nest and some hearts that got tangled in the branches were added to create a sense of whimsy and fun. All of the pink and red hearts were cut out from the pile of hearts from Little Pickup. Notice that I added two piles in the truck to make the pile even bigger. After all, we’re spreading love in the hills here!
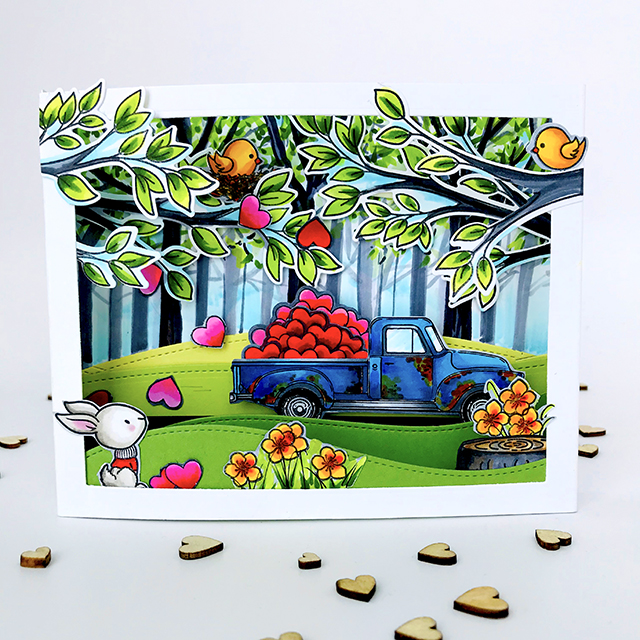
For the bottom of the scene, I added hills in various colors of green using the Honey Cuts Hill borders. I used the lightest color to the back and and the darkest shade to the front with the color in between to provide some depth in the scene. The very front hillside is actually attached to the card front frame at the bottom.
In between the hills is a black rural road for the truck to drive on. All of these layers are dimensional and build on each other using foam tape. For the front, I had to add that cute bunny from Snow Buddies stamp set. The flowers are from the Birds and the Bees set and the tree trunk is from Bill the Bear stamp set.
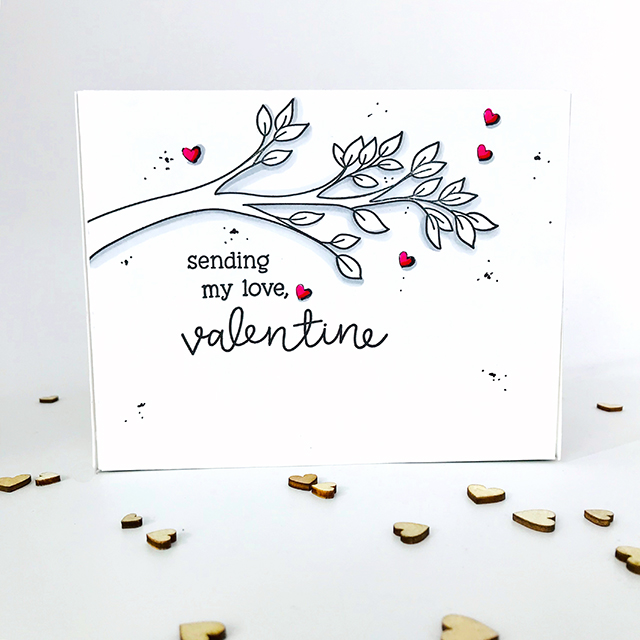
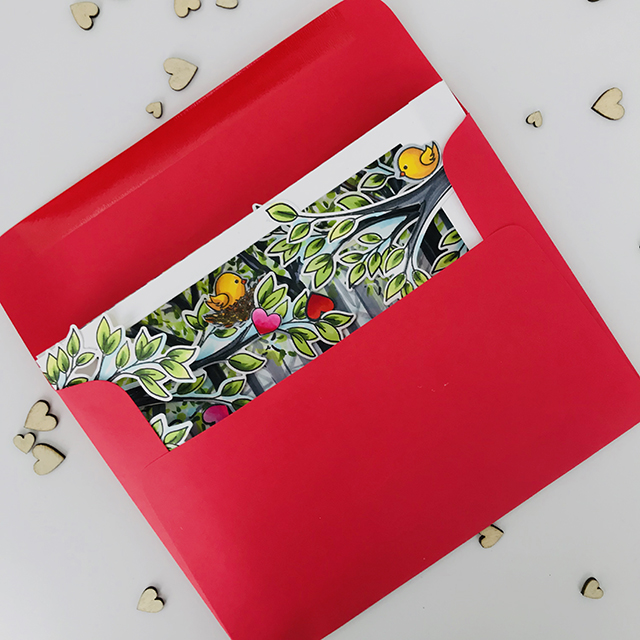
One of the first things I did, was stamp the back side of the card before adhering my scene together. I stamped the branch and the saying from Brie Mine on the back and kept it mostly black and white so that it was different from the vibrant front. I assembled my card by overlapping the 3/4″ sides using very sticky double sided tape on both ends. You want the card front side to be on the top so that your seam is to the back. Once completely assembled, I tested to make sure it would all fit in a standard envelope made for a 5″ X 7″ card and it did! You can seen how neatly it folds down to a flat card for mailing. Do you love making diorama cards, too? They take some time, but the results are fun and awesome! Let me know if you have questions. Thanks for visiting!
Create joy for the soul and shine! Bobbi


I love this card! So creative. Your so very talented. I’m going to give it a go and hope it turns out as nice as yours. Thanks for all the inspiration you give.
That’s awesome! I’m glad to hear to you’re giving it a go! There’s so many ways to make it cute that I’m sure your card will turn out beautifully! Thanks for visiting! Bobbi
WOW! This is an AMAZING card! It must have taken you a long time to make this card. I absolutely love every little detail and aspect of this card! Thank you so much for sharing all of the details and instructions on how to make the card. I love that it’s a “larger” card. (Everyone makes such small pop-up box cards and shadow boxes.) I definitely want to give it a try. Thank you for the inspiration and for sharing.
Thanks for visiting! This was fun and you it does take a little more time, but if you have coordinating dies, the cutting time is significantly reduced! I also let a project sit and when I come back to it, I may add a little more here and there. I rarely do all the work in one studio time. Bobbi