

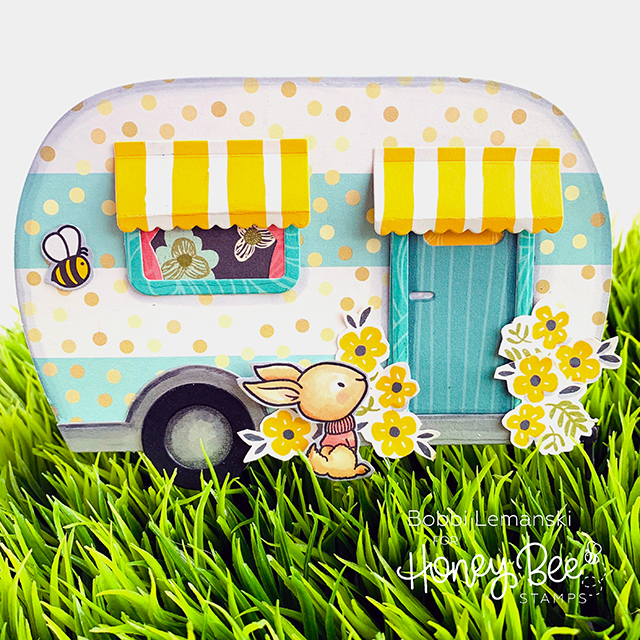
Hopefully, by now you’ve checked out the Honey Bee Stamps Autumn Blessings Release. There are so many great sets you’ll FALL in love with this autumn season. Today, I’m sharing a new die that’s part of the release, called Camper Trailer Card Die set. With this die set, you can create a camper-shaped card that fits in an A2 envelope! You can dress it up however you like to personalize for the recipient which I think is so fun. Time to get creative, crafters! Here’s a list of supplies from Honey Bee that I used to make this fun-shaped card:
- Camper Trailer Die Set
- Snow Buddies stamp and die sets (for the bunny, only)
- Spring Fling 6″ X 6″ Pattern Paper Pad
- Over the Rainbow 6″ X 6″ Pattern Paper Pad (for the yellow striped awning paper, only)
- The Bee’s Knees 6″ X 6″ Pattern Paper Pad (for the bee, only)
- Neenah 110lb Solar White Cardstock
- Neenah 80lb Solar White Cardstock
To make this card, I first die cut the main body of the card from a sheet of 110lb Neenah 8-1/2″ x 5-1/2″ folded Solar White cardstock. I like to use a heavier cardstock for the base to support the elements and to make it stand in place. Here’s the critical step in making this shaped card. –> When you die cut the base, you want to make sure that your die falls off of the paper at the top of the die and by the fold so that it does not cut through the folded side. This will make it a folded card. Note: There is a small die cut hinge in the set that can be used to make it a shaped card that opens, too. Kelley Kohout has a video (Begin to watch at the 2:08 minute marker to see her demonstration on how to use the hinge.) to show how that is used. I like the cleaness of just using the folded side to connect my front and back panels.
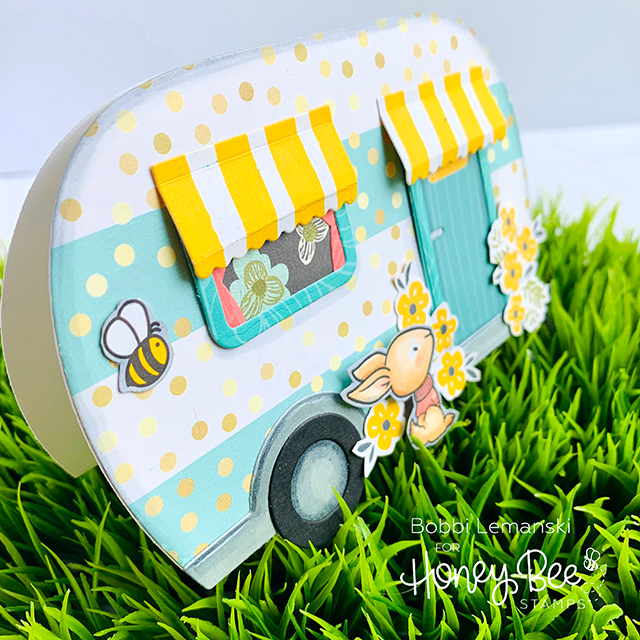
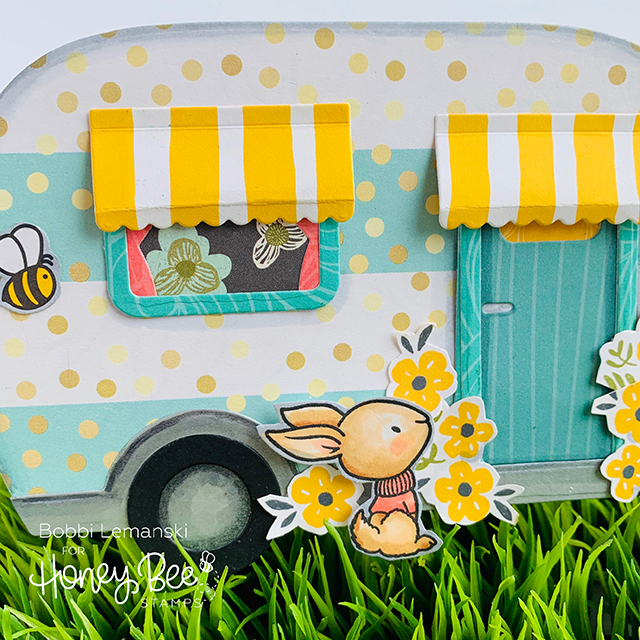
I used the 80lb for any other elements needed to be cut from white cardstock. I die cut the front card panel from the mint green/gold striped confetti pattern paper for the camper body. The rest is easy – simply die cut the camper elements to fit the look you want. I used various pieces of patterns to make the door, door frame, curtains, interior space wallpaper (inside the window), window frame, etc. Black cardstock was used for the tire and hitch and a silver metallic cardstock for the bottom framing of the camper and hubcap.
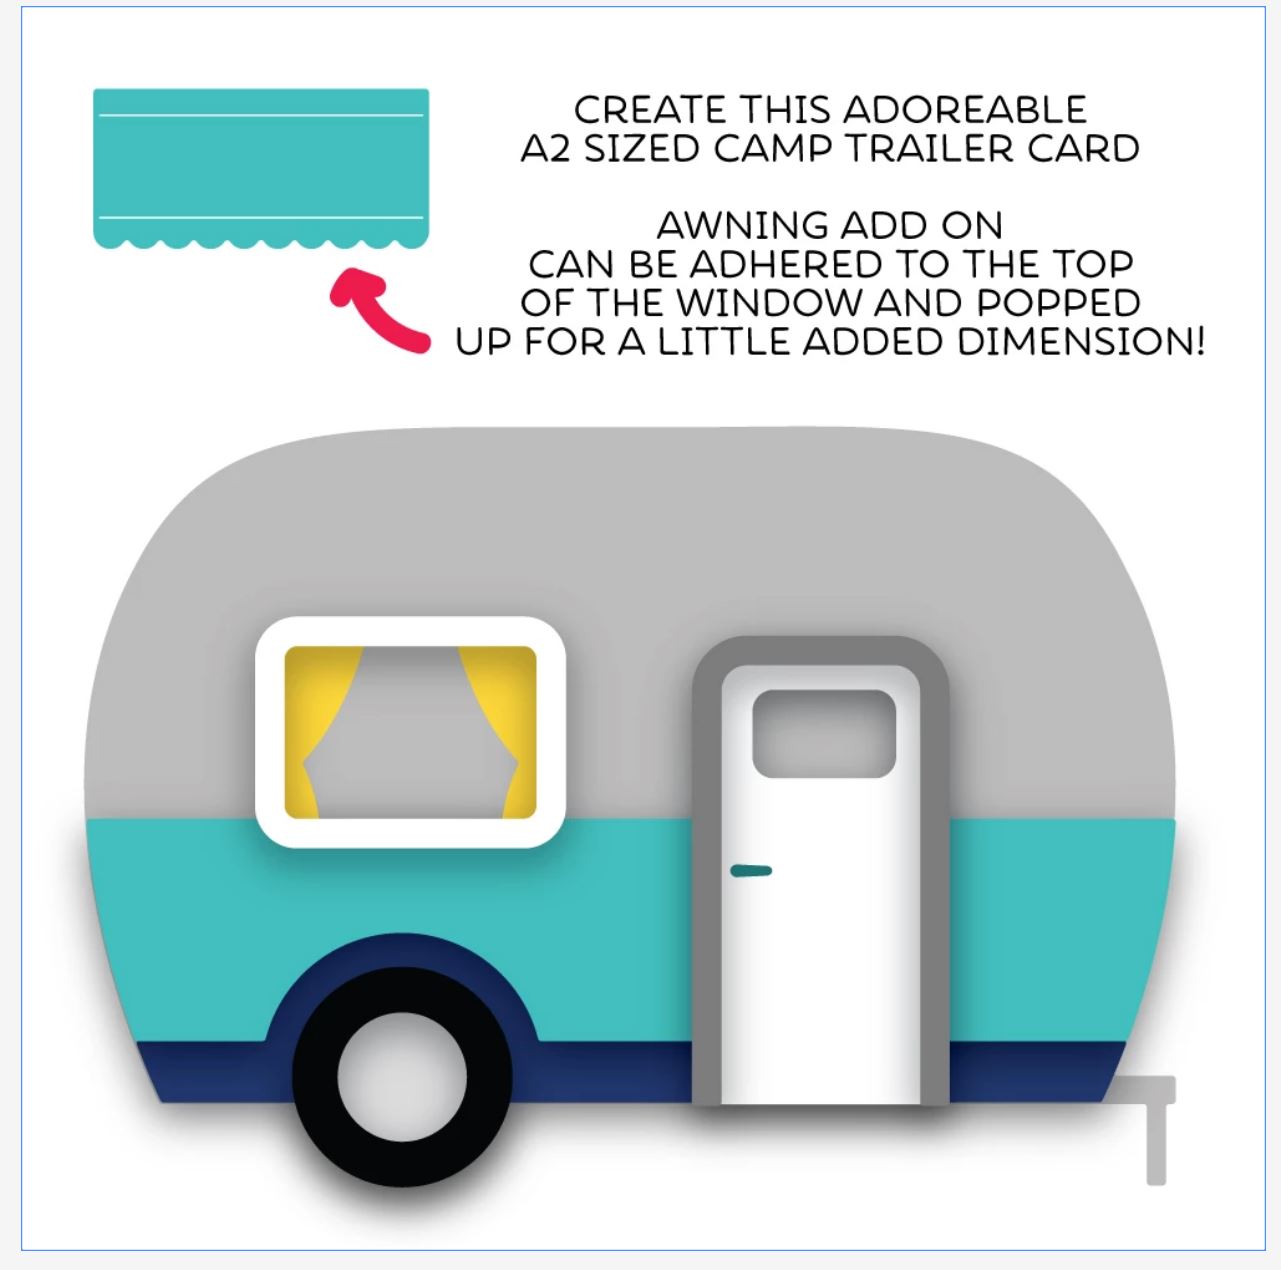
Honey Bee Stamps shares this photo to the left on its website to show where all the pieces go. I found this very helpful in putting mine together. This is the part when you can get really creative with your choices and personalize your camper. How about adding a pup or a person in the window? Perhaps your camper door opens to reveal a message inside? Ooh, now I’ve got to try these ideas on my next one!
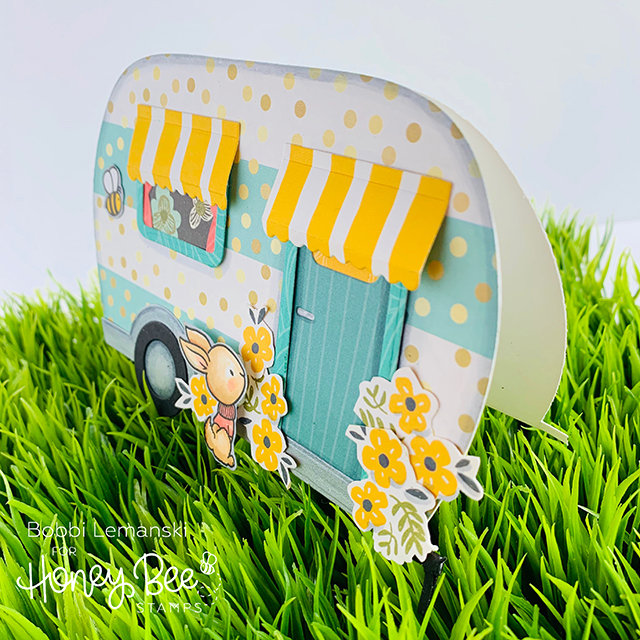
To personalize further, I added a bunny and some flowers to the outside of my camper. The flowers were cut out of a piece of pattern paper in the Spring Fling pad. The bunny is from the stamp set, Snow Buddies (love this cute winter set!)
Don’t forget to check out more ideas on the Honey Bee Blog all week during Inspiration Week. You’ll find more ideas on Day 5 using this cute camper-shaped card. Also, the Honey Bee Blog Hop begins tomorrow so be sure to hop around and maybe win some prizes, too!
Have a great labor day weekend. I hope you’re a happy camper and out having fun for one last weekend this summer!
Adding h♥art into every design
Bobbi Hart♥ Design


I real thankful to find this web site on bing, just what I was
searching for 😀 also saved to my bookmarks.