
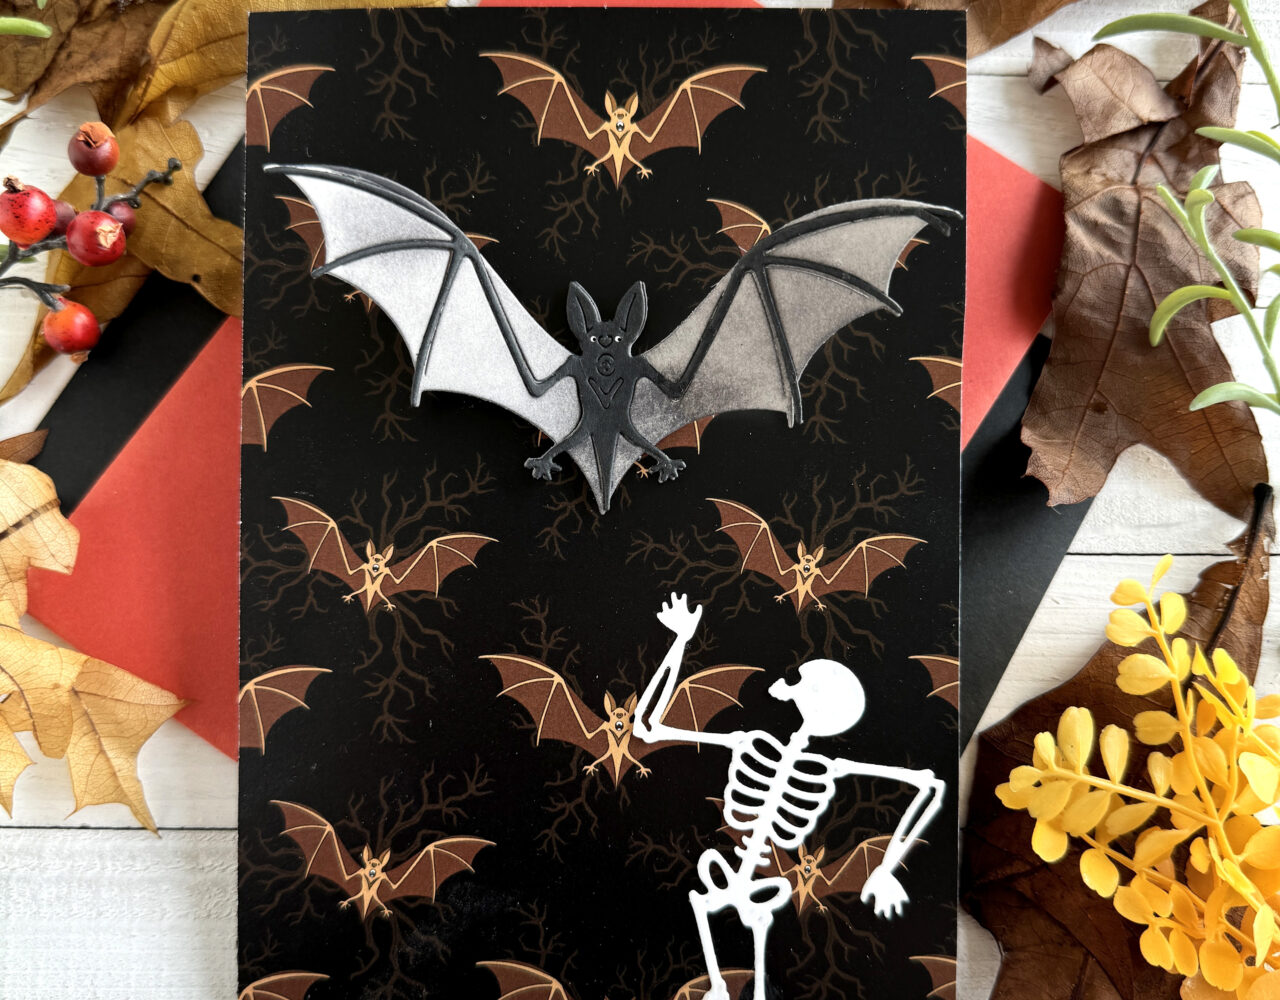
Hello Halloween lovers! Do I have a card for you, today! I got so many cool stamps and dies from Scrappy Tails Crafts that I just had to make another card with these fun sets. I call this card “Batty for You” because it is all about BATS! Can bats be kinda cute? Hmm… Make sure to check out the inside of this card with its interactive feature! I’m using the following Scrappy Tails products:
Frankenstein’s Tombstone Die Set
Nevermore Designer Pattern Paper Pad
My card below measure 5″ X 7″ and fits inside an A7 envelope. I’m using black cardstock for the card base. Everything is stamped using Hero Arts Intense Black Ink. I use Simon Says Stamp Dot Runner Tape Adhesive to attach the elements together. My white Gelly Roll Pen is my go-to for adding any white highlights. Here’s the details.
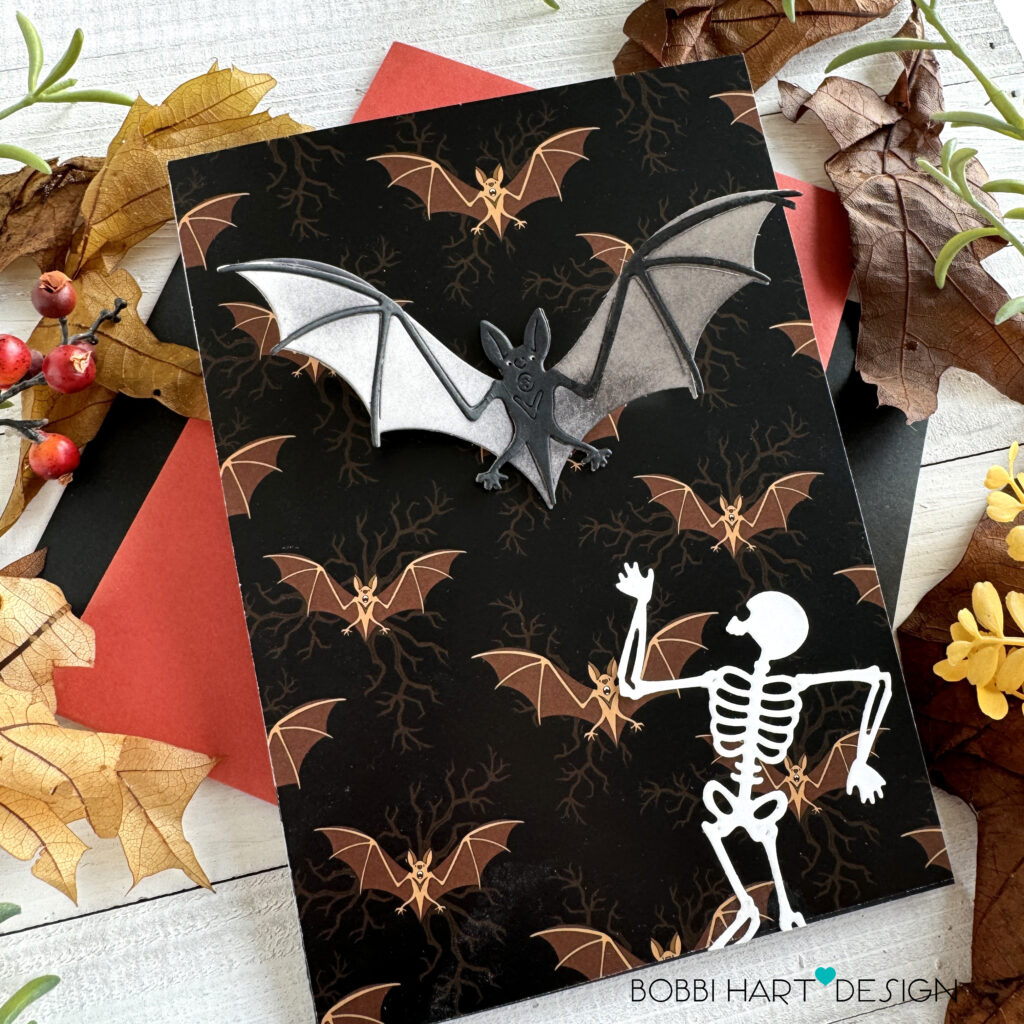
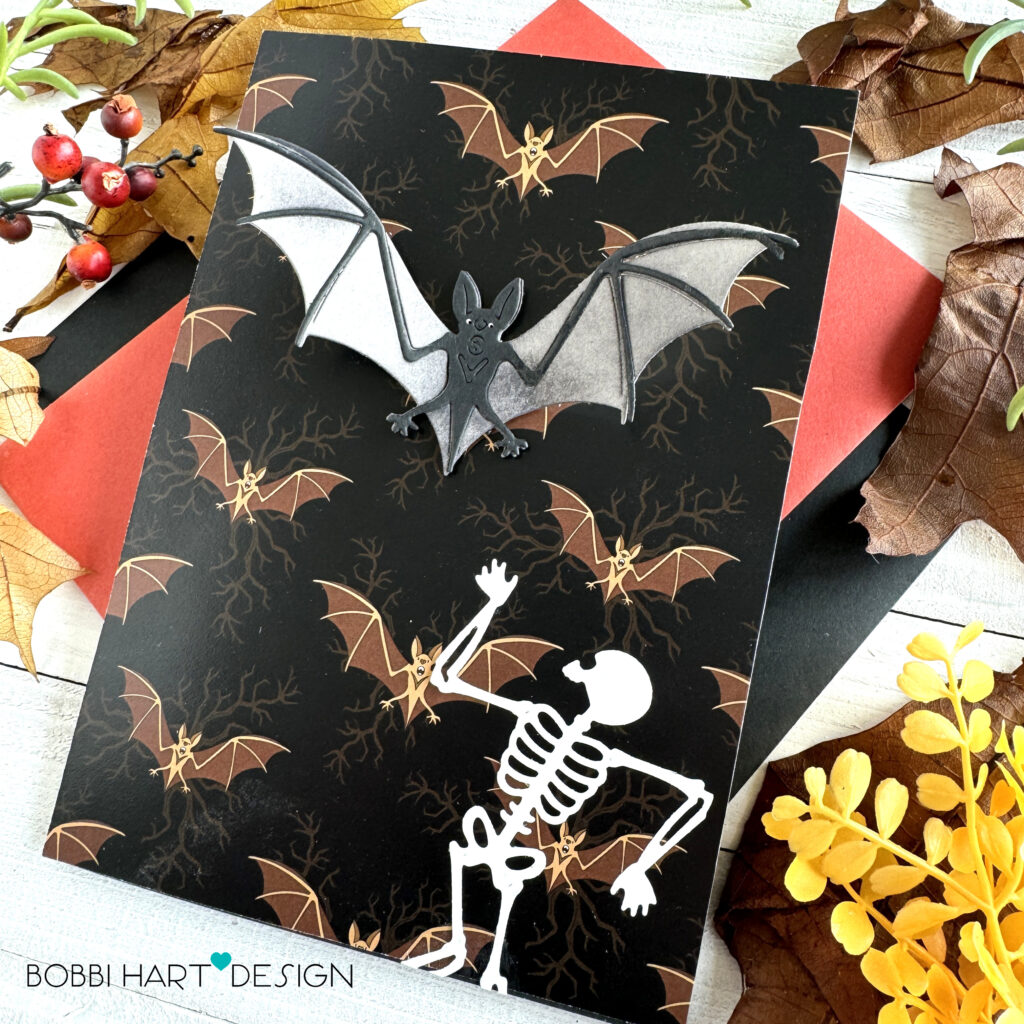
This card is a fun one to make and actually pretty easy. First, to make the front panel, I used a piece of pattern cardstock cut 5″ wide X 7″ tall for the background. Next, I die cut the layers of the large bat from the Dracula’s Lair Die Set. I ink blended Black Soot ink on the warm gray wings. I also used my white Gelly Roll pen and a black marker for the bat’s eyes. Lastly, I added one of the skeletons from the Dancing Skeletons Die Set cut from white cardstock and attached it to the bottom, trimming off part of the legs. I think it looks like the skeleton is frightened by the bat overhead! I set aside the front panel to work on the card base element.
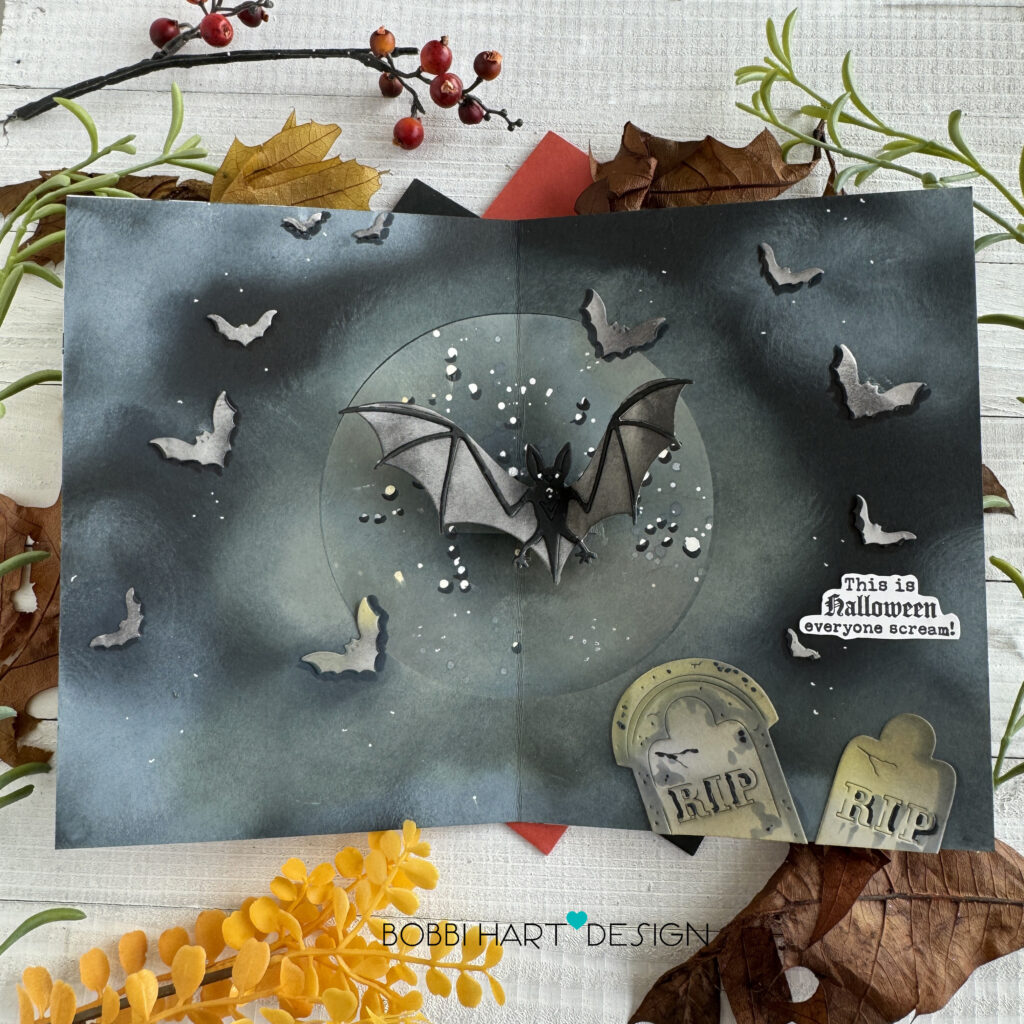
The inside of this card has this large bat flying out from the middle of the inside with a moon background behind it. To make this interactive inside, I completed the following steps.
I die cut a circle out of copy paper (very thin paper) and attached it to the inside of my black card base. Tip: Do not score the card base until the inside is completely inked. I used the circle cutout in a later step.
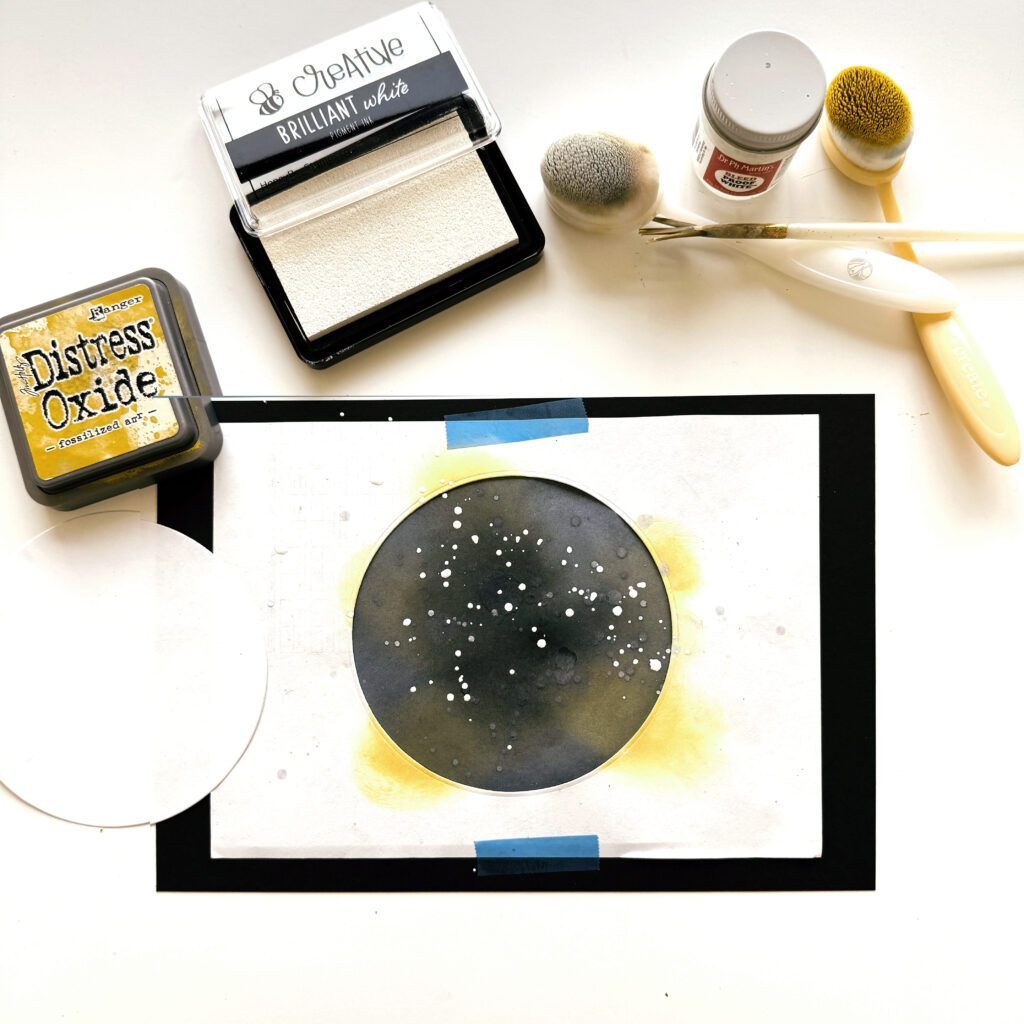
I ink blended Brilliant White and Fossilized Amber ink into the moon, making it lighter white and foggy looking. Next, I splattered white ink over the blended ink to create crater shapes.
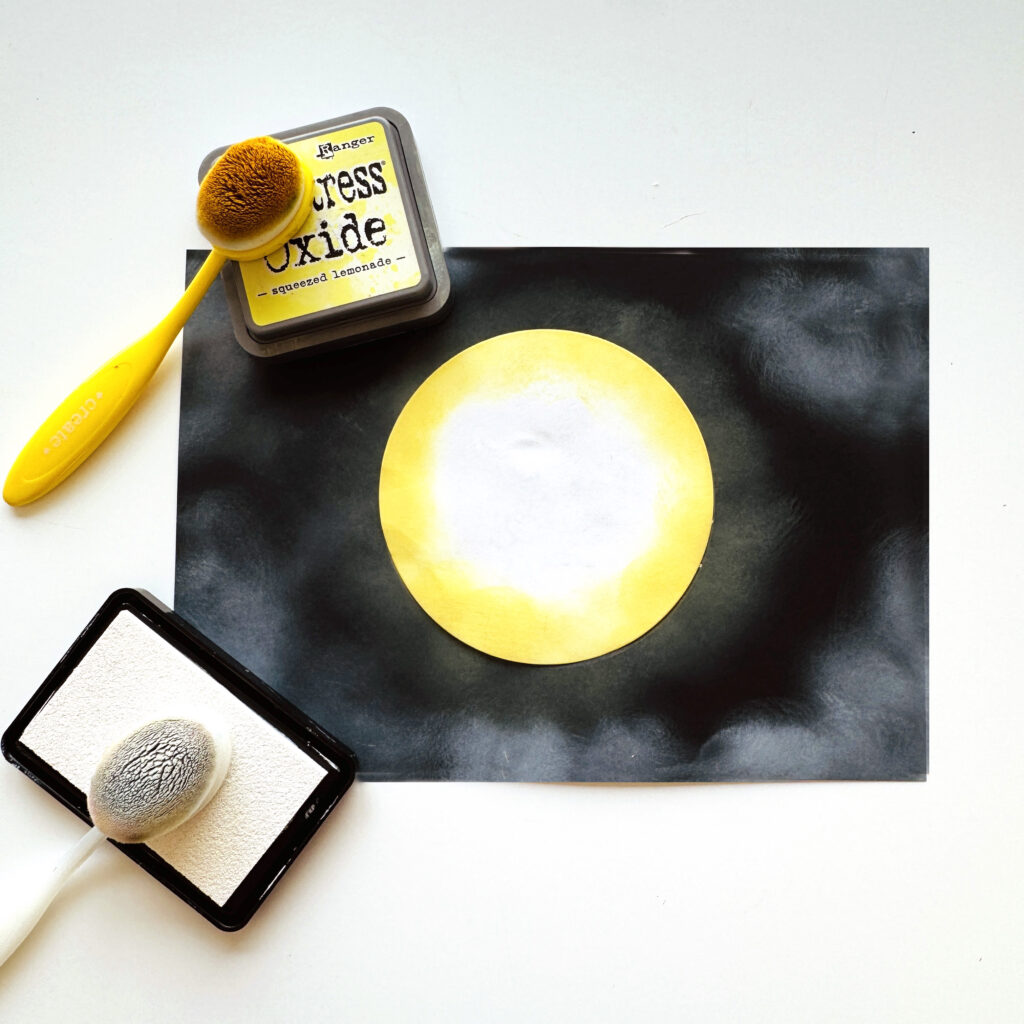
I covered the inked moon with the circular cover up and blended ink around the edge of the moon using Squeezed Lemonade Distress Oxide ink to make it look like a halo of light around the moon shape. I also used Brilliant white to add clouds around the moon, in the sky.
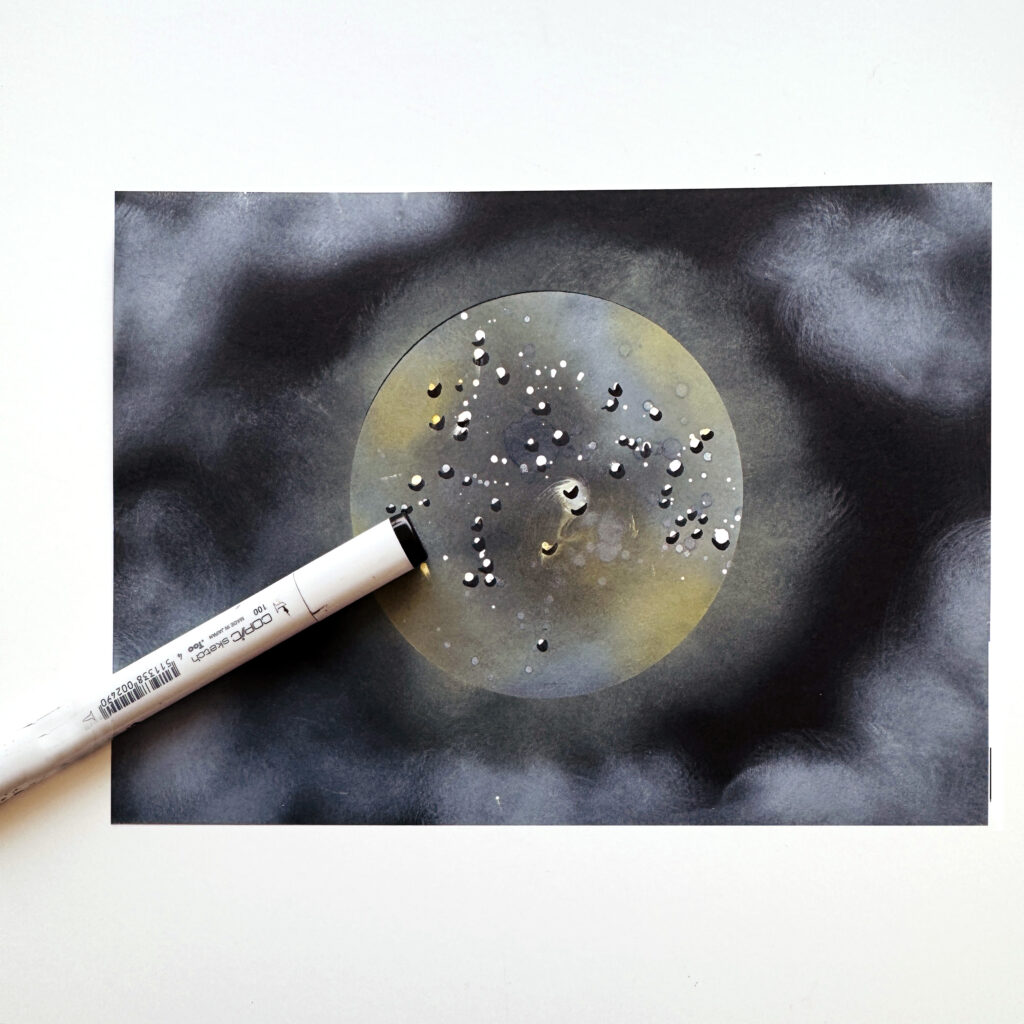
I added dark shadows under the white splatters to make them stand out even more. I used a Copic 100 Sketch Marker.

Once the ink was completely dry, I scored down the middle of the cardstock to create a 5″ X 7″ card base. I used a ruler to mark the center and cut two slits from the sored edge in to the card. I pulled the tab into the card’s interior. When the card is folded, it looks like this from the outside.
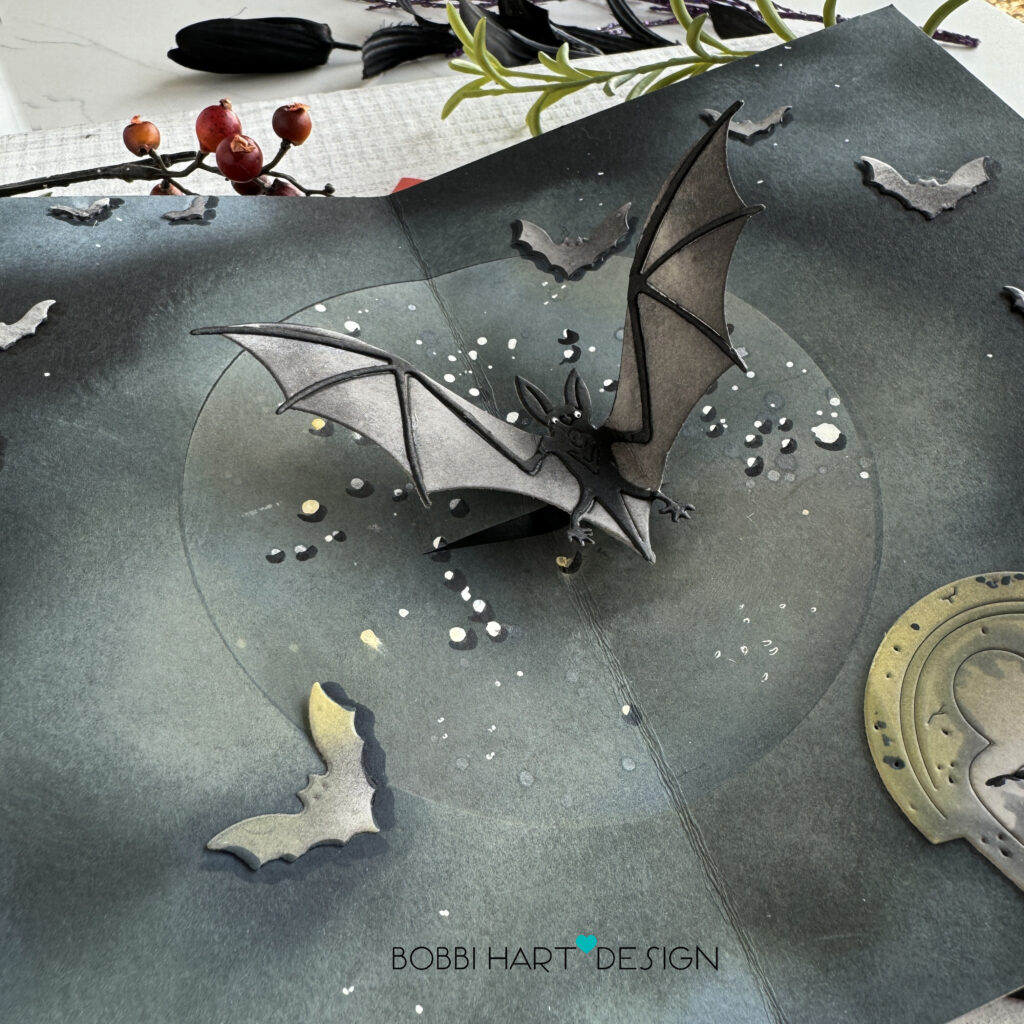
I added a small piece of black cardstock to cover this opening up from the outside and then attached a another large bat to the left side of the inverted tab, carefully folding the bat inside so that when the card is closed, the bat is folded flat.
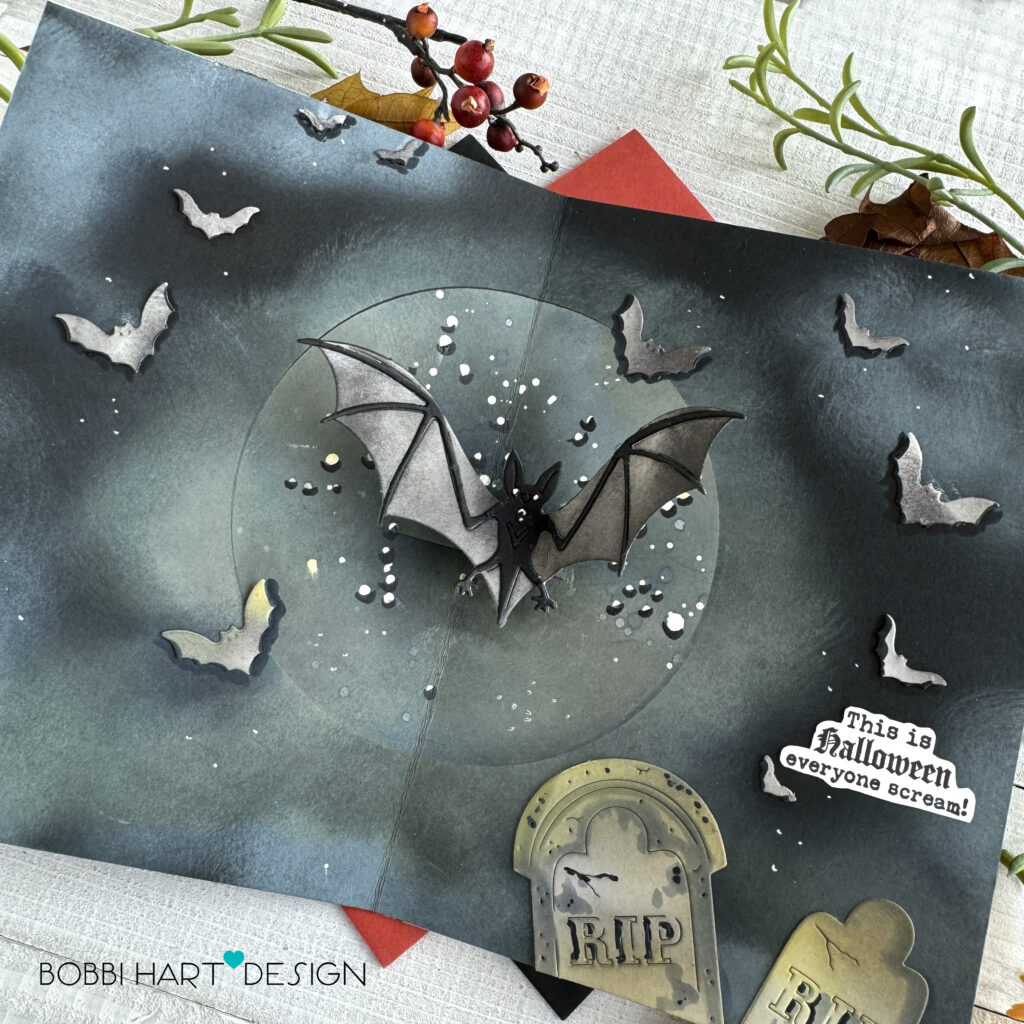
I’ve added smaller bats around the moon (from the Dracula’s Lair Die Set) and two tombstones cut from a warm gray cardstock and ink blended with Black Soot and Squeezed Lemonade Distress Oxide Ink. I added white dots around the bats. I stamped and cut a sentiment from the Nevermore Stamp set and attached it to the inside.
Lastly, to cover the center tab, I attached the card front panel to the front of the card and another matching piece of the Nevermore Designer Pattern Paper to the back of the card base to complete the card. The black spine of the card base does show on the edge which just blends in.
If you decide to place an order, please use the links in this post so that Scrappy Tails Crafts knows what inspired you. I appreciate it very much. It helps me to continue to bring more ideas to you!
Thanks for stopping by today. If you want to see more ideas and inspiration from me, subscribe to my blog, BobbiHartDesign.com. I’ll send you updates on new posts! You can also find me on Instagram as @BobbiHartDesign and on Facebook as BobbiHartDesign. Bobbi Hartmann Lemanski, Bobbi Hart♥ Design, Adding h♥art into every design


