 Hello friends! Honey Bee Stamps is participating in a blog hop collab with Waffle Flower Crafts. We’ve got an IG hop going and you could win prizes, too! Check out the blog hop, by hopping over here, @BobbiHartDesign
As a member of Honey Bee Stamp’s design team, Waffle Flower Crafts sent me its new stencil mat to use with Honey Bee products. I used this mat to create a card using Honey Bee Stamps brushes, stencils, stamps and die sets. I LOVE using the new stencil mat. It made clean up easy with the mess contained and it looks great in my craft studio, too! It comes in two sizes, regular size stencil mat and mini stencil mat. I have a graphic below, explaining the differences including the dimensions.
Now for the card, I’m using the following products for this 5″ X 7″ card:
Waffle Flower Crafts products:
*NEW Stencil Mat (I am using the regular size for this 5″ X 7″ card)
Honey Bee Stamps products:
Bold Botanicals stamp set and coordinating die set
Praying Big Time and coordinating die set
Background Blender Brushes (Larger)
Detailed Blender Brushes (Smaller)
Prayers Card
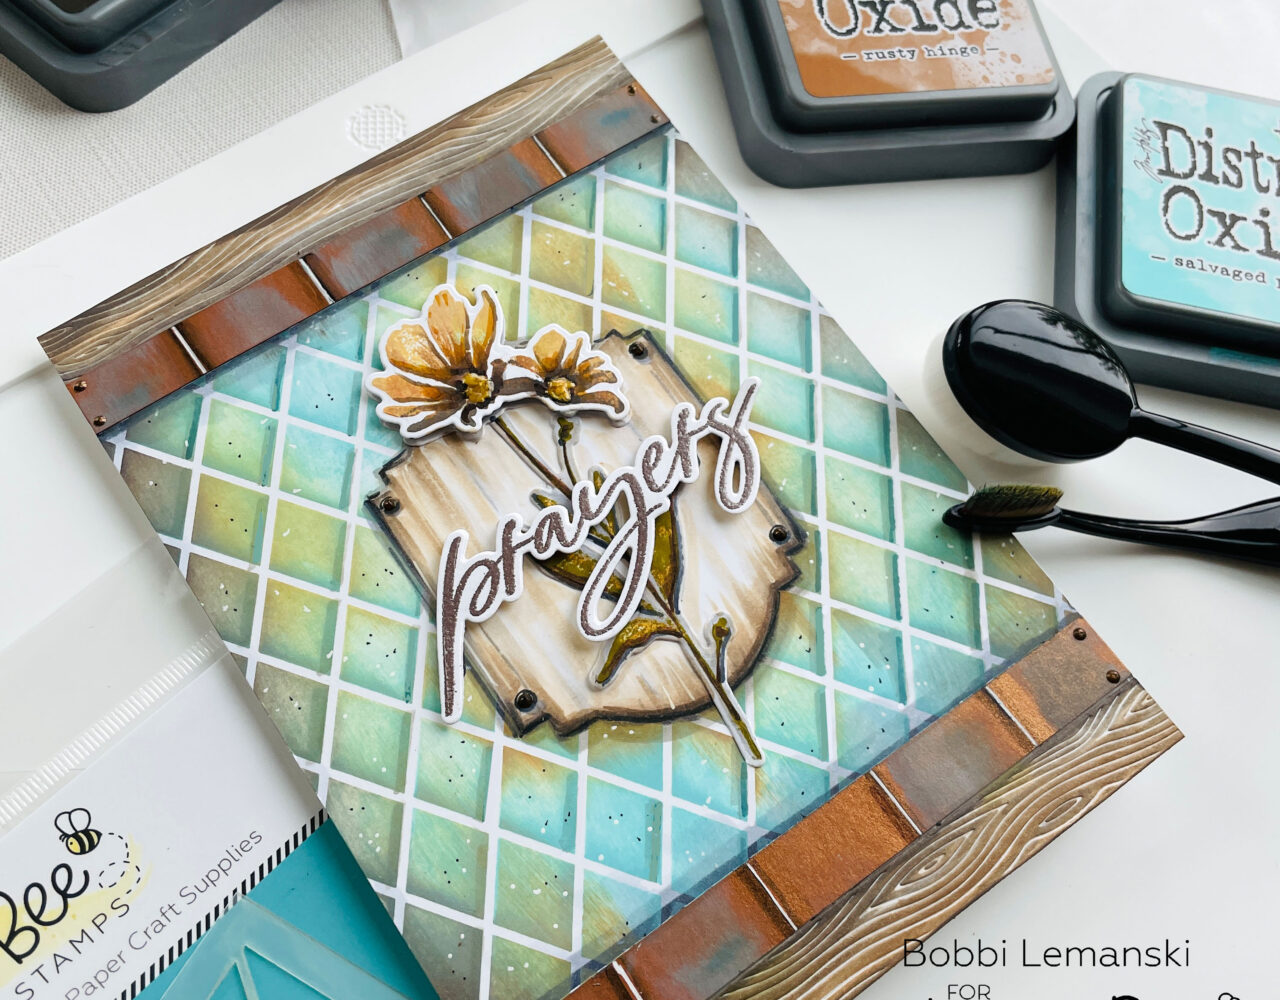
I wanted this card to look like a tile wall with a wood plaque hanging over it. The tile inlay is trimmed out in copper and wood strips, above and below. There is a lot of dimension on this card created with ink and stenciling (AKA smoke and mirrors:))!
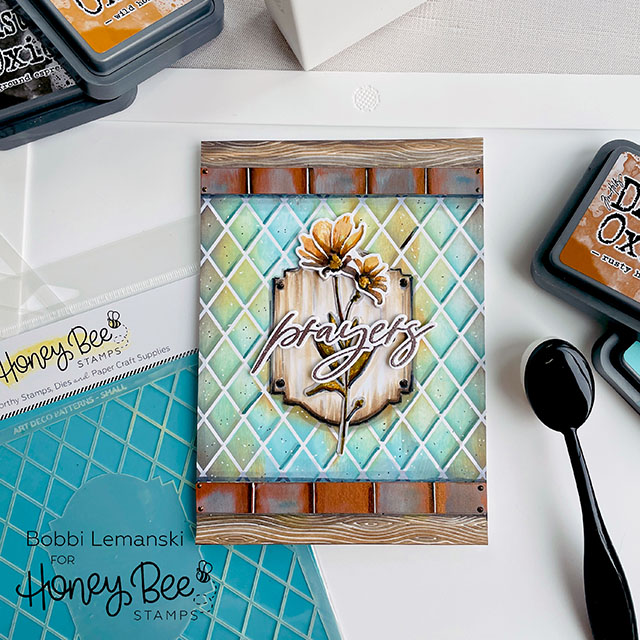
To make this card, I started with the Art Deco Patterns Stencil and Distressed Oxide Inks in Salvaged Patina, Rusty Hinge, Wild Honey, and Ground Espresso. I used all four colors on the stencil design. I am working on Neenah 80lb Solar White cardstock I wanted the background to look like tile with a wood plaque on it. I also wanted the tile to have a bit of a patina look to match the copper trim pieces so I added the Salvaged Patina color in the mix. After I finished stenciling and the ink was completely dry, I enhanced each square by adding a shadow line (on the lower right sides) for dimension on each “tile” using a slightly darker/gray tone to match the tile color.
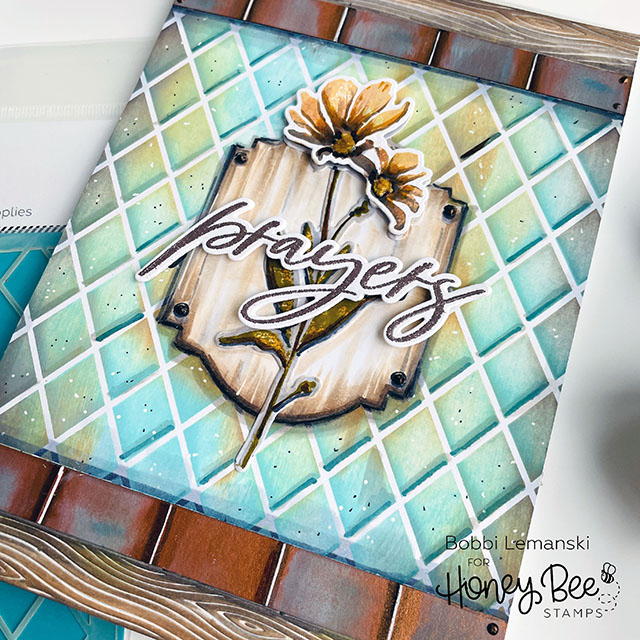
The stencil design leaves an art deco shape in the middle, blank. I used Copics in E44, E43, E40, E50, E53, W3, W2, and W1 to add a wood look to the blank space. I wanted it to appear like a wood plaque nailed to the tile backsplash. I also wanted it to look dry, old and worn so there is a definite cast of gray on this wood for an aged appearance. I used a bronze pearl pen liquid (similar product: Nuvo Crystal Drops Bronze) for the nail head trim in the corners. E59, E57 and W9 were used to shade below the wood to make it look dimensional.
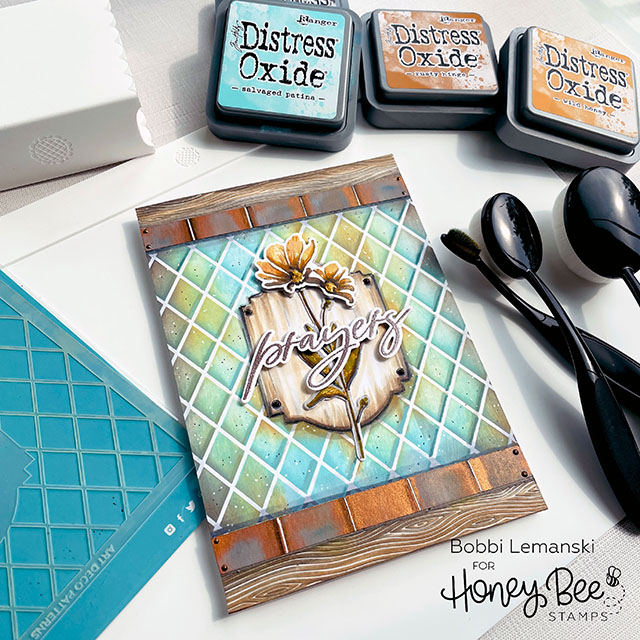
For the copper trim, I used copper metallic cardstock and added white lines to the copper using a ruler and my Gelly Roll pen. I added shading to both sides of the white lines to create the look of dimensional strips/bends in the copper, like a copper roof on a house. To create the patina look, I added Salvaged Patina and Mermaid Lagoon ink to the copper to give it the appearance of an aged metal. I used the smallest blender brush to apply. I added nail trim using the Bronze Pearl Pen in the corners.
For the woodgrain strips, I cut the Wood Plank Dies from white cardstock. I added Copic colors in the E50s range with some warm gray to age the wood for a weathered look.
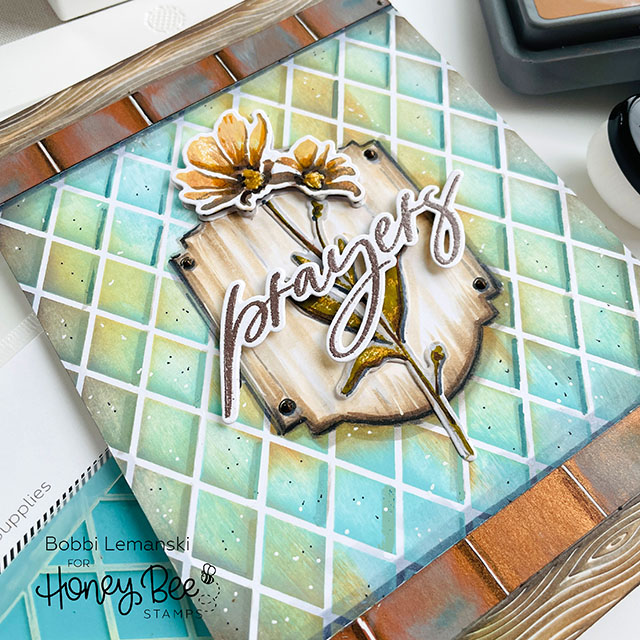
To finish this card, I added the flower design from the Bold Botanicals stamp set and coordinating die sets. I inked the flower using distressed oxide inks completely! This is super easy and kinda fun. 🙂 I did go back and add some E59 brown to created more depth in the center, too. I added gold Pearl Pen (similar product: Nuvo Crystal Drops Gold) to the center of the blossoms. I also heat embossed in rose gold and die cut the Prayers word from the set using Praying Big Time stamp and coordinating die set and attached using Scrapbook Adhesives .25 Foam Squares in white. This card is ready for any “thinking of you,” “sympathy,” “get well soon,” or general need use.
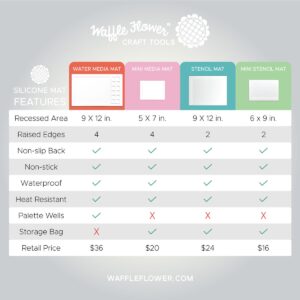 Here’s more details on the stencil mat by Waffle Flower Crafts. You can order it from Honey Bee Stamps, too! Here’s the links:
regular size stencil mat and mini stencil mat
You can shop Honey Bee Stamps here. If you decide to place an order, please use the links in this post so that Honey Bee knows how you found these products!
Thanks for stopping by today. If you want to see more ideas and inspiration from me, subscribe to my blog, BobbiHartDesign.com. I’ll send you updates on new posts! You can also find me on Instagram as @BobbiHartDesign and on Facebook as BobbiHartDesign.
Bobbi Hartmann Lemanski, Bobbi Hart♥ Design, Adding h♥art into every design

