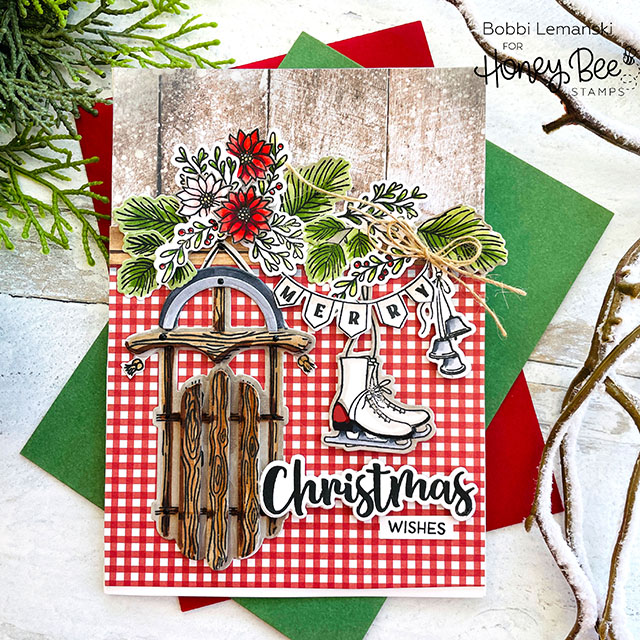
Hi friends! It’s Bobbi Lemanski here with a vintage-inspired holiday greeting using some new sets from the Vintage Holiday release. I fell in love with the new Sleigh Bells set when I saw it. Who doesn’t love a vintage sleigh, ice skates and lots of pretty holiday greenery, too? This set is beautiful!
In addition, I’m using the following new Honey Bee Stamps products:
Sleigh Bells stamp set and coordinating die set
Christmas stamp set and coordinating die set
Inside: Holiday Sentiments stamp set and coordinating die set (I used the stamp set, only, on this card)
Gingham Galore Holiday 6″ X 6″ paper pad
Vintage Holiday 6″ X 6″ paper pad
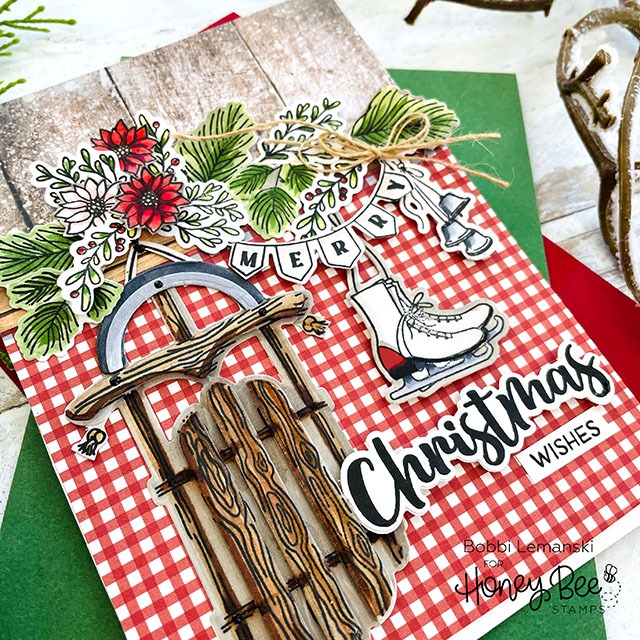
To make this 5″ X 7″ card, I stamped, colored and die cut all the beautiful greenery (in multiples), the ice skate, sled, banner and silver bells. I used the following Copic Sketch Marker colors to color the images:
- Sled: E43, E59, E57, E55, W2, C7, C3
- Ice Skates: W1, W2, R89, R39, 100, C3, C1
- Greenery: YG67, YG63, YG03, R89, R29
- Bells: C5, C3, C1
- Poinsettias: R89, R46, R29, R20, R17, R14, Y21
- Banner: W3, W0
All of the images were die cut using the Sleigh Bells coordinating die set. The sleigh has a base die and also top layer dies for the wood planks and metal pieces. I stamped and die cut them, attaching the top layer wood pieces using 1/4″ black Scrapbook Adhesive foam tabs. It looks awesome with the extra dimension!
I also stamped and die cut the “Christmas wishes” phrase using the Christmas stamp set and coordinating die set.
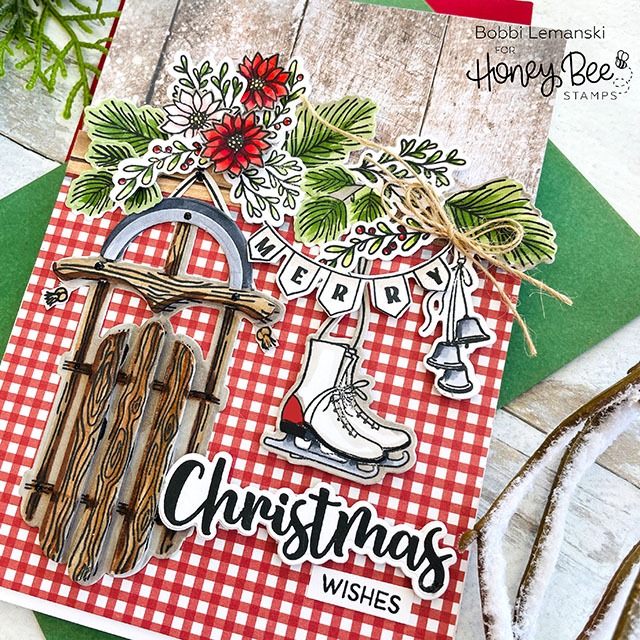
For the background of this A7-sized card, I used pattern papers from both the Gingham Galore Holiday 6″ X 6″ paper pad (for the bottom section) and Vintage Holiday 6″ X 6″ paper pad (for the top section.) I added a wood ledge between the two patterns for the sled and ice skates to hang from and for the greenery to rest on. To make the ledge, I used a strip (aka “plank”) from a wood pattern paper found in the Farm Fresh Holiday. paper pad.
All of the elements were positioned into place on the card front and glued together using Bee Creative Precision Tip Glue. I added a small hemp twine bow to the banner, too. The Christmas word, ice skates and silver bells were attached using Scrapbook Adhesives foam tabs. Once the card front was done, I attached it to a 5″ X 7″ card base made from Neenah 80lb Solar White cardstock.
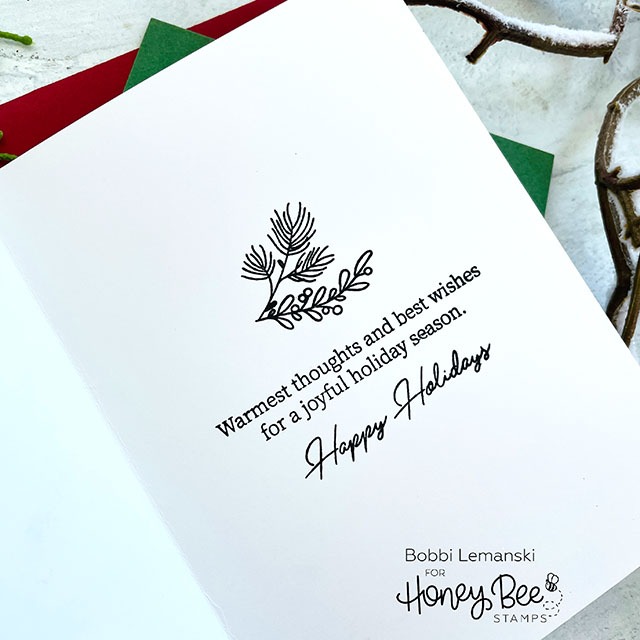
Inside the card, I stamped a phrase and the “happy holidays” scripted phrase from the stamp set, Inside: Holiday Sentiments stamp set to complete the card. This card fits inside an A7 envelope.
You can shop Honey Bee Stamps here. Here’s a quick link to the Vintage Holiday release. If you decide to place an order, please use the links in this post so that Honey Bee knows how you found these products!
Thanks for stopping by today. If you want to see more ideas and inspiration from me, subscribe to my blog, BobbiHartDesign.com. I’ll send you updates on new posts! You can also find me on Instagram as @BobbiHartDesign and on Facebook as BobbiHartDesign.
Bobbi Hartmann Lemanski, Bobbi Hart♥ Design, Adding h♥art into every design

