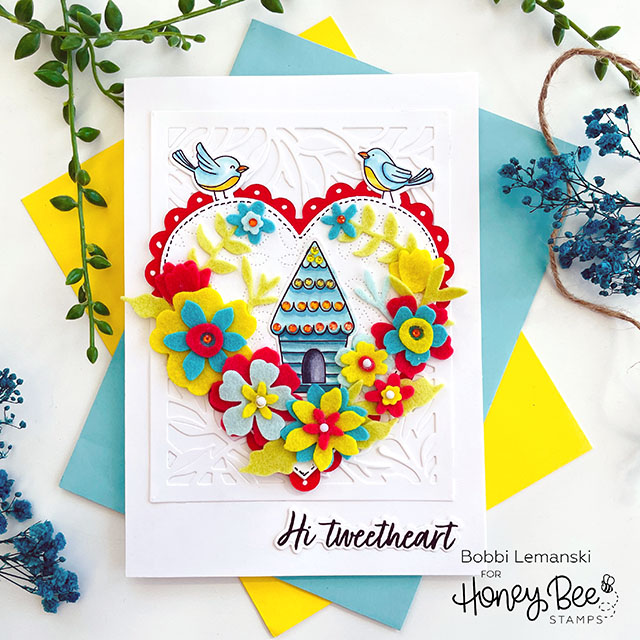
Hello friends! Bobbi Lemanski here with a very heart-FELT greeting to share with you today. This is a card that will literally make you feel something because it is partially made of wool felt! I’m using the following Honey Bee Stamps products for my card:
Little Birdies stamp set and coordinating die set
Spring Leaves A2 Pierced Cover Plate Die
The Supplies
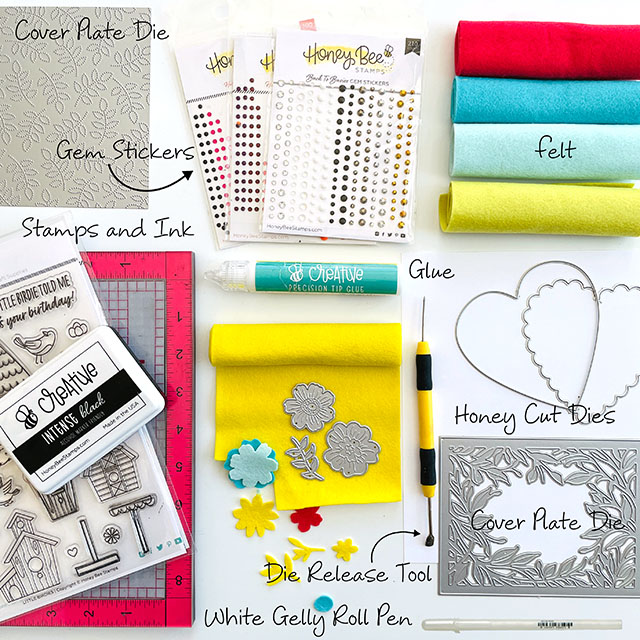
In addition, I’m also using the following items for this design including:
Bee Creative Precision Tip glue
Bee Creative Intense Black Ink
Gem Stickers: Hot Tropics, Halloween Harvest and Back to Basics
Neenah 80lb White Cardstock as well as a tomato red colored cardstock
and wool colored felt, a black fine-tip marker, and a MISTI Stamping Tool
How To Make This Card
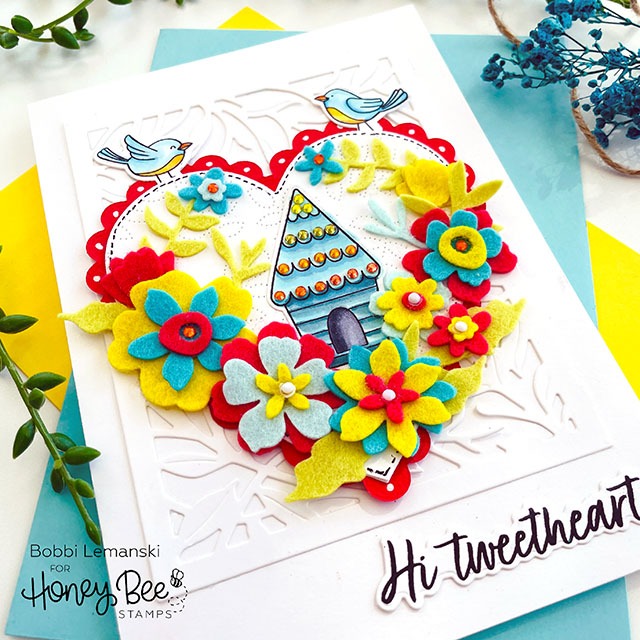
To make this 5″ X 7″ card, I started by creating a card base out of white cardstock. I also die cut the Secret Garden Cover Plate Die and the Spring Leaves A2 Pierced Cover Plate Die from white cardstock and attached the Secret Garden cut to the front of the card base. Next, I die cut the 3-7/8″ wide heart shape out of the Spring Leaves die cut piece. I also die cut a 4-1/4 wide scallop heart out of red cardstock and layered the two hearts together. Using a fine-tip black marker, I added faux stitches around the perimeter of the white heart and white dots on the red scallops.
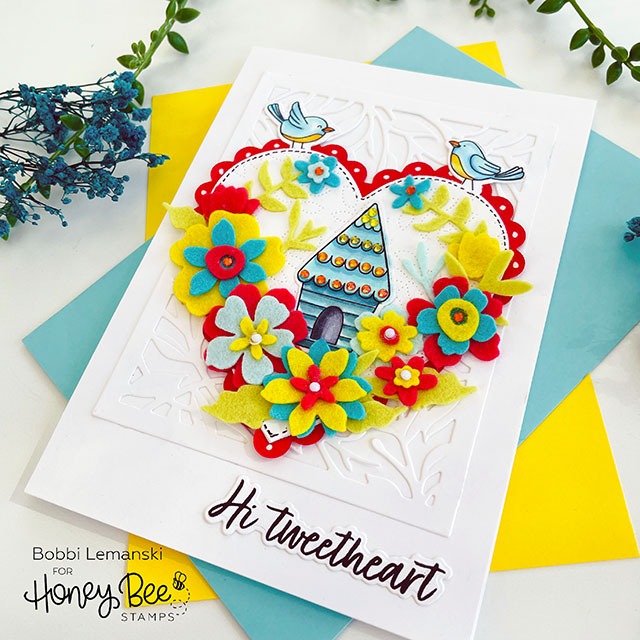
Using the Whimsical Flower dies, I die cut the flowers from the colorful wool felt. I have always had best luck die cutting using wool felt. Other felts do not work as well for me. I layered the flowers, using different felt colors and glued them together. Each flower also got a gem sticker on the top, too! A little sparkle never hurts any card!
The two birds and the birdhouse were stamped and die cut using the Little Birdies stamp set and coordinating die set. I colored the birds using blues and greens and a bit of yellow/green and orange using: B000, B00, BG11, YR68, YG00, YR61 (for the birds) and BG75, BG72, BG11, B00, B000, C8, C5, C3 (for the birdhouse). I added gem stickers to the scallops on the roof of the house, too.
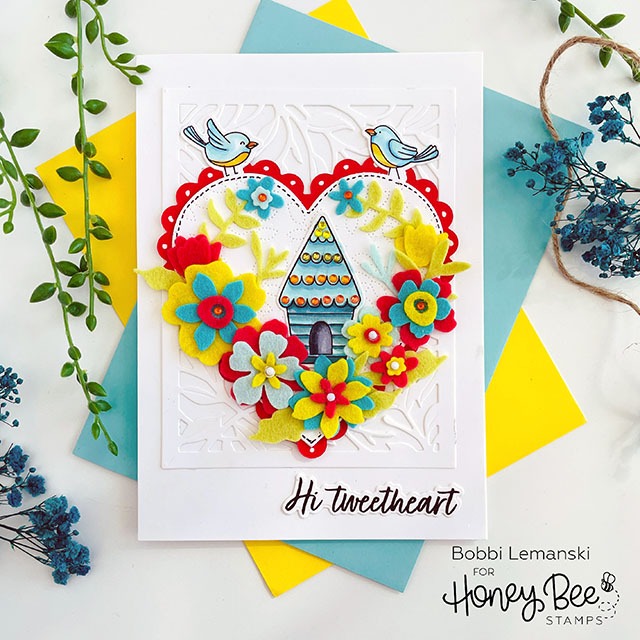
I glued all the elements together and attached the embellished heart to the card base. I also stamped the “Hi Tweetheart” phrase using Bee Creative Intense Black Ink, die cut it and attached it to the card’s lower right corner to complete the card. This card is ready for my tweetheart!
You can shop Honey Bee Stamps here. If you decide to place an order, please use the links in this post so that Honey Bee knows how you found these products!
Thanks for stopping by today. If you want to see more ideas and inspiration from me, subscribe to my blog, BobbiHartDesign.com. I’ll send you updates on new posts! You can also find me on Instagram as @BobbiHartDesign and on Facebook as BobbiHartDesign.
Bobbi Hartmann Lemanski, Bobbi Hart♥ Design, Adding h♥art into every design

