
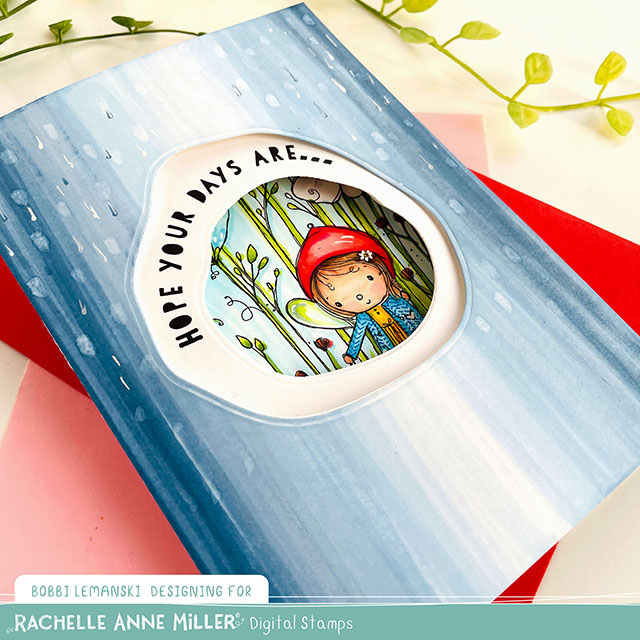
I am so excited to share my first post featuring Rachelle Anne Miller Art digital stamps. Today, I’m using the Little Fairy digital stamp for this tri-fold, peek-through window card. On the outside, we see a rainy day and on the inside the rain disappears and there’s a full floral garden. My card is a 5″ X 7″ greeting. Here’s the details…
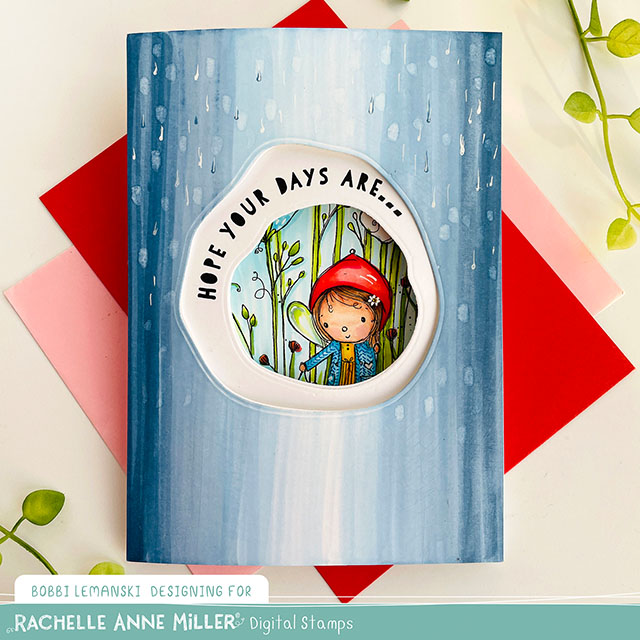
To create the opening, I used one of the windows from Simon Says Stamp called, Paper Layering Circles. I centered it and die cut it out of a 5″ X 7″ front panel and a 10″ X 7″ card base, both cut from 80lb Neenah Solar White cardstock. I cut the two pieces together to make sure they line up perfectly.
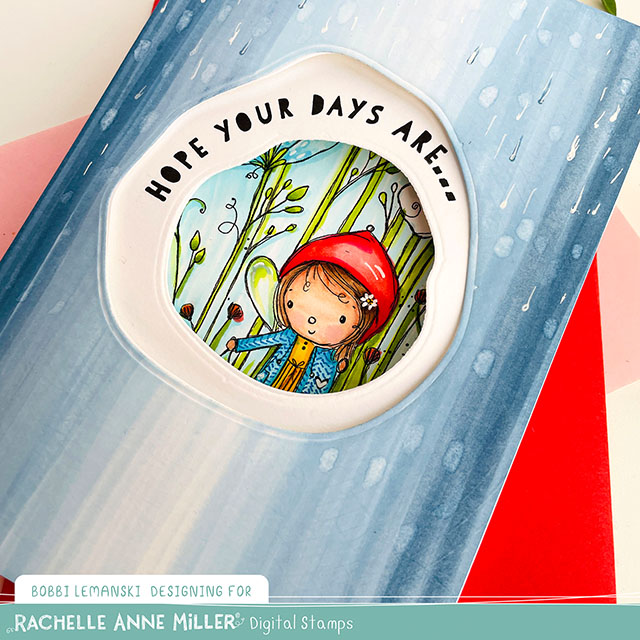
Before attaching the front panel, I colored it using Copics, B95, B93, B91, B45, B41, B00 and B000, going dark to light in the center on both sides. Using my colorless blender (Copic 0), I added drops of rain in the dark areas. I also added white drops using my Sakura Classic White Gelly Roll white pen.
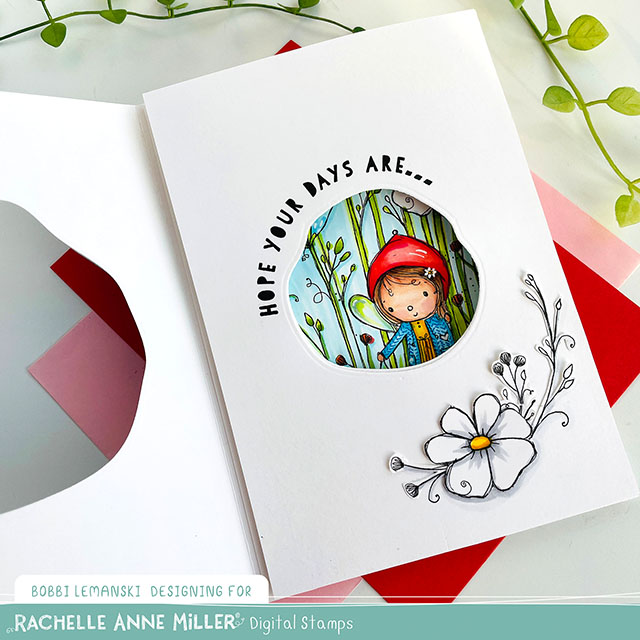
For the inside panel, I used another imperfect circle opening included in the Paper Layering Circles on another card base measuring 10″ X 7″. Note: For this card base, I printed the garden design on the opposite panel from the opening (for inside design) and scored down the righthand side. The design layer will layer over the the other card base.
Above the opening, I stamped a phrase from an older Concord & 9th stamp set called, Rainbow Wishes. I think this font style is so cute with this fairy. You could use any phrase here or hand doodle one yourself.
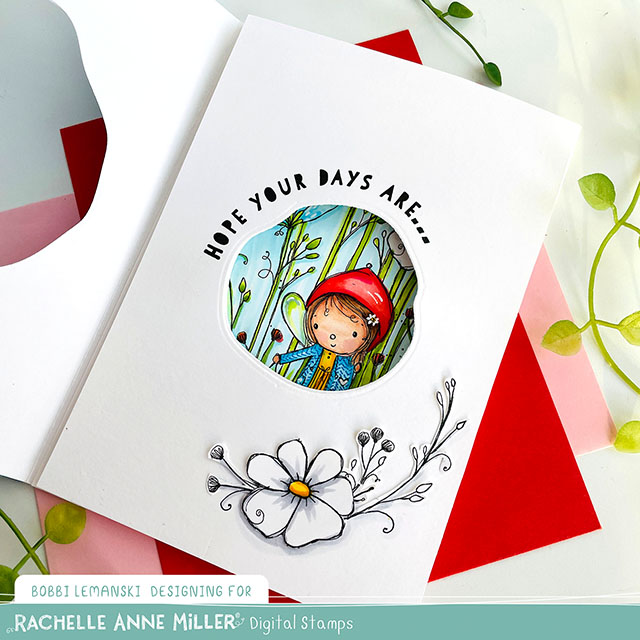
In the lower, right corner, I cut out a flower and some sprigs from the garden design and glued it in place. I kept it simple – mainly black and white – to enhance v. compete with that sweet fairy peeking through the window. Because this layer does not have any coloring on it (only stamping), I did not have have to back it with another piece to conceal any color bleeding.
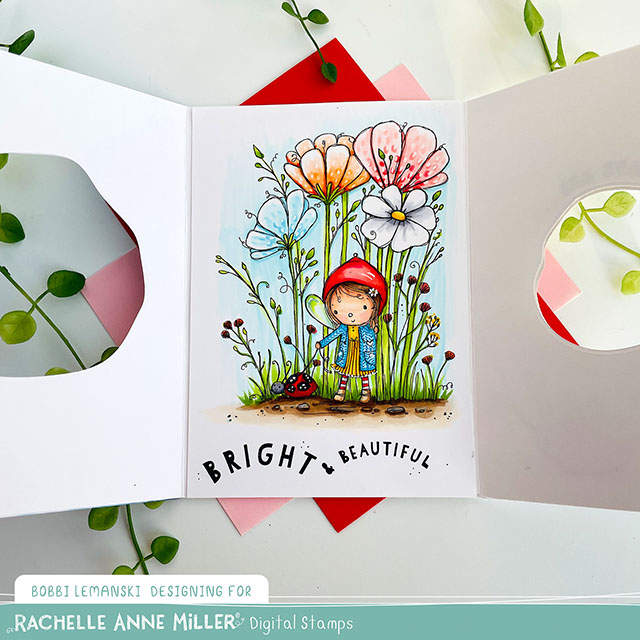
When the interior panel is opened, another reveal happens, displaying the entire garden design. I colored this design using the following Copic colors:
- Greens: YG67, YG63, YG23, YG03, YG00
- Reds: R89, R29, R17, R14, R22, R00
- Yellows: Y38, Y19, Y13
- Blues: B04, B02, B00, B000
- Browns: E59, E57, E55, E43
- Skin tones: E21, E11, E000, E00, R20, R00
- Oranges: YR68, Yr65, Yr61, YR00
- Cool Grays: C5, C3, C01
- Warm Grays: W4, W3, W1
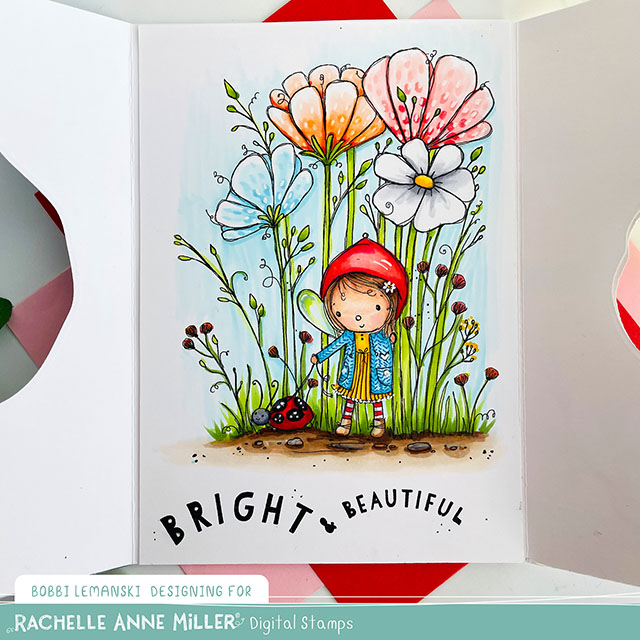
A few details… I used my Sakura Classic White Gelly Roll white pen to create the pure white daisy in the hair, buttons on the sweater pockets, lady bug dots, and flower petal detailing. I also used a fine tip bright blue marker to add the knitted stitching detail on the sweater. For the dirt specks/gravel on the ground and around the phrase, I used a fine-tip black marker, too.
If you decide to place an order, please use the links in this post so that the companies know what inspired you. I appreciate it very much. It helps me to continue to bring more ideas to you!
Thanks for stopping by today. If you want to see more ideas and inspiration from me, subscribe to my blog, BobbiHartDesign.com. I’ll send you updates on new posts! You can also find me on Instagram as @BobbiHartDesign and on Facebook as BobbiHartDesign.
Bobbi Hartmann Lemanski, Bobbi Hart♥ Design, Adding h♥art into every design


