
Car or sleigh? How will you get to your Christmas party this year? Scrappy Tails has a cute car, sleigh, sled, pickup truck and more to get you to the festivities! I am guest designing for Scrappy Tails this fall. The new Scrappy Tails holiday collection is focused on products to create custom Christmas party invites. We are celebrating the collection with a Holiday Inspiration Instagram hop featuring the new Christmas Party collection. Hop with us on Instagram for a chance to win prizes. This release includes several new awesome pop up dies that can be used to create gorgeous ornaments, tags, light up home décor pieces, pop up cards and even party favors! Details are on my Instagram post you that can find here.
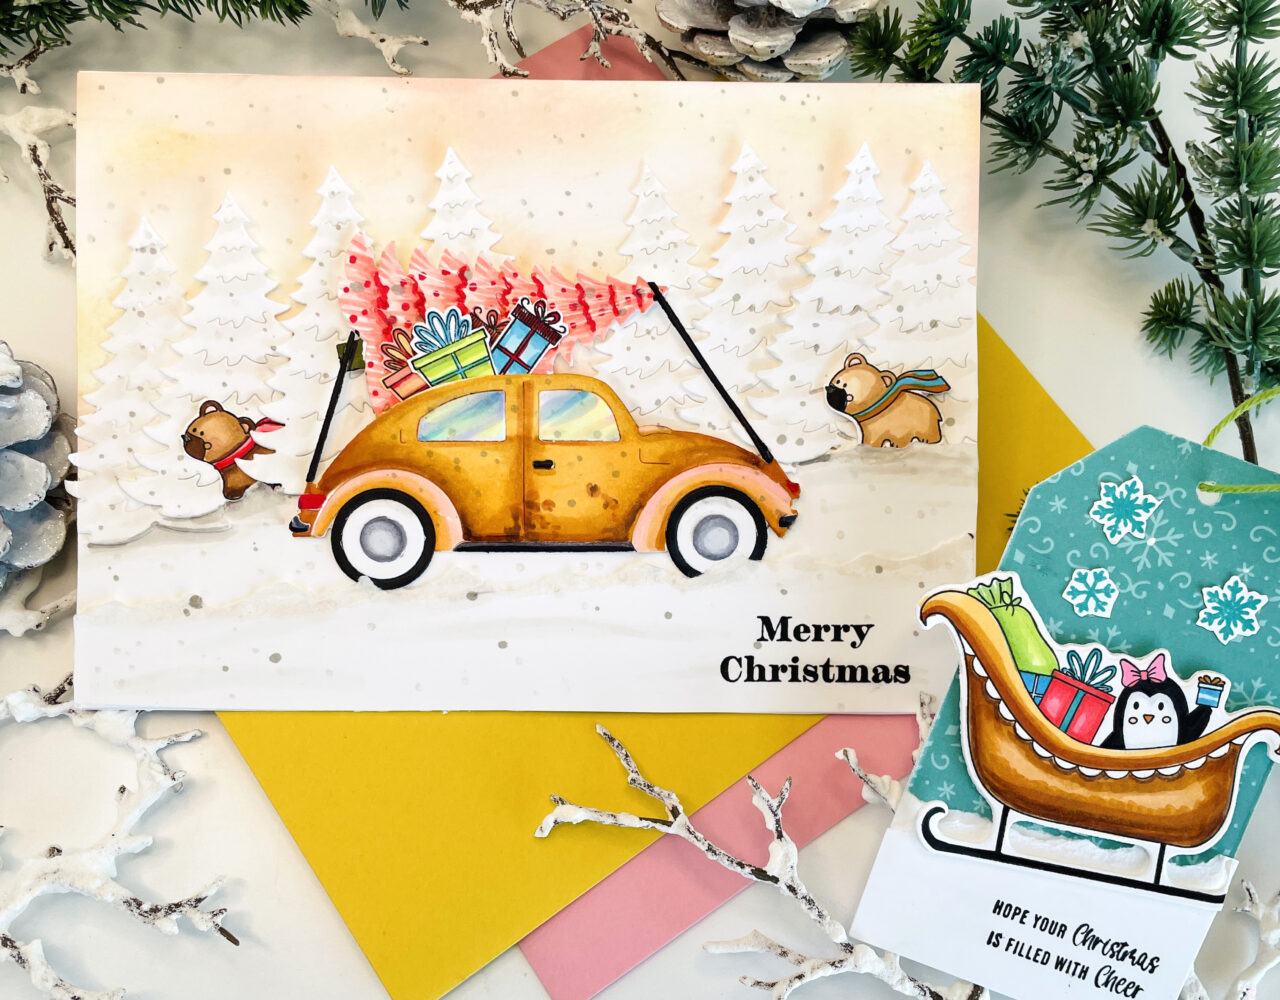
Christmas Bug Holiday Card
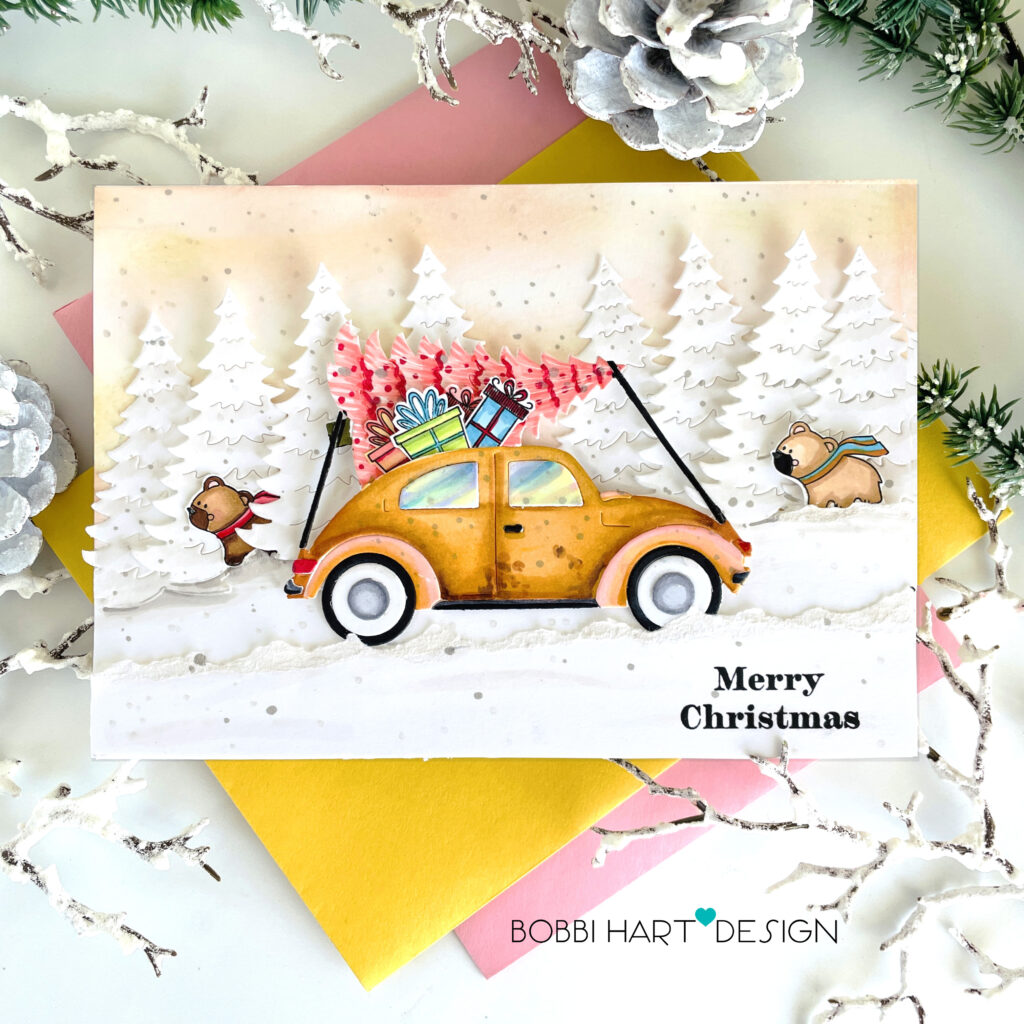
- Car and tree: YR27, YR24, YR21, R29, R22, R20, C5, C3, C1, BV000, Y11, B00 and 100
- Bears: E59, E57, E55, R29, YR27, B02, R20 and 100
- White Trees and snowscape: E43, E42, and E40, W3, and W1
- Presents: B05, B02, B00, R29, YG67, YG17, and YG03
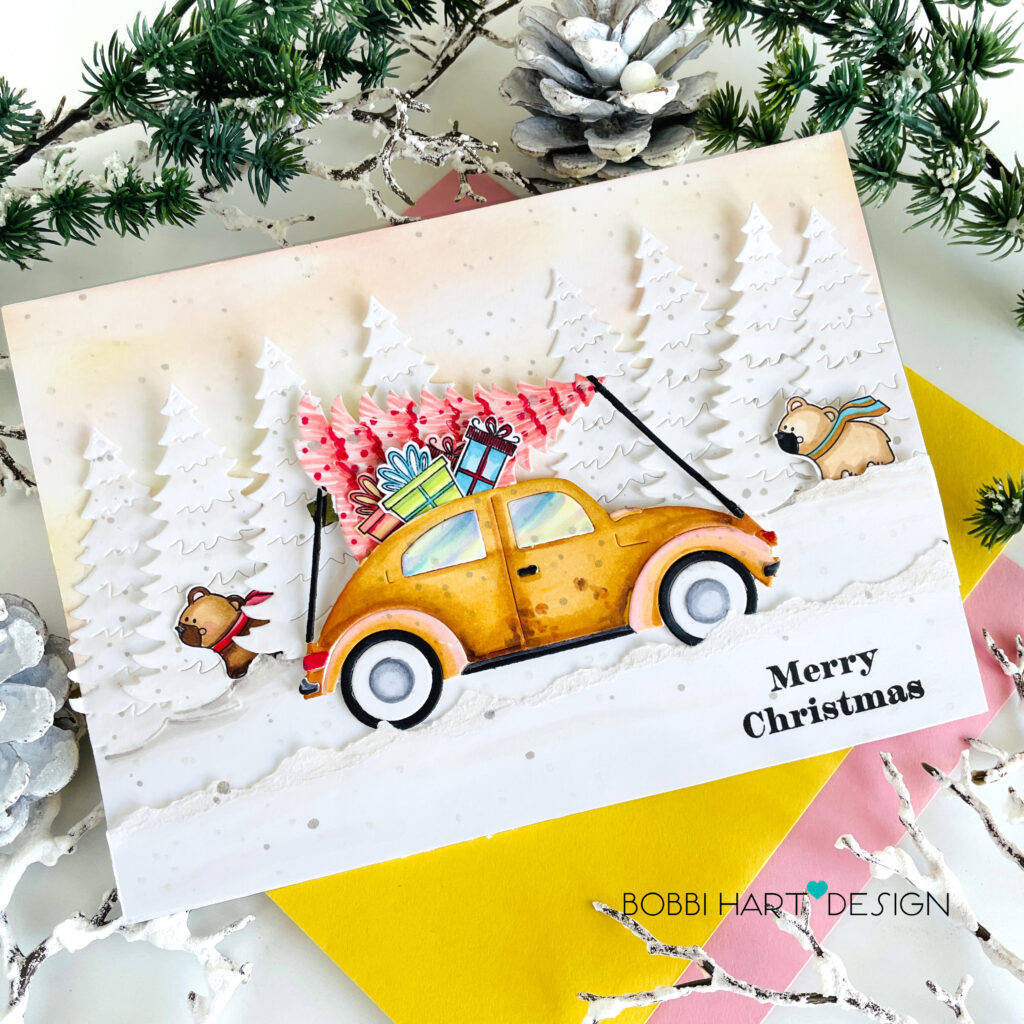
For the landscape background, I blended on Antique Linen and Tattered Rose Distress Oxide Ink to create the soft sky background. I added strips of torn white cardstock at the bottom to create the snow hills in front and behind the car. I attached the eight trees, overlapping them to cover the curved cutout part of the die cut. I tucked the bears between the trees and added presents to the top of the car, by the pink decorated tree. I adhered the card to the scene between the snow hills and added foam tabs on the top side of the car to make it stand out, while tucked between the snow hills at the bottom. I used my W3 and W1 Copic to add snow fall over the white trees and landscape. I also added some color to the tops of the snow hills for dimension. Finally, I stamped the sentiment in the lower right corner in black ink to finish the card.
Holiday Sleigh Tag
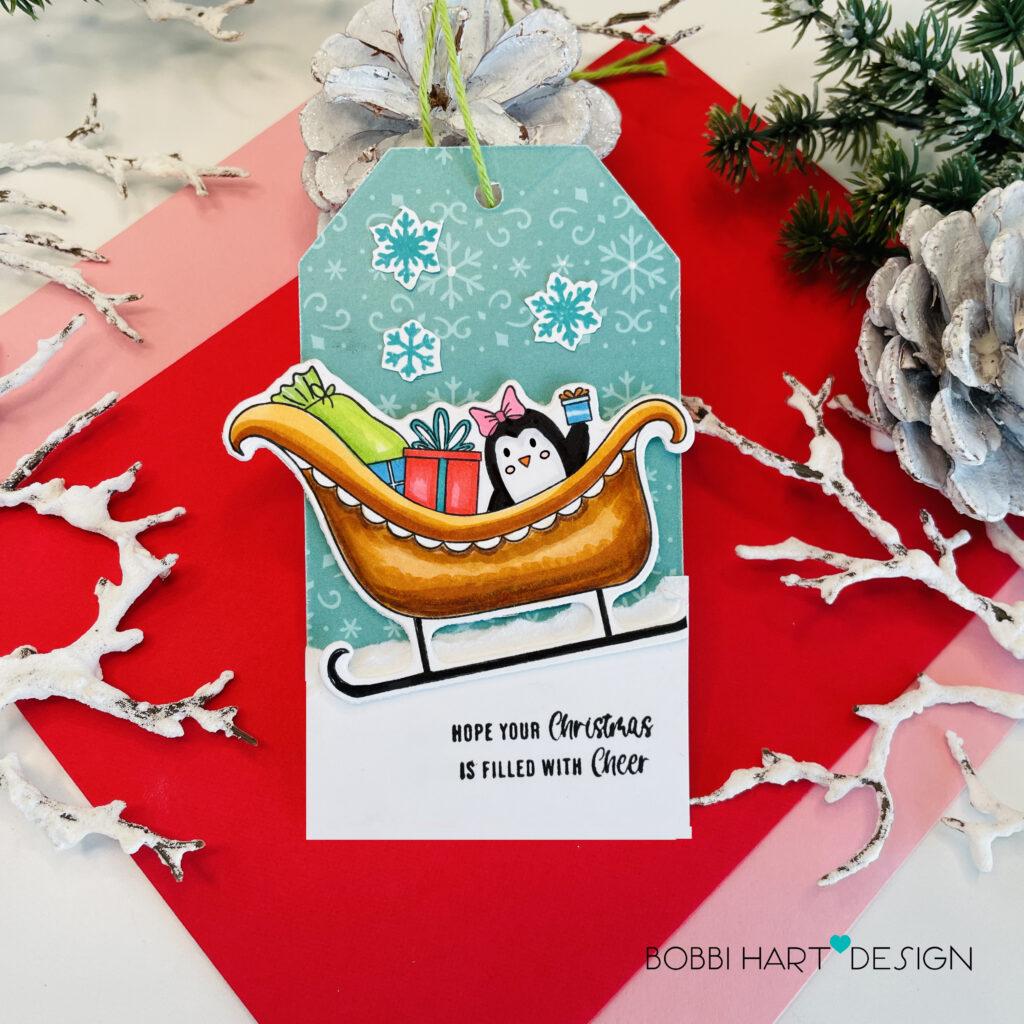
For the tag, I used pattern paper from the Christmas Party Pattern Paper Pad for the background. I tore white cardstock for the snow hill and adhered it to the tag’s base. I stamped the sleigh and colored it in using colors from above. I attached the sleigh to the tag base using foam tabs and added snowflakes stamped in teal to the sky area. A green twine cord finishes the tag.
If you decide to place an order, please use the links in this post so that Scrappy Tails knows what inspired you. I appreciate it very much. It helps me to continue to bring more ideas to you!
Thanks for stopping by today. If you want to see more ideas and inspiration from me, subscribe to my blog, BobbiHartDesign.com. I’ll send you updates on new posts! You can also find me on Instagram as @BobbiHartDesign and on Facebook as BobbiHartDesign. Bobbi Hartmann Lemanski, Bobbi Hart♥ Design, Adding h♥art into every design


