
Hello friends! I have a very fun Halloween card to share with you today. I got the most fun dies from Sabrina of Scrappy Tails Crafts and just had to make a card to share in the Instagram Hop for the new Horror Classics release. The card below was made using ALL dies! If you don’t like to color, this may be a great card for you to make. 🙂
I’m using the following products:
Dracula’s Lair Metal Craft Dies
Pumpkin Kitties Metal Craft Dies
These dies are so detailed and fun to use! They also come completely cut so no dies to cut apart before you use them! I was so impressed with how well they work. Sabrina has a way of making the dies so intricate and interesting!
Join our Instagram Hop
Before you read on about my card, I wanted to mention that you should really join our hop to see all the cool ideas that the other designers came up with using these new sets! There’s some fantastic ideas that are being shared on Instagram. You can start here, with me on the hop! Follow the list of designers shared in my post! Leave a comment for a chance to win, too! Oh, and don’t forget to follow me and Scrappy Tails Crafts for more ideas… Wait till you see the Holiday release!
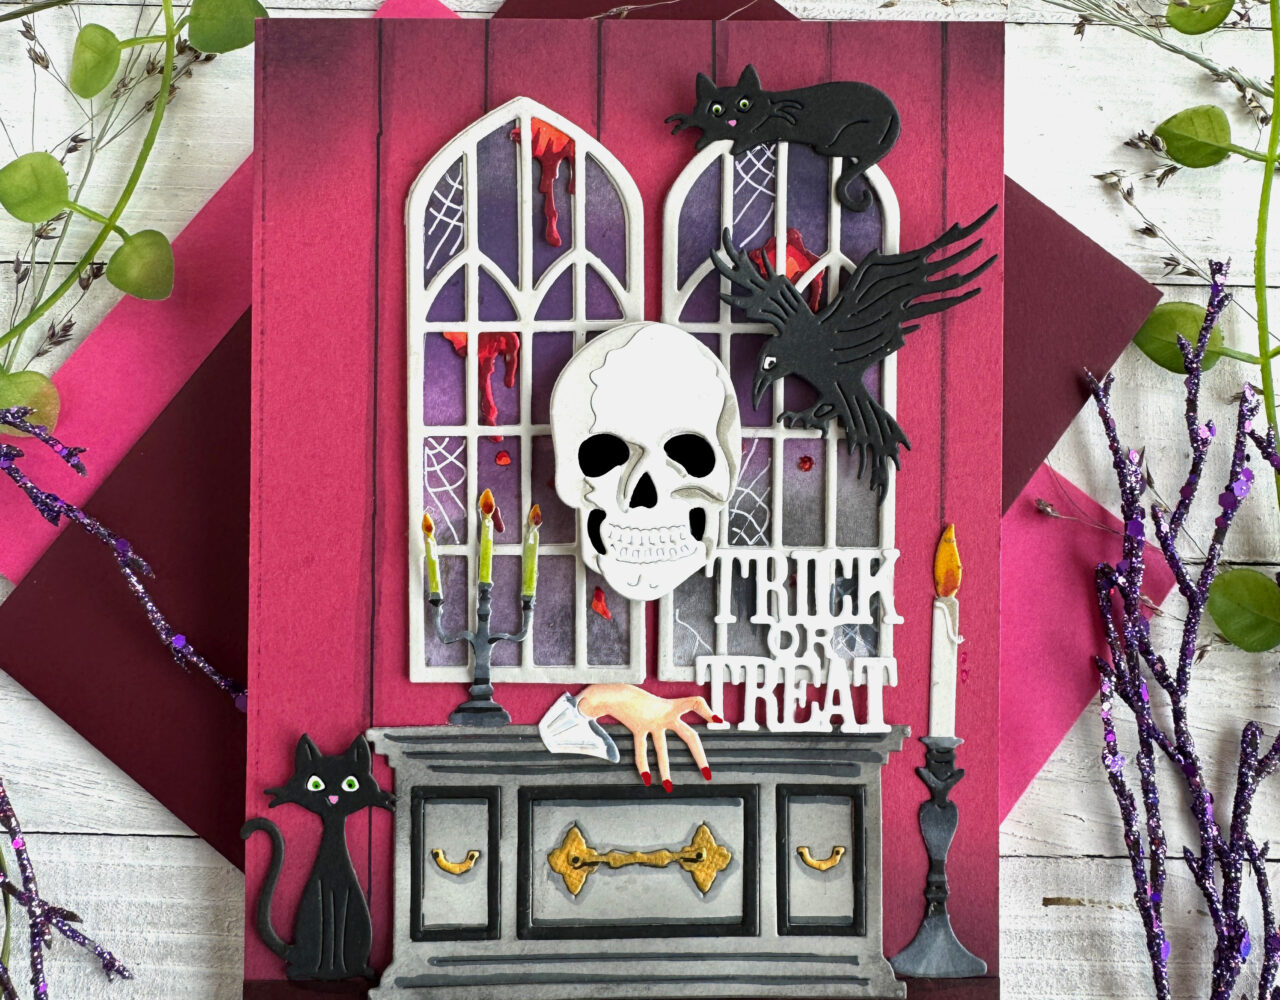
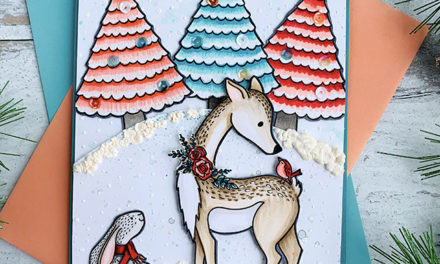
To make this 5″ X 7″ card, I started with a white card base and a fuchsia card front panel (measuring 5″X7″). I wanted to make this scene look like the inside of a funeral parlor or home so I added Beadboard to the background by simply drawing black lines with a fine-tip black marker. I added some shading for dimension to each line with a Copic C3 Sketch Marker. I also blended on some “spooky” black ink around the edges to create a creepier, darker scene. I used a blender brush and Distress Oxide Ink in Black Soot to add the shadowing around the card’s edges.
Next, I die cut all the elements using black, a warm gray, gold, maroon and white cardstock. Here’s what I cut with each color:
- Black – Cats, back layer of the skeleton, casket wood trim squares, bird,
- Warm gray – Window panes and window backdrops (I cut two pane sets for each window), casket, middle layer of the skeleton, candlesticks (2)
- White – Skeleton top layer, cat’s eyes, hand, “Trick or Treat” sentiment
- Gold – Hardware on casket
- Deep maroon – Floor strip at bottom of the scene (cut 1/2″ tall X 5″ wide)
The only coloring I did using Copic Sketch Markers included:
- Hand: E11, E00
- Fingernails and blood drips: R46, R17, R14
- Candlesticks: 100, C4, C6, YG03, R46, YR15 (flames)
- Cat eyes and nose: 100, YG03, YG17, RV02
- Shadowing on elements: C6, C3, C1 (shirt cuff, casket, background, etc.)
I used a white Gelly Roll pen to add hand-drawn cobwebs to the window panes, enhance the eyes on the bird and cats, and add highlights on the candlesticks.
Layered Windows
I hand cut backdrops for the windows and blended Distress Oxide Ink in Villainous Potion, Seedless Preserves and Black Soot to make the outside look dark, and dreary. I glued the backdrop and a layer of window pane together. Then I added some blood drips to the panes and glued the another pane over the first pane, sandwiching the blood.
Once all of my elements were cut and colored, I assembled my card. I did not have a lot of room for the “trick or treat” sentiment, so I tucked it behind the hand which I think looks really cool! The hand emphasizes the greeting. It’s like the one in the casket is offering the greeting! Very spooky 🙂
I attached by card front panel the card base to complete the card. What do you think? Is it a spooky and/or fun scene for Halloween?!
You can shop the entire Scrappy Tails Crafts Horror Classics Halloween release here. If you decide to place an order, please use the links in this post so that Scrappy Tails knows which ideas inspired you!
Thanks for stopping by today. If you want to see more ideas and inspiration from me, subscribe to my blog, BobbiHartDesign.com. I’ll send you updates on new posts! You can also find me on Instagram as @BobbiHartDesign and on Facebook as BobbiHartDesign.


