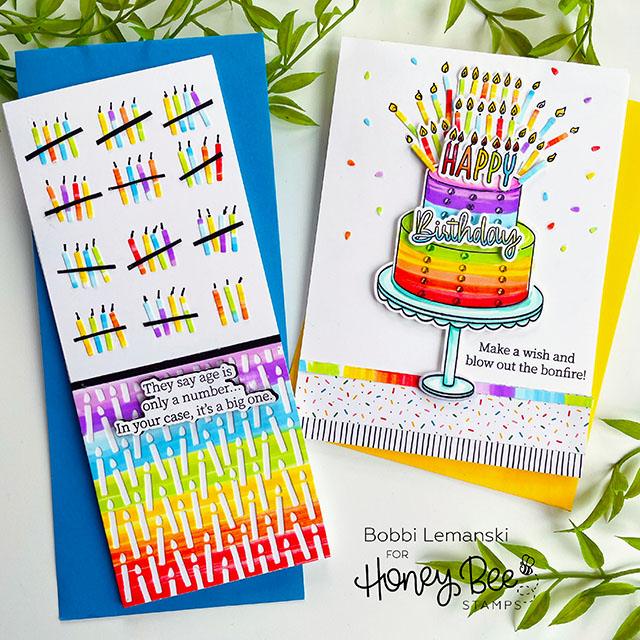
Hello Bee friends! Bobbi Lemanski here with two cards to celebrate the aging! Well, at least the ones that have a good sense of humor. It can be fun to poke fun at a person’s age, but you definitely need to know your audience. :0) It can go south quickly if you offend someone. So, here’s two cards you can make and share at your own risk! I’m using the following products from Honey Bee Stamps:
This 3-1/2″ wide X 8-1/2″ tall slimline card is made from Neenah 80lb Solar White cardstock. There are candles galore on this card and they were all cut quickly and easily with the Candle Cover Plate die. All the candles you need are die cut in one pass of the die cut machine!
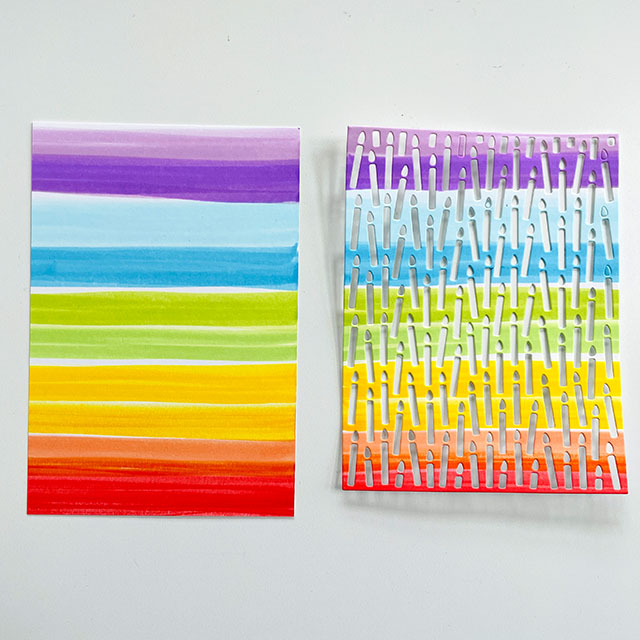
To make the bottom half of this card and the candles at the top, I started by creating a rainbow striped pattern on white cardstock. I used the following Copic Marker colors: R17, R14, YR68, YR02, Y18, Y08, YG03, YG00, B02, B00, V04, and V12 to create the colorful stripes. I die cut the piece using the Candle Cover Plate die. Now I have lots of pretty colored candles to use on the top as well as the bottom design. I removed the candles and attached the die cut to the bottom of my card 3-3/4″ up from the bottom edge and trimmed down the side to a 3-1/2″ wide piece. The cut was attached using the Bee Creative Precision Glue.
For the top half, I glued the individual candles next to each other in fours and added a 1/8″ stripe of black cardstock over each set to create the age tally markings. You can personalize the number to the recipient’s age. I also added a 1/4″ strip of black cardstock right above the die cut to create a clean border as well. Using a .05 fine-tip black marker, I added wicks to each candle on the top. I stamped, die cut and backed the phrase from the Inside: Snarky Birthday Sentiments stamp set and coordinating die set for the front. I used a 4mm black craft foam backing to make the phrase stand out. I like that the black shows through from the side, too. All the layers were glued together and then glued to the front of the card.
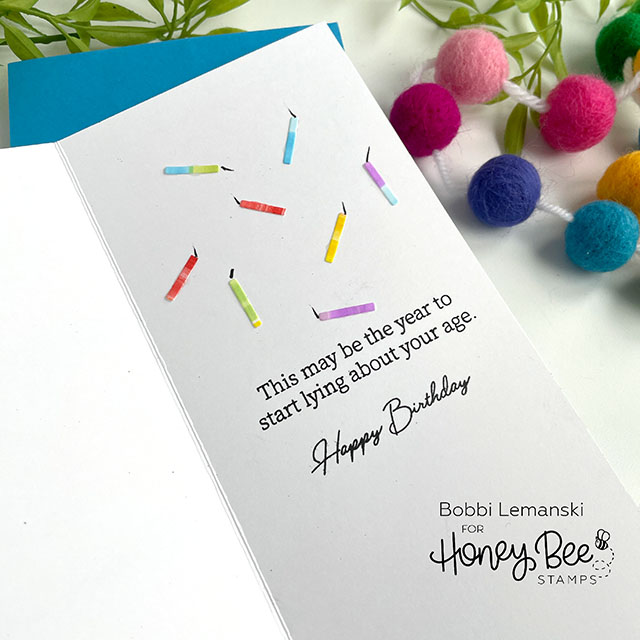
Inside the card, I stamped two more phrases from the same set and added a few more fun candles with black wicks to finish this card. How cute is that?!
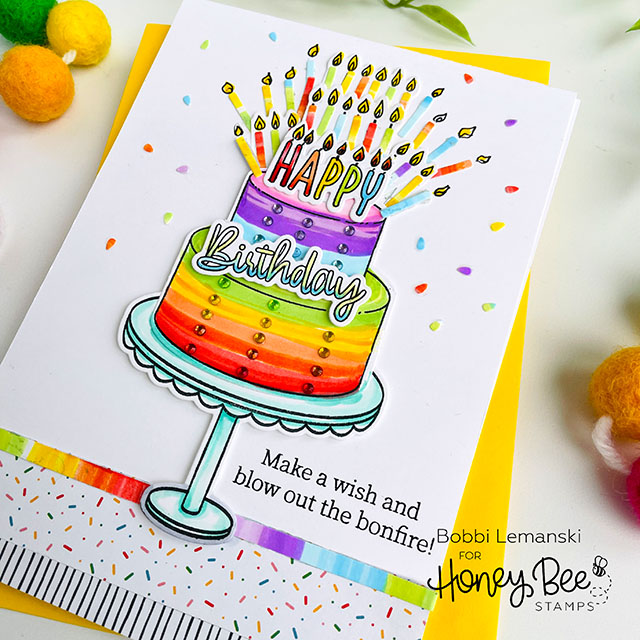
Blow Out the Bonfire
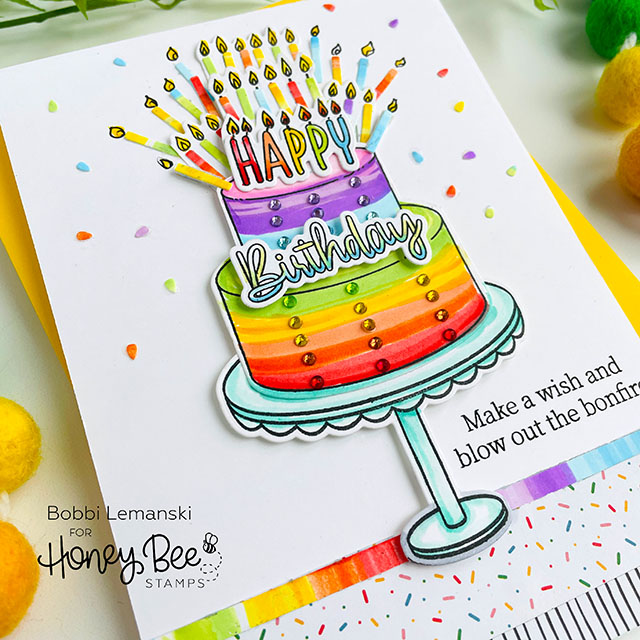
My next card is a 5″ X 7″ card made from Neenah 80lb Solar White cardstock. I stamped, colored and die cut the cake, cake pedestal, “happy” and “birthday” from white cardstock. The cake was colored using the following colors: R17, R14, YR68, YR02, Y18, Y08, YG03, YG00, B02, B00, V04, and V12. I added rhinestones from the Rainbow Gem Stickers to the front of the cake for sparkle. I stamped the image of six candle flames from the set three times and die cut them. I layered all the images together on the card front as shown. I used Scrapbook Adhesives .25 Foam Squares in white to raise the cake design of the card front. I added additional candles on the side and hand drew in matching candle flames (with the ones from the set) using a black marker. The small colored die cut flames were added around the cake to look like confetti pieces.
For the bottom of the card, I added pattern papers from the Let’s Celebrate 6″ X 6″ pattern paper pad to create a platform for the pedestal to rest on. I also added a 1/4″ wide rainbow striped piece from a scrap piece left over from card one. The entire “table base” is 1-3/8″ tall from the bottom edge. A phrase from Inside: Snarky Birthday Sentiments stamp set was stamped right next to the pedestal vase.
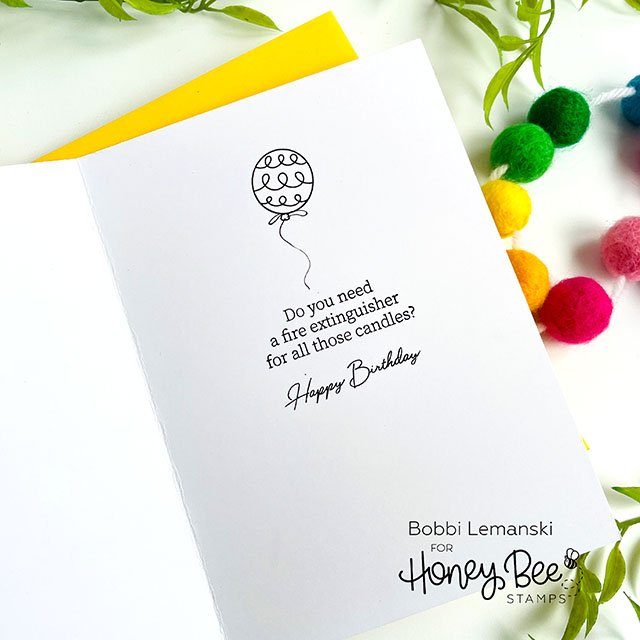
Inside the card, I stamped two more verses from the same snarky sentiment set and stamped a balloon above from the Fancy Frosting stamp set. I hand drew the balloon string and loops using a black marker. This card fits inside an A7 envelope.
You can shop the entire Honey Bee Stamps store here. If you decide to place an order, please use the links in this post so that Honey Bee knows how what inspired you! I appreciate it very much. It helps me to continue to bring more ideas to you!
Thanks for stopping by today. If you want to see more ideas and inspiration from me, subscribe to my blog, BobbiHartDesign.com. I’ll send you updates on new posts! You can also find me on Instagram as @BobbiHartDesign and on Facebook as BobbiHartDesign. Bobbi Hartmann Lemanski, Bobbi Hart♥ Design, Adding h♥art into every design


