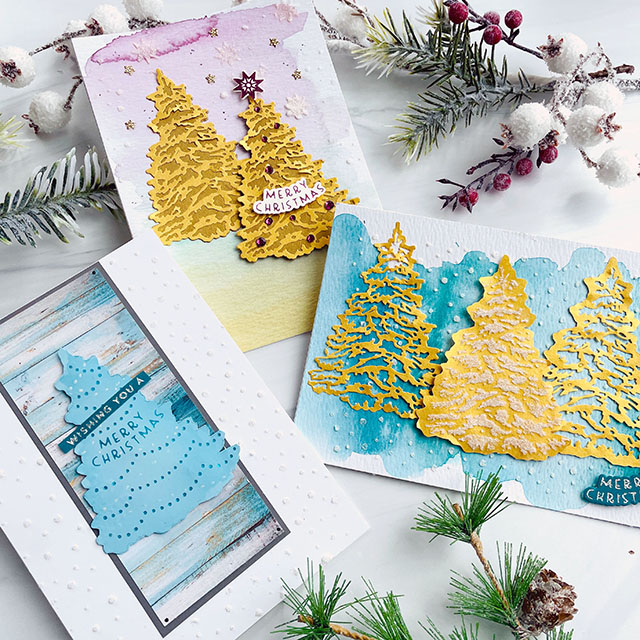
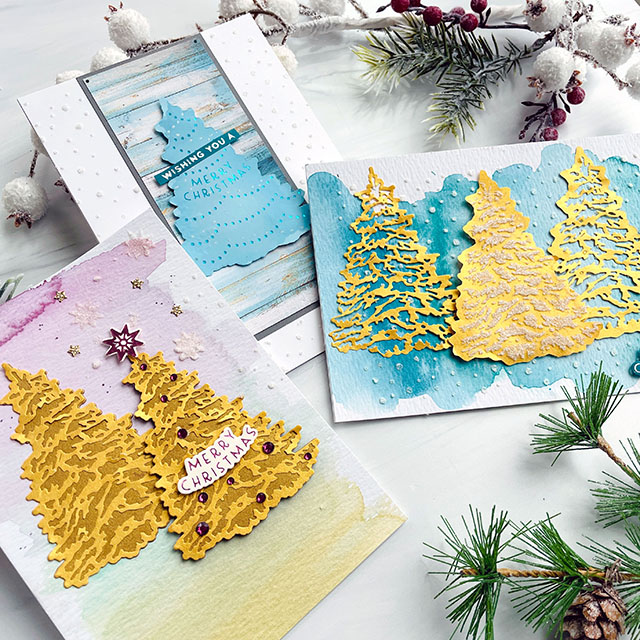
Hello, friends of Spellbinders! I’m sharing some festive trees for the holidays as the guest designer for Spellbinders. At our house, we celebrate big for Christmas with four trees in the home and countless decorations. We love to decorate each tree uniquely to fit the space. Today, I am decorating trees for my holiday cards instead. I’ve got three cards to share that show the many different ways you can use the Trim a Tree Collection of products together to create lovely winter trees.
Card 1: O Christmas Tree
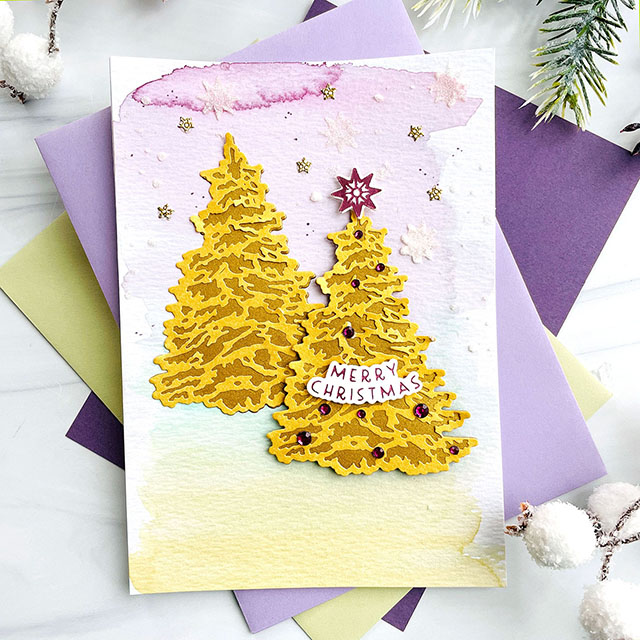
My first 5” X 7” card features the O Christmas tree dies. You get a base and layered die that offering pretty dimension in your trees . To create this card:
- I started with Ranger Watercolor paper and Zig Kuretake watercolors and applied a soft watercolor wash of mulberry/pinks, greens and golds for the background.
- I die cut two each of the base and top layer of the O Christmas Tree die from a metallic yellow-gold cardstock. The layers were adhered together with Bee Creative Precision Glue to make two trees.
- I hot foiled the “Merry Christmas” phrase and the star topper from the Shining Christmas Tree die set using a pink foil and my Spellbinders Glimmer Hot Foil System. Both were cut using the coordinating dies in the set and attached to one tree.
- I attached the trees, using Scrapbook Adhesive foam tabs to the decorated tree in the foreground.
- I die cut some tiny stars (part of the O Christmas Tree die set) and glued them to the background.
- Using Gina K Glitz Glitter Gel and the Layered Christmas Tree stencil, I added stars and snowflakes in the sky.
- Wine colored rhinestones were added to the foreground tree.
- Lastly, the card front was attached to an A7 white card base using double sided tape to complete this card.
Card 2: Shining Christmas Tree
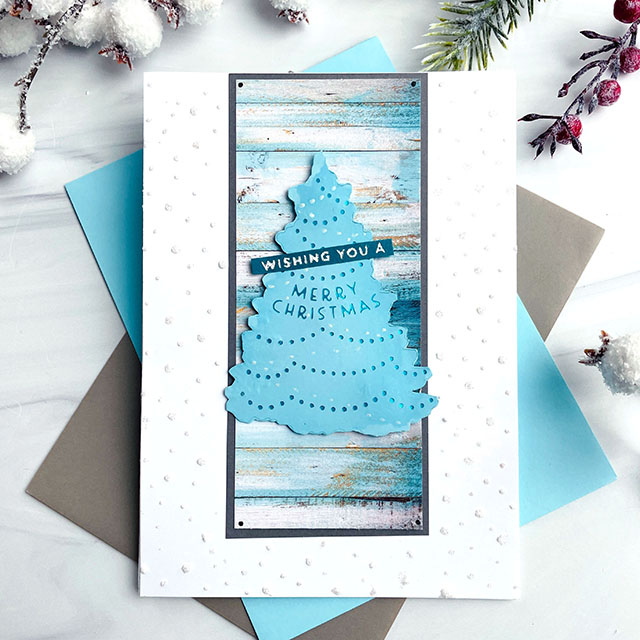
My next card features the Shining Christmas Tree die set.
- I simply hot foiled the phrase and garland design on aqua blue paper using an aqua blue foil.
- I also foiled the “Wishing You A” phrase using silver on a teal piece of cardstock. The tree was then die cut using the base layer die from the O Christmas tree set and the phrase was cropped.
- For the background of this card, I added a pattern paper framed in a solid gray cardstock down the center of my white 5” X 7” card base and attached the shining tree using Scrapbook Adhesives foam tabs.
- Using the stencil and the Glitz Glitter Gel, I added a snowballs all around the outer white front to complete this card.
Card 3: Layered Christmas Tree
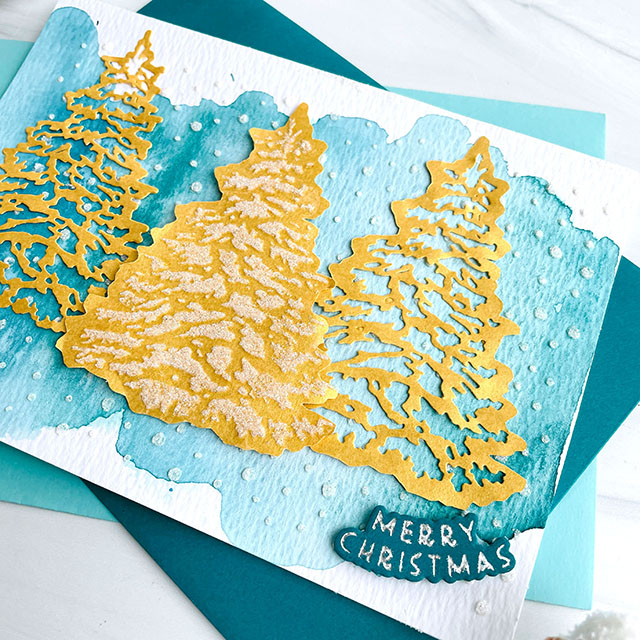
In this last card, I just wanted to show the beauty in using the Layered Christmas Tree stencil to add snowy glitz to the base layer tree. It looks so pretty as it shines and stands out. I also think using the top layer alone, allowing the watercolor backdrop to show through, makes beautiful and delicate background trees for this scene. These products work nicely together and alone for countless looks for your holiday trees.
Here’s a list of the Spellbinders supplies I used:
S3-419: O Christmas Tree die set, GLP-291: Shining Christmas Tree die set, STN-003 Layered Christmas Tree stencil, GLF-012 Hot Glimmer Foil 4-Pack, GLS-003 Glimmer Hot Foil System
Other products used: Ranger Watercolor Paper, Zig Kuretake Gansai Tambi 48 watercolor set, Honey Bee Stamps Bee Creative Precision Glue, Gina K Glimmer Glitz Gel, Honey Bee Stamps Rhinestones, Neenah Solar White cardstock and Scrapbook Adhesives foam tabs.
You can shop the entire Spellbinders store here. If you decide to place an order, please use the links in this post so that Spellbinders knows which ideas inspired you!
Thanks for stopping by today. If you want to see more ideas and inspiration from me, subscribe to my blog, BobbiHartDesign.com. I’ll send you updates on new posts! You can also find me on Instagram as @BobbiHartDesign and on Facebook as BobbiHartDesign

