Hello Honey Bee Friends. It’s Bobbi Lemanski here with a holiday card that I hope brings you a little joy! I’m using the following new products from the Vintage Holiday release collection by Honey Bee Stamps:
Merry Little Mice stamp set and coordinating die set
Fancy Flakes Cover Plate 1 die
Merry Christmouse stamp set and coordinating die set
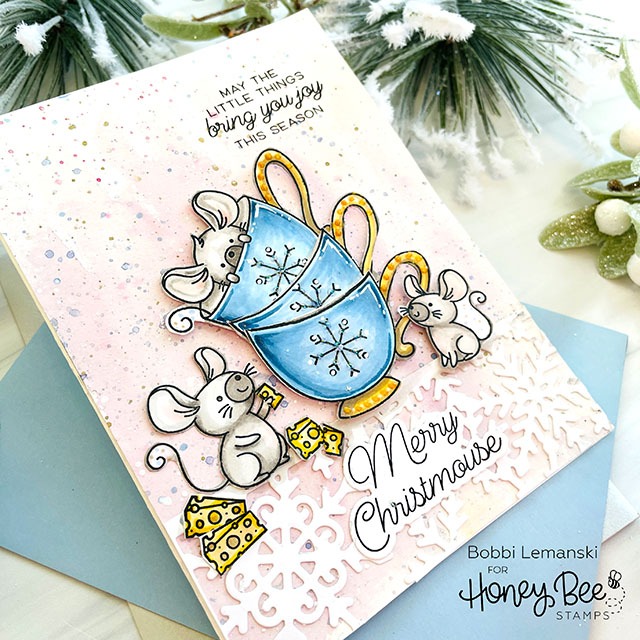
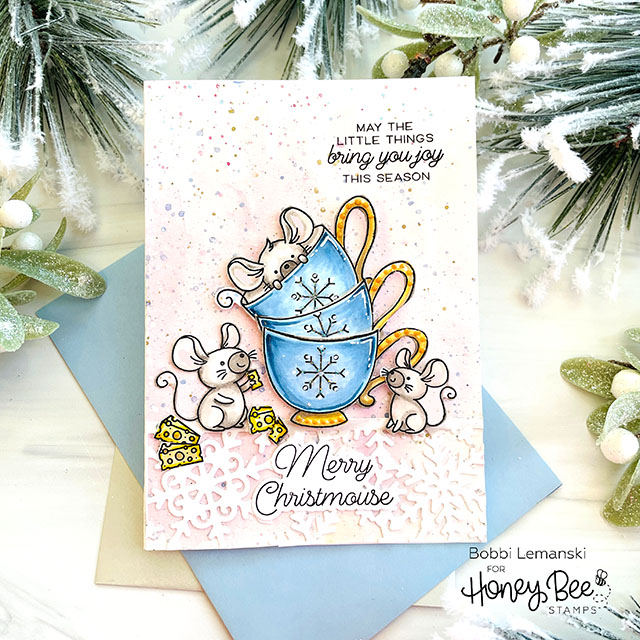
My card measures 5″ X 7″ and is made out of Neenah 80lb Solar White cardstock. For the card front, I used watercolor paper and my watercolor paints to create the background. It’s a soft wash of pinkish lavender with splatters of metallic gold, blue, pink and white. It’s soft, light and pretty enough to complement delicate teacups. 🙂 On the lower half of the front, I added a stripe of white snowflakes made by die cutting the Fancy Flakes Cover Plate 1 from white cardstock and placing it horizontally on the front. I glued the snowflake design to the watercolor paper using Bee Creative Precision Tip Glue. The delicate design reminds me of a lace tablecloth used for serving afternoon tea.
With the background ready, I focused next on the images. I stamped the cup, cheese and mice images using Bee Creative Intense Black ink on white cardstock. I colored the images using the following Copic markers:
- Mice – W5, W4, W3, W1, W0, R000, R00
- Teacups: B95, B93, B91, B32, B21, Y28, Y21
- Cheese: Y28, Y19, Y13
To create the stack of teacups, I stamped one full image. I also stamped two separate cups, masking the mouse so that only the cup designed stamped on my paper. I hand cut all three images and positioned them in a toppling stacked design. The two phrases from the Merry Christmouse stamp set were stamped – one directly on the card front and one on white cardstock. “Merry Christmouse” was die cut using the coordinating die set
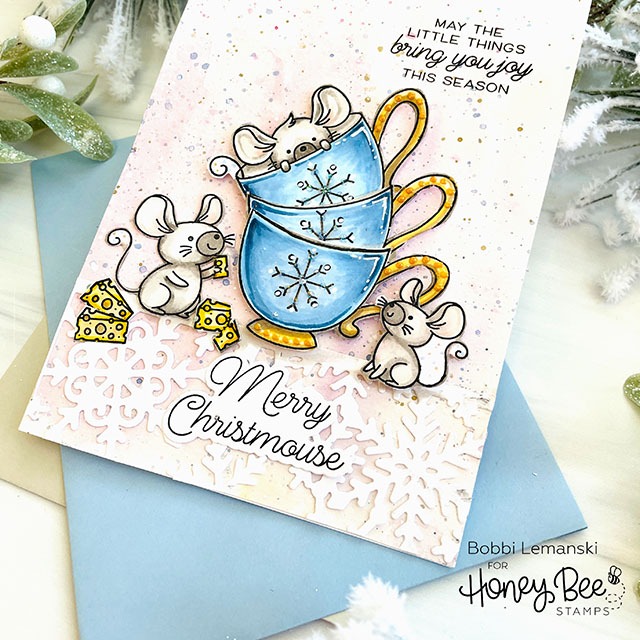
I attached the mice, toppling teacups, cheese and phrase. I used Scrapbook Adhesives .25 Foam Squares in white to attached the teacup stack and smaller mouse to make them stand out a bit more. I cut a piece of cheese off one chunk and added it to the hands of the mouse on the left. Nuvo Drops in gold was used to add a dimensional design on the teacup base and the cups’ handles to complete the front. The card front panel was attached to the card base using double sided tape to complete the handmade holiday greeting. (This tape works well with watercolor paper.)
You can shop the entire Honey Bee Stamps Vintage Holiday release now. If you decide to place an order, please use the links in this post so that Honey Bee knows which ideas inspired you!
Thanks for stopping by today. If you want to see more ideas and inspiration from me, subscribe to my blog, BobbiHartDesign.com. I’ll send you updates on new posts! You can also find me on Instagram as @BobbiHartDesign and on Facebook as BobbiHartDesign.

