
Hello witches! You know who you are! 😉 This is Bobbi Lemanski and I have a new set of stamps to share with you. They are from the latest Spooktacular release by Honey Bee Stamps. My card is an interactive, easel card with a see-through moon opening. It’s the perfect backdrop to this drop-dead gorgeous witch. 🙂 I’m using the following new products:
If the Broom Fits stamp set and coordinating dies
Painted Pumpkins stamp set and coordinating dies
Happy Halloween stamp set and coordinating dies
Fright Night City Scape die set
Hocus Pocus stamp set and coordinating dies
Halloween Potion Labels stamp set and coordinating dies
The featured project below is made from Neenah 80lb Solar White cardstock for the images and 100lb black cardstock for the card base. All of the black ink stamping was done using Honey Bee’s Bee Creative Intense Black Ink. I use Honey Bee Stamps Bee Creative Precision Glue for adhering my elements together. My card is 5″ X 7″ in size. Now for the details…
The Easel Card Base
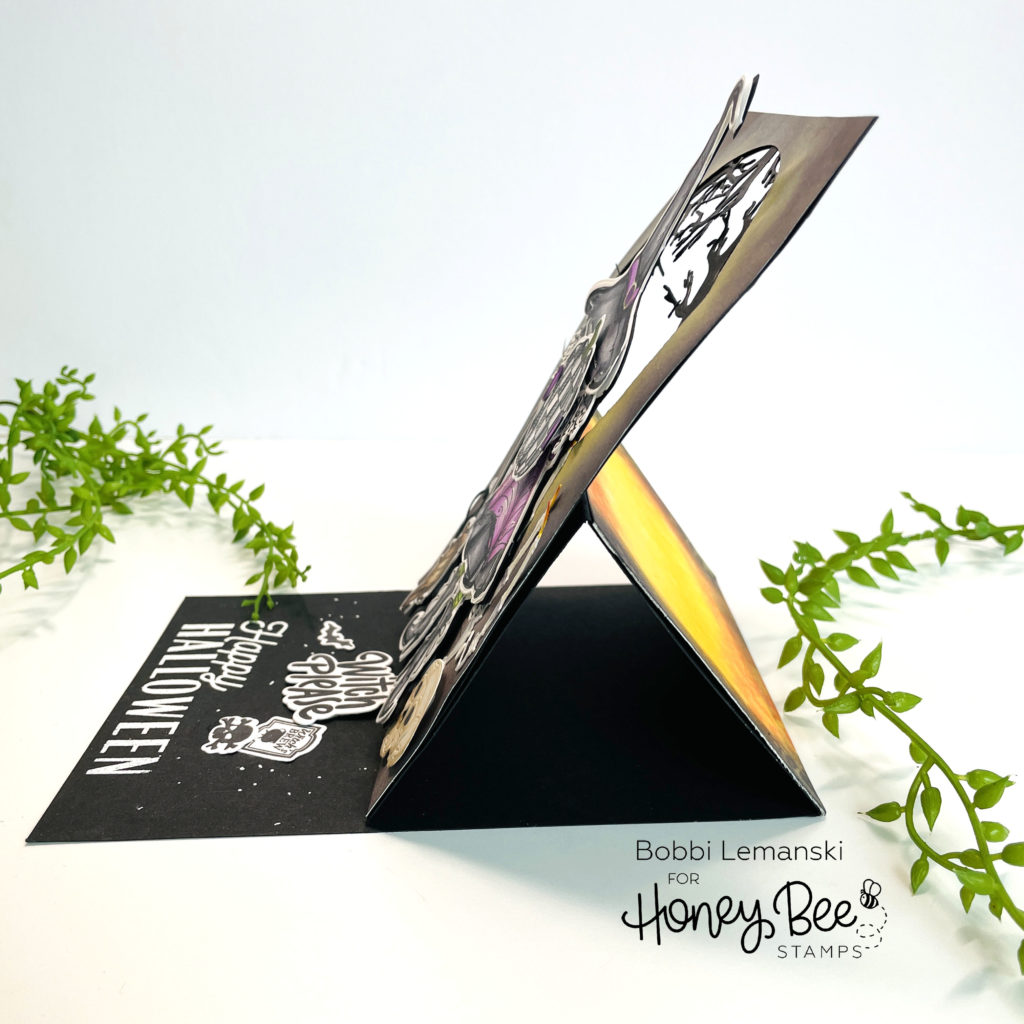
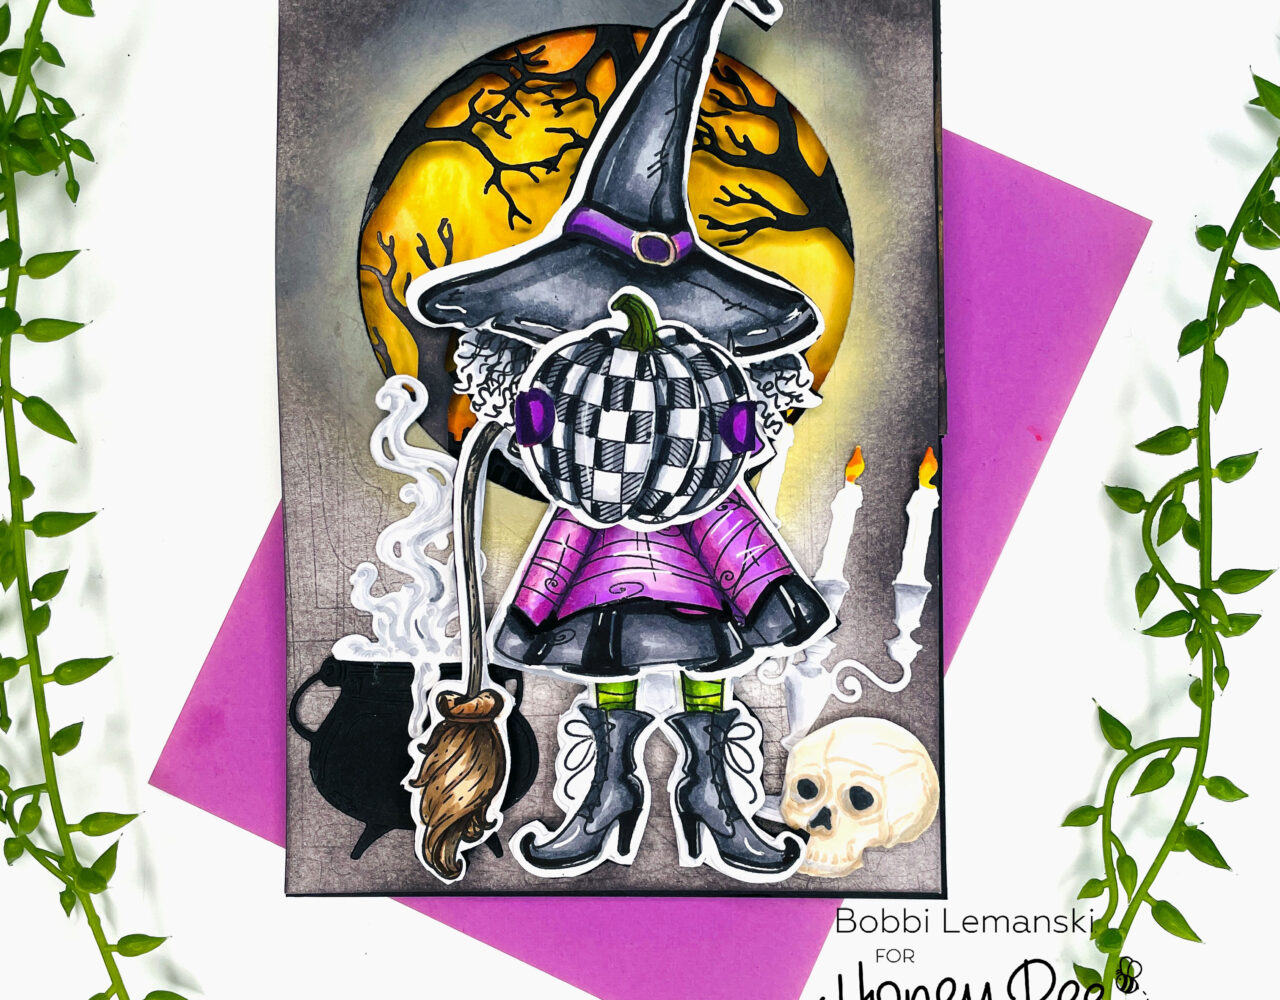
This 5″ X 7″ easel card uses a black card base with the fold at the top. To make it, I cut a 5″ wide X 10″ long piece of black cardstock and scored at 7″ to create the 5″ X 7″ back panel. Next, I cut another piece of black cardstock 5″ wide X 4″ long and scored at 1/2″ from the top. I attached the 1/2″ section to the 3-1/2″ long flap in front to extend and make it 7″ long in the front, too. This score line also creates the easel mechanism.
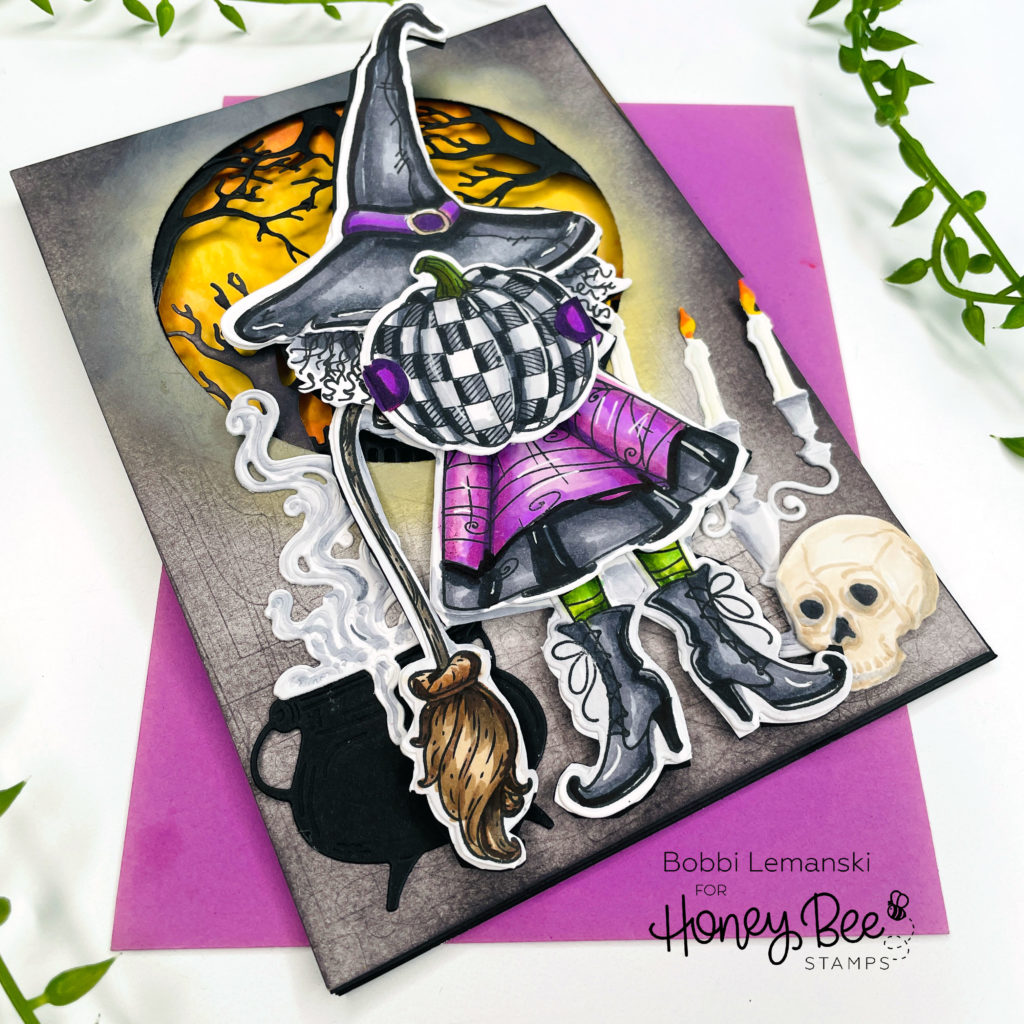
For the moon section, I added a 5″ wide X 3-1/2″ tall piece of white cardstock that was blended in yellow, orange and black Distress Oxide inks and splattered with water (to lift the ink and make it splotchy.) I added this piece to the top half of the front panel of the base (above the easel score line) to create the colorful moon you see when the card is in its closed position. When the card is in its upright position, this colorful piece shows from the back (see photo above).
The Front Panel
For the front panel, I cut two 5″ X 7″ pieces of cardstock, one in black and one in white. I layered (but not adhered) the two pieces together and cut a circular opening in the upper half section at the same time to ensure the openings match up perfectly. I used the Fright Night City Scape die set to cut the big circle. I reserved the trees that this die cuts at the same time and used them to create branches across the “moon” opening by sandwiching them in between the white and black panels. Why two panel layers? Two layers will make a stronger, more sturdy panel. Plus, it offers a nice dark black background so that when the card is in its upright position, it will look clean on the backside.
I used Distress Oxide Ink in Black Soot to make the front panel look cloudy and spooky. I used Squeezed Lemonade to add some yellow moonlight around the circular opening . A little splatter of water lifted some of the ink to make it look splotchy, too.
All of the witch components and accessories you see above are from the If the Broom Fits stamp set and coordinating dies, A Little Spooky die set, and Painted Pumpkins stamp set and coordinating dies. I stamped, colored, die cut then assembled them and attached to the front. I hand drew some hair on the witch and positioned the pumpkin right under the hat to make it look like the pumpkin is covering the witch’s face. I also added “mitten hands” to the sides of the pumpkin for the arms.
I used the following Copic colors to color the images:
- Witch: V09, V06, V05, V04, YG67, YG03, YG00, 100, C8, C7, C5, C4, C2, C1,
- Broom: W4 E49, E44, E43, E57
- Skull: E43, E42, E40, 100, C4
- Smoke in cauldron: C4, C3, C2, C1
- Candelabra: C5, C3, C1, R17, Y19, YR30
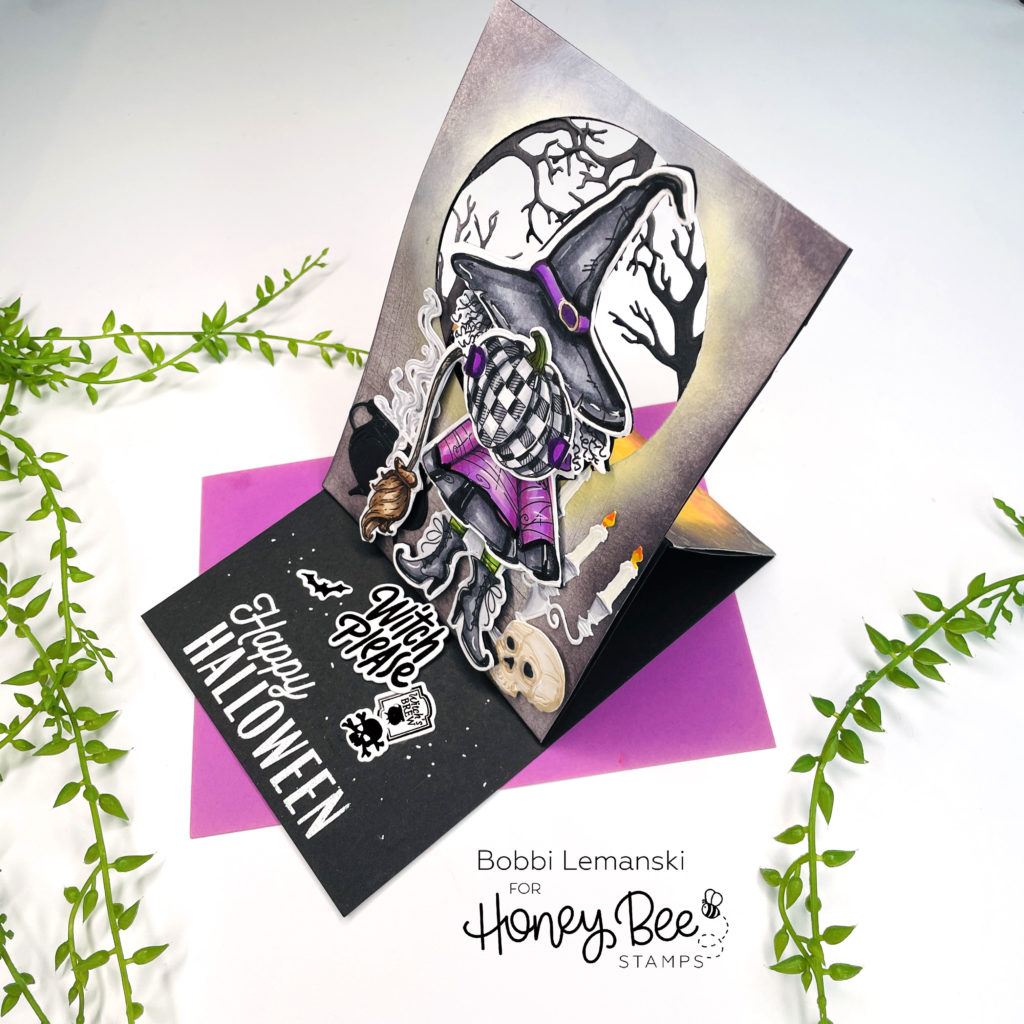
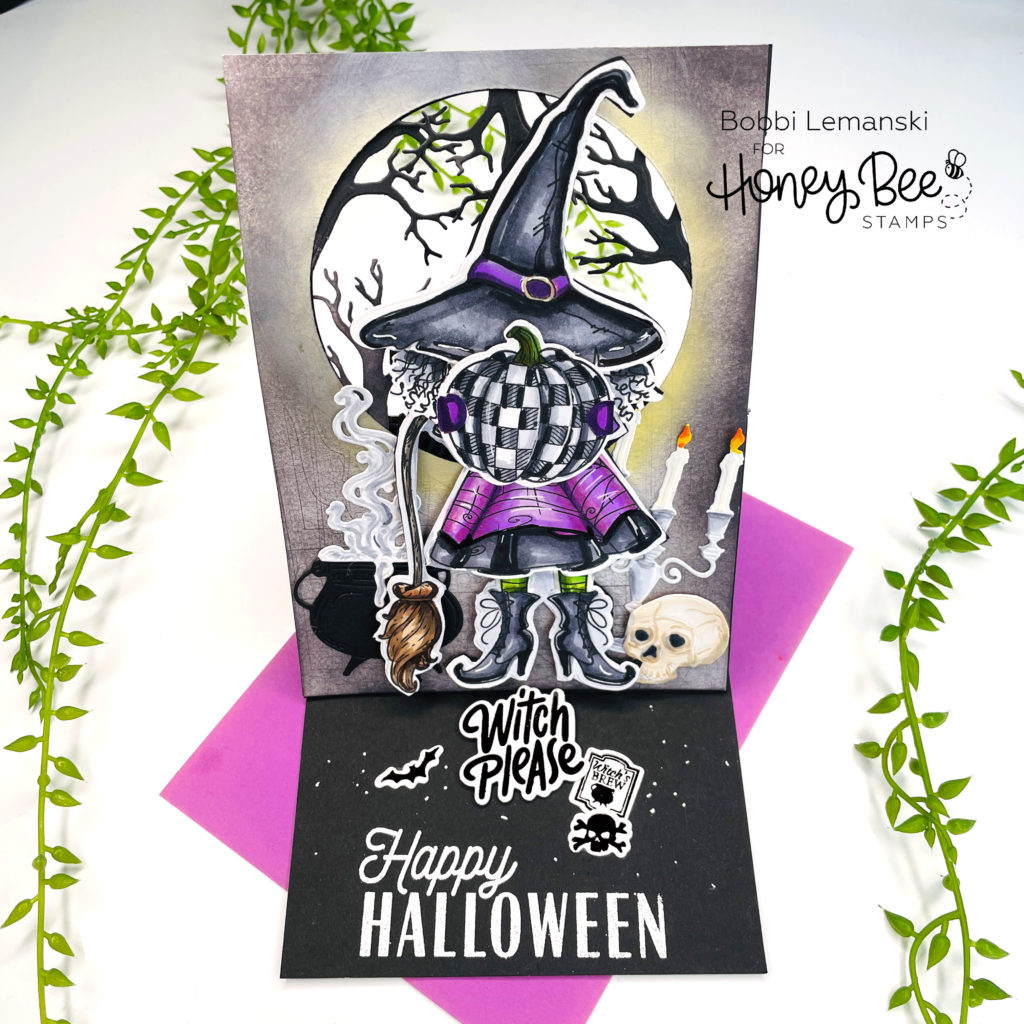
The Inside Panel
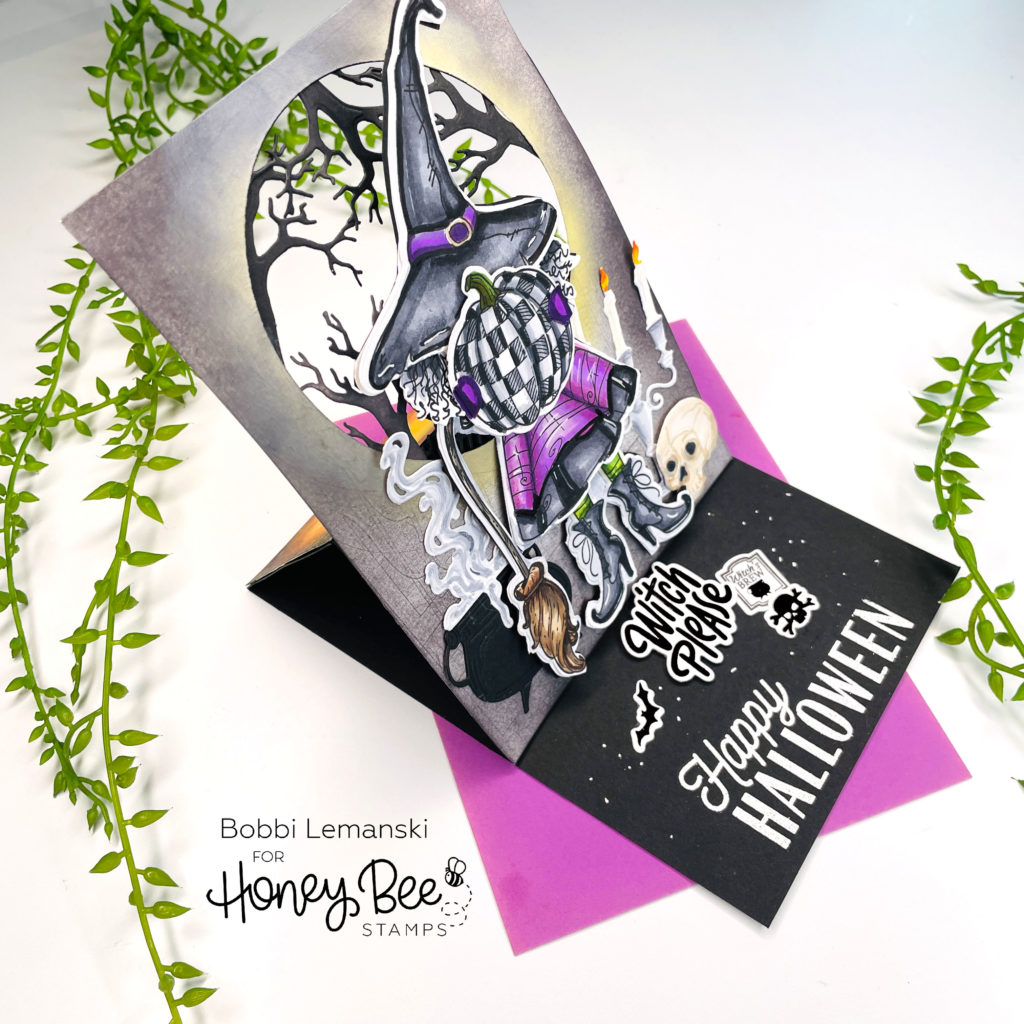
When the easel is upright, you see the images inside. I stamped and embossed in white the “Happy Halloween” sentiment from the Happy Halloween stamp set on the bottom of the inside panel. Spooky Images and labels from the Halloween Potion Labels stamp set and coordinating dies were attached as well as the phrase, “Witch Please” from the Hocus Pocus stamp set. When I attached the die cut phrase, I attached it using two foam tabs so that it is raised and can act as the easel holder. A few dots using my white Gelly Roll pen finishes off the inside look.
This card is a fun way to send a note AND share a little holiday décor with someone. Imagine how cute this would be sitting out on a shelf or mantel to enjoy! You can shop the entire Honey Bee Stamps Spooktacular release here. If you decide to place an order, please use the links in this post so that Honey Bee knows which ideas inspired you!
Thanks for stopping by today. If you want to see more ideas and inspiration from me, subscribe to my blog, BobbiHartDesign.com. I’ll send you updates on new posts! You can also find me on Instagram as @BobbiHartDesign and on Facebook as BobbiHartDesign.


