
Hello friends. We’re having a Pet-tastic party on Instagram today for the new Honey Bee Stamps release. I’m sharing this card on the hop and wanted to provide additional details here on @BobbiHartDesign how I made this 5″ X 7″ card.
Hop with us! You can win prizes by hopping with us today on Instagram. To learn about the prizes and to hop and enter, head to my Instagram page for all the details here. While you’re there, don’t forget to follow me and most importantly, leave a comment on my post so that you are entered to win a $50 gift card to shop!
I am using the following products from the new Pet-tastic Release:
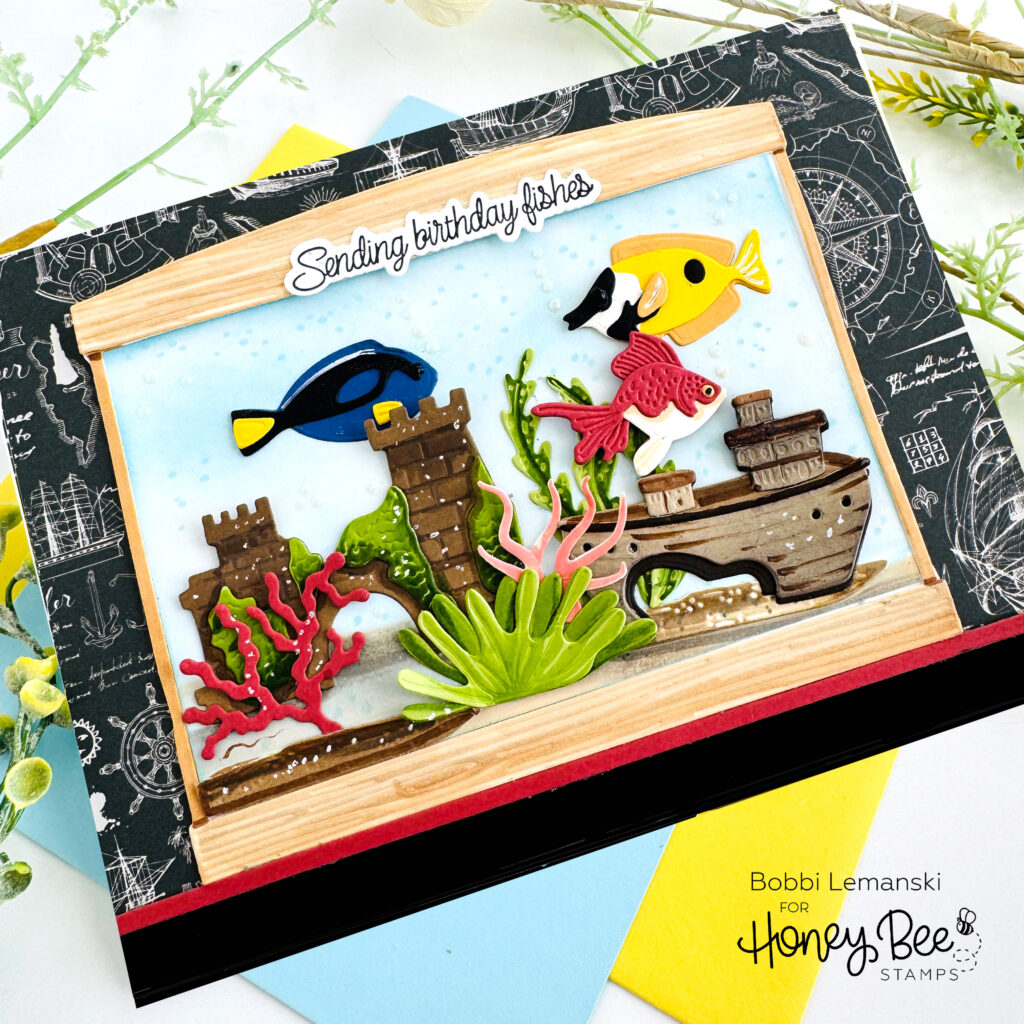
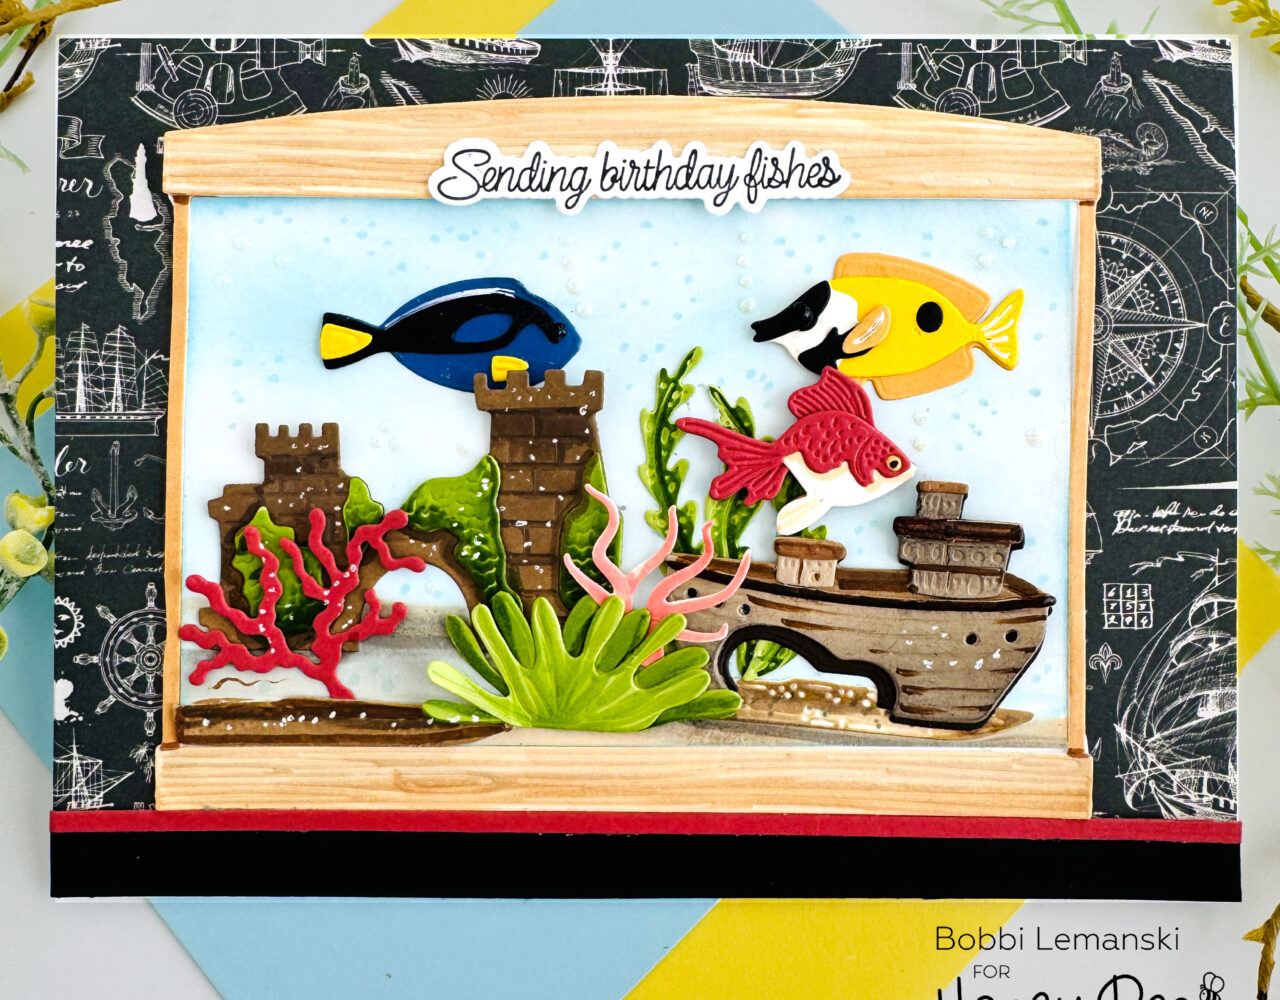
To create this 5″ X 7″ card, I started by die cutting the aquarium/tank using the Lovely Layers: Tank Honey Cuts dies. I colored it using light browns including Copic Markers in E42, E55, and E57. This tank has a woodgrain texture so I kept it light and natural wood-looking. I also die cut the elements to create the fish using the Lovely Layers: Fish Honey Cuts dies and color cardstock. I assembled them using the layering guide that is on the website. You can print it off and have it by your side as you glue the components together. I did the same for the other elements using the Lovely Layers: Tank Aquarium Add-on Honey Cuts dies. I added a sandy base to the aquarium using the base layer in the add-on set, then carefully added the scene elements to the tank. For the greens, I spruced them up by adding some additional color to the medium green cardstock using Copic YG67, YG17 and YG03. I did the same for the abandoned castle and ship using brown markers of various colors. I also used my white Gelly Roll pen to add speckles and a fine-tip black marker for the stony specks, too.

For the background, I used a sea paper from the Grab Your Passport Paper Pad. I like the Honey Bee papers because they are big enough to cover the entire front of a 5″ X 7″ card. This black and white marine paper was perfect for this “aquarium sea scene!” I also added a white background to the aquarium that I blended on Tumbled Glass Distress Oxide ink over it to create a light, partially colored blue water background. Normally, you would leave the background show through since aquariums are clear on both sides, but for this scene, I chose this route so the elements would really stand out versus being over the pattern paper background.
With everything in place, I used Glossy Accents for the some bubbles come out of the fish mouths and added dots of blue for more bubbles in the water. To ground the aquarium and have a place for it to rest, I added a 5/8″ strip of black and and 1/8″ red strip of red cardstock to the bottom to tie in the colors in the aquarium elements. Lastly, I added the phrase at the top to complete the card. I used the Pet-tastic stamps and coordinating Honey Cut dies to do this.
You can shop the entire Honey Bee Stamps , Pet-tastic Release here. If you decide to place an order, please use the links in this post so that Honey Bee knows which ideas inspired you!
Thanks for stopping by today. If you want to see more ideas and inspiration from me, subscribe to my blog, BobbiHartDesign.com. I’ll send you updates on new posts! You can also find me on Instagram as @BobbiHartDesign and on Facebook as BobbiHartDesign.


