I’m in love with so many WPlus9 sets that it was hard to pick just one or two sets to feature as guest designer last month. I decided to use the New Home stamp and die set paired with an older set, Friends for all Seasons: Fall. Lately, I’ve needed cards for new home buyers. I have two nieces who have recently purchased their first homes. It’s fun to create a custom, tailored card for new homeowners that matches their new digs!
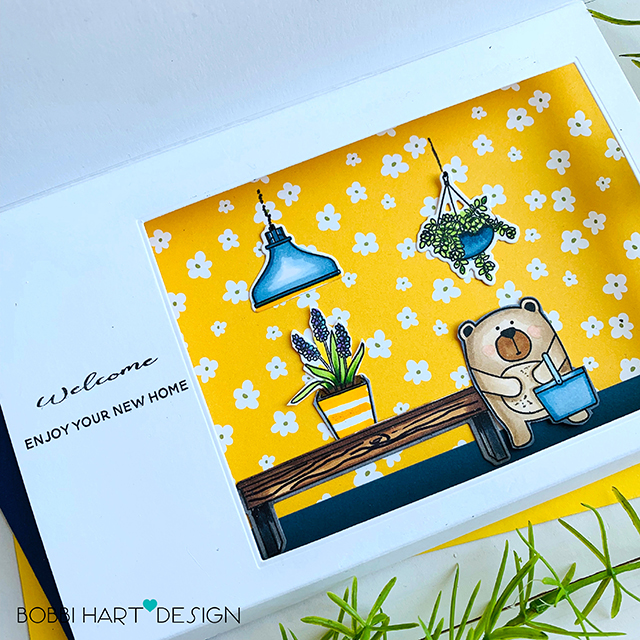
I have seen so many beautiful cards made using the New Home set by WPlus9. I knew I wanted to add a twist – an element of surprise – to my card so why not add a scene inside the door? This diorama card design will take you right into this beautiful new home, giving you first just a peek before the big reveal!
To make this card, I used the following products:
- New Home stamp and coordinating die sets
- Friends for all Seasons Fall stamp and coordinating die sets
- Neighbors stamp set (for the “enjoy your new home” phrase only)
- Neenah 110lb Solar White cardstock for the card base
- Neenah 80lb Solar White cardstock for the card front and die cuts
- Copic Sketch Markers in various colors
- X-Acto Knife
- Rectangular die (similar to the Bar Stitched Rectangular die)
- Double sided ¼” adhesive tape
- LePen Fine Tip black marker
- 6” X 6” pattern paper piece
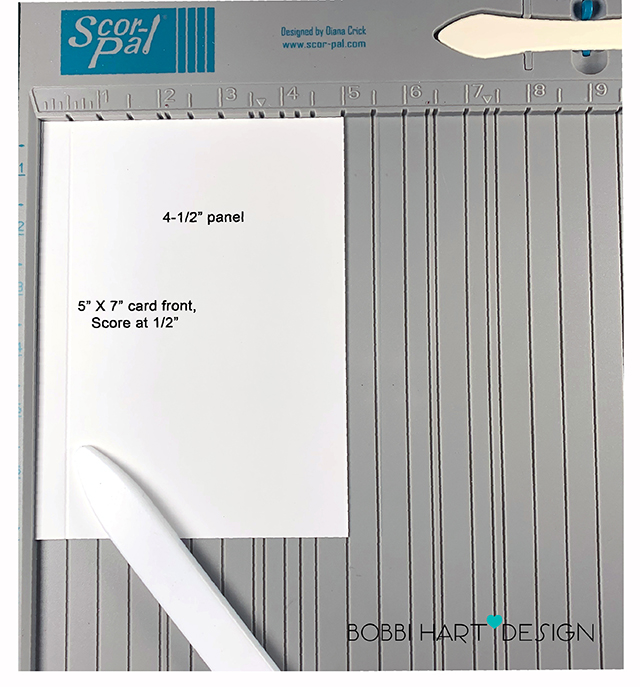
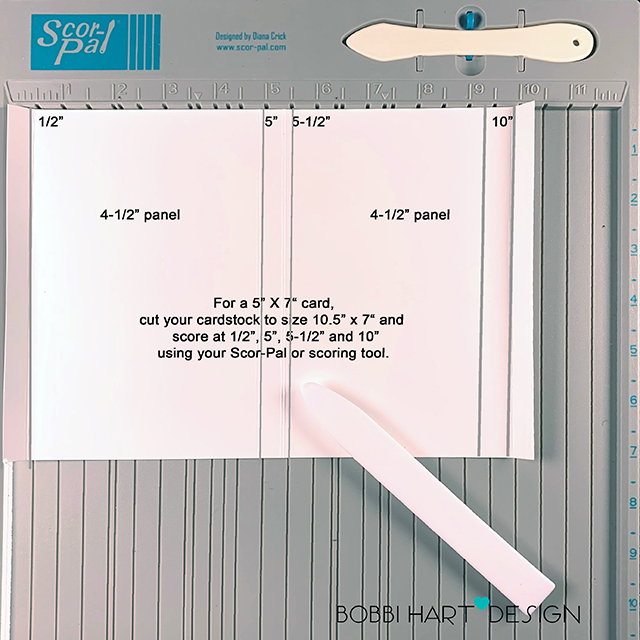
To create this 5” X 7” card, I started by cutting and scoring two card fronts and a base out of the Neenah cardstock. I like to make the base from the heavier weight cardstock so that it creates a sturdy box. I cut and scored the following pieces:
- From 110lb cardstock: a 10-1/2” X 7” rectangle, scored from the left side at ½”, 5”, 5-1/2” and 10”.
- From 80lb cardstock: a 5” X 7” rectangle, scored from the left side at ½”.
- From 80lb cardstock: a 4-1/2” X 7” rectangle to back the card front (to cover any Copic marker bleeding on the inside)
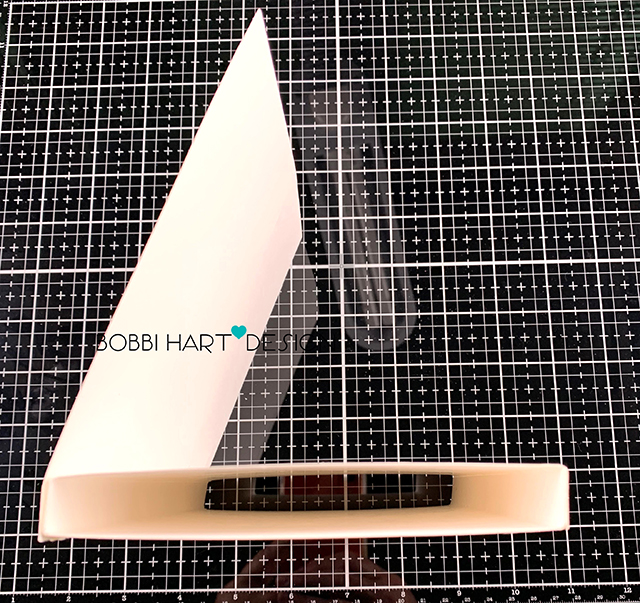
I reinforced the score lines using a bone folder so that they are nice and crisp folds to make the box shape. When you line up the card front score line with the ½” score line on the base and fold at the scores, the card will appear like this from the side when it is eventually adhered together.
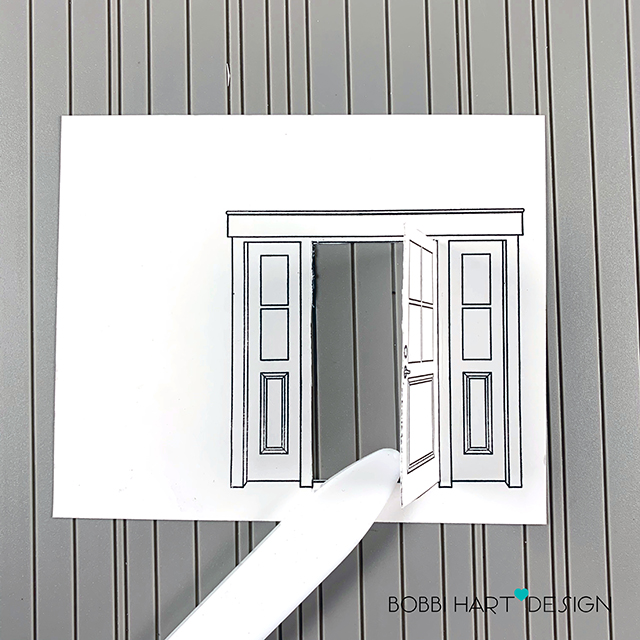
I stamped the door image on the card front piece with the scored line at the top. Using an X-Acto knife, I cut the door opening on three sides, leaving the right side attached. Sometimes you must clean up your opening with a small scissors if the knife is not sharp enough (like mine).
Copic markers will bleed through the card front so I needed another piece to cover and finish the inside panel for a clean, professional look. I layered the stamped door piece over the other 4-1/2” X 7” rectangle, matching up the bottom edge, and marked the door opening. I cut out the door opening using a punch several times. You could use a rectangular die or X-Acto knife, too.
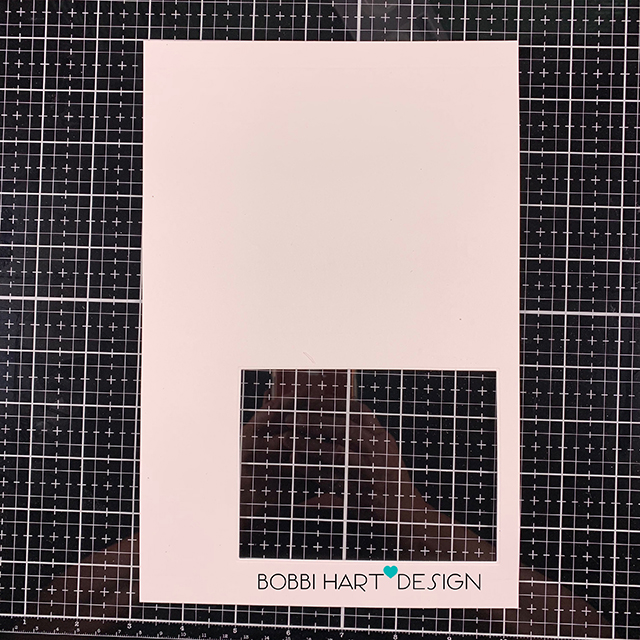
I layered the card front on the flattened card base and marked the door opening on the base front panel. Using a rectangular die, I placed it over the marked opening, making sure the entire door opening will be within the die cut area. I die cut the rectangle out using my die cutting machine and tools.
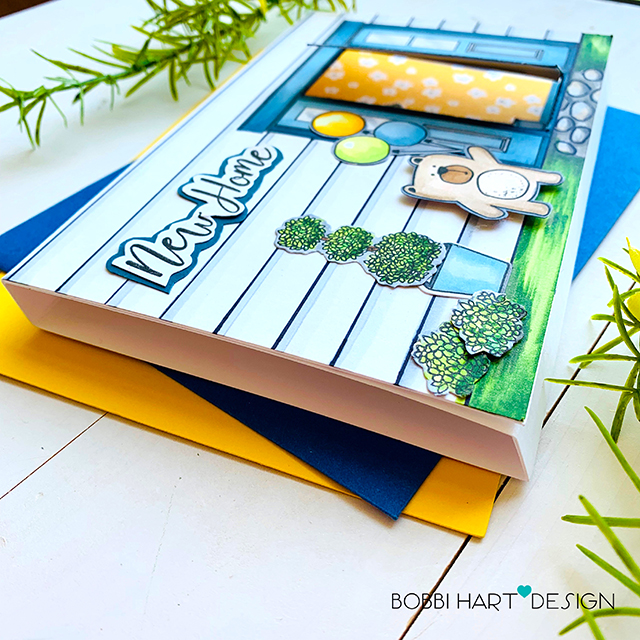
Now it’s time for the fun stuff…creating the interior and exterior scenes!
Exterior Scene
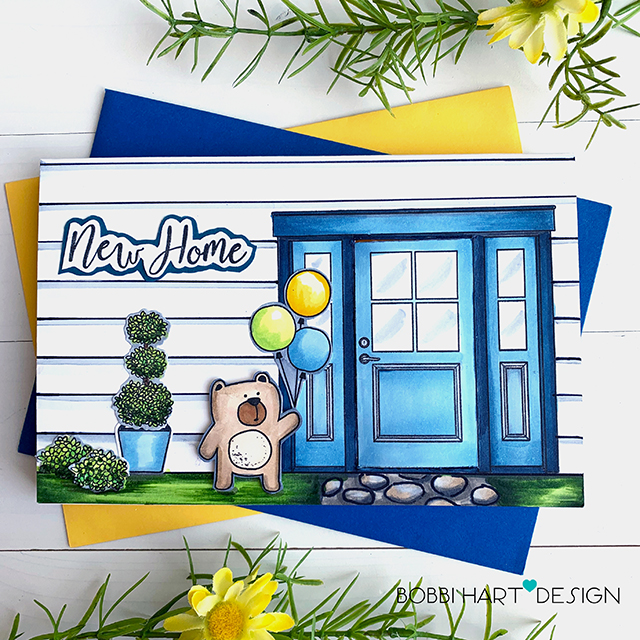
- I colored the stamped door in blue shades.
- I added siding to the exterior using a straight edge ruler and a fine black marker and added shading below each siding piece with Copic Sketch C3 and C0 markers for a dimensional look. I realized later that the stamp set came with siding lines to make this step even easier! No ruler or marker needed. ?
- I stamped and die cut elements to fit both spaces from the New Home and Friends for All Seasons: Fall sets like the planter, shrubs, the “New Home” phrase, bear and balloon bouquet.
- I colored in a grassy area at the base to “ground” the scene and added a stone pathway to the front door to highlight the entry.
- I added dimensional foam under the bear image to bring him forward for more interest.
- I added blue cardstock beneath the New Home phrase to make it stand out on the white siding background.
- All elements were adhered in place and the card front was set aside while I worked on the inside scene.

Interior Scene
- I added a 6” X 6” pattern paper sheet (cut down to 4-3/8” X 6”) to the inside panel of the box to mimic a bright and cheery wallpaper. You could use images from the sets to create your own custom wallpaper, too.
- I stamped, colored and die cut various elements from both sets including the bear, bench, and planters. The New Home set has cute planters and benches that work inside and outside.
- I needed furniture to fill the space, so I used the bench from New Home and cut off the back. I colored it in like woodgrain to look like a dining or entry table using my black marker and Copics. I added flowers in a planter to make the table arrangement.
- All elements were adhered in place making sure my bear image was in front and centered with the door opening.
- I stamped the “Welcome, Enjoy your new home” phrase to the outside panel of the interior box while my box was still in a flat position.
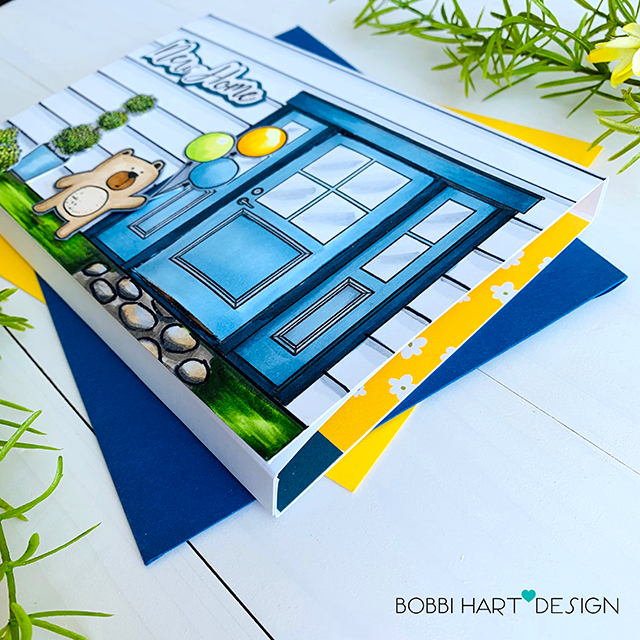
I adhered my box edges together to create the dimensional box shape and added the card front by matching of the score lines at the top. I like to use a heavy duty double sided ¼” adhesive tape when creating these cards. It holds the box in place perfectly and is clean and easy to use with no glue mess!
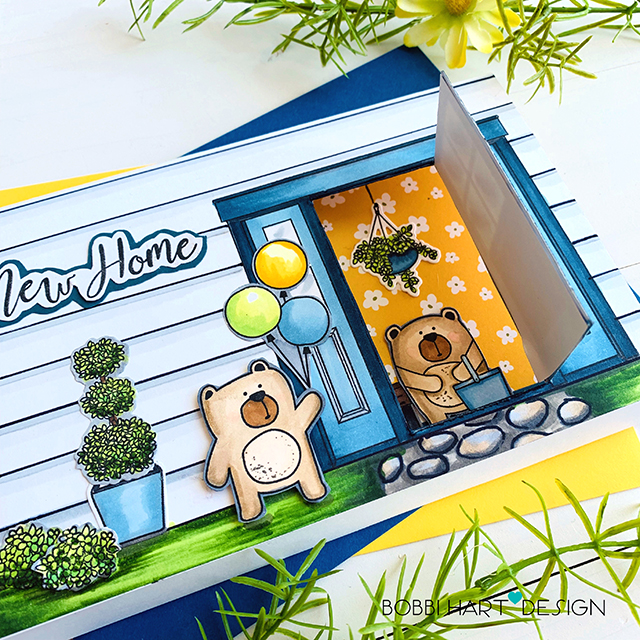
I love when you open the door, you get a peek at the inside of the home.
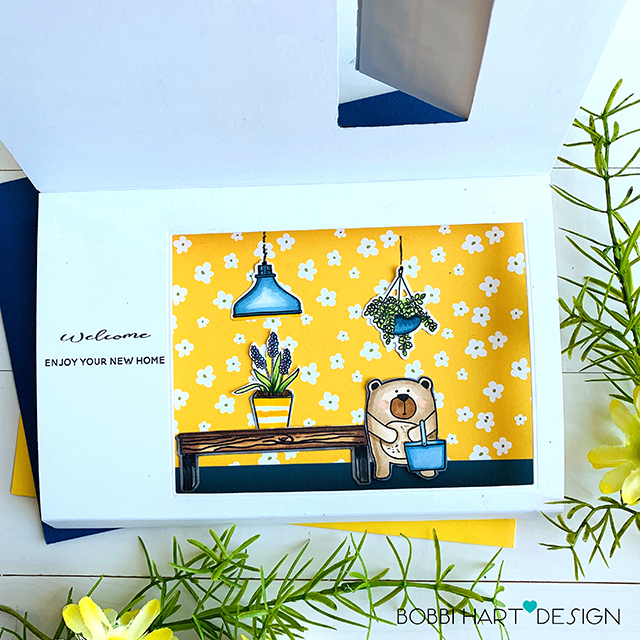
When you open the card front, you get a full view of the interior space!
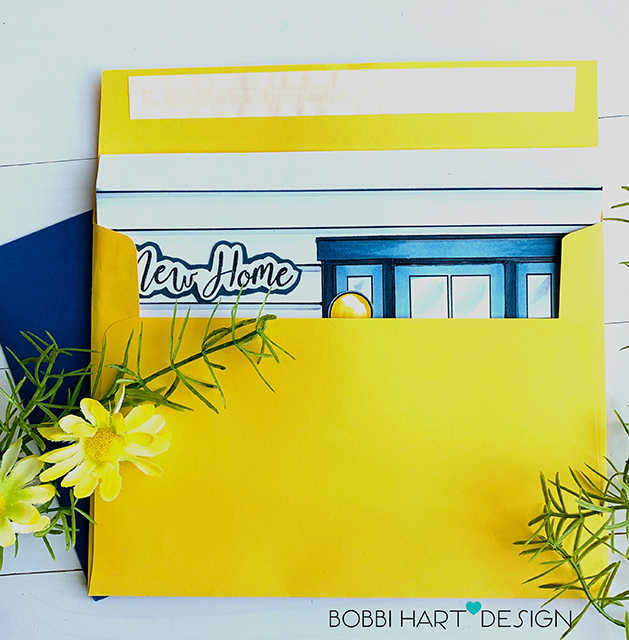
The diorama card folds down to fit inside a 5-1/4” X 7-1/4” standard sized greeting card envelope for easy mailing and/or delivery.
This is a card with layers and surprises. You could color the exterior and interior to match the recipient’s new home. You could add a pup or kitty, art on the walls or anything that will remind the person of his/her new, home-sweet-home! Thanks for visiting today. I had a great time creating this card and I hope it inspires you to do the same!
If you’d like to see more of my work, check out the WPlus9 blog today that is featuring a card I made using the Neighbors stamp set!
You can find me on my Instagram as @BobbiHartDesign and on Facebook as BobbiHartDesign.
Bobbi Hartmann Lemanski, Bobbi Hart♥ Design,
Adding h♥art into every design




I love the diorama card made using WPlus9 “New Home.” Genius idea and super fun. You made reference to checking out WPlus 9, “today,” to see your card featuring the Neighbors stamp set. I would love to see it, but can find no date reference in your post.
I have the Neighbors stamp set, & would love to see your card.
Thank you.
Sandy
Hi Sandy. Here’s the link to the blog post. I guest designed for them a while back. I loved making this card of the houses. I had just returned home from travel and was inspired by the buildings on our travels to Denmark, Poland and a few other countries on the Baltic.
https://blog.wplus9.com/guest-artist-bobbi-lemanski/
Let me know if you have any questions! Crafty Hugs, Bobbi