
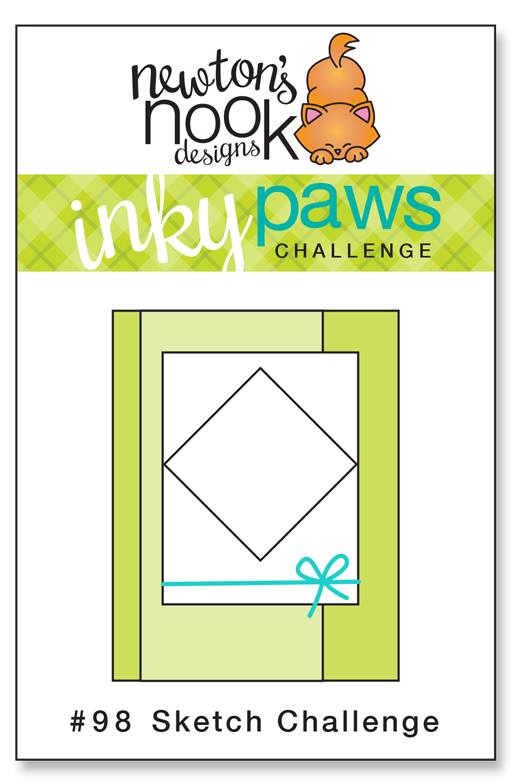
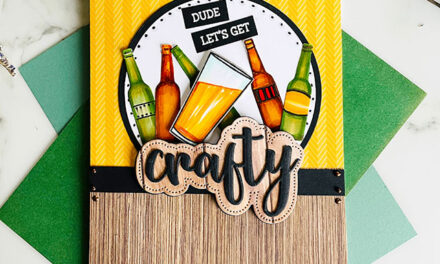
It’s time for another Inky Paws Challenge sponsored by Newton’s Nook Designs. Get your creative juices flowing and tackle this new sketch challenge. It’s got angles, corners and a little bow, too! I created a card to inspire you today. I used the following products:
- Shark Bites
- Shark Frenzy
-
Uplifting Messages (for the Smile phrase)
-
Cocktail Mixer (for the “Here’s to” phrase)
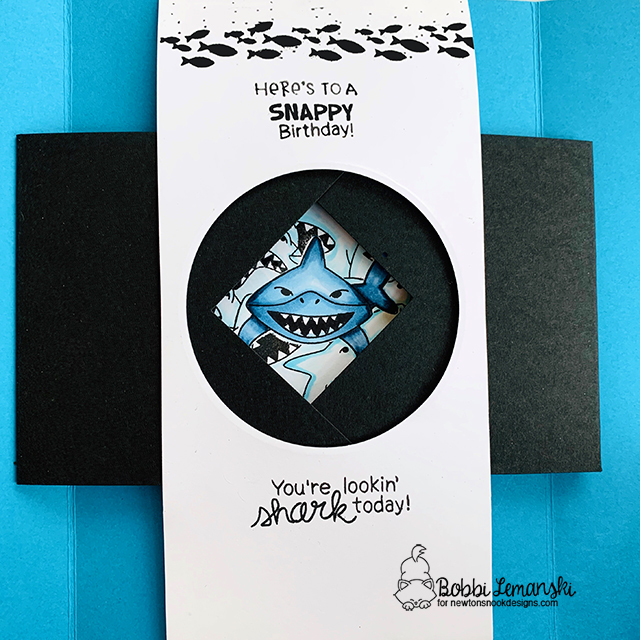
When I looked at the sketch, I saw a shutter card design instantly. I decided to make this inspiration card into a double sketch card! It’s a shutter card inside and the front also follows the sketch on the outside. Here’s the sketch design.
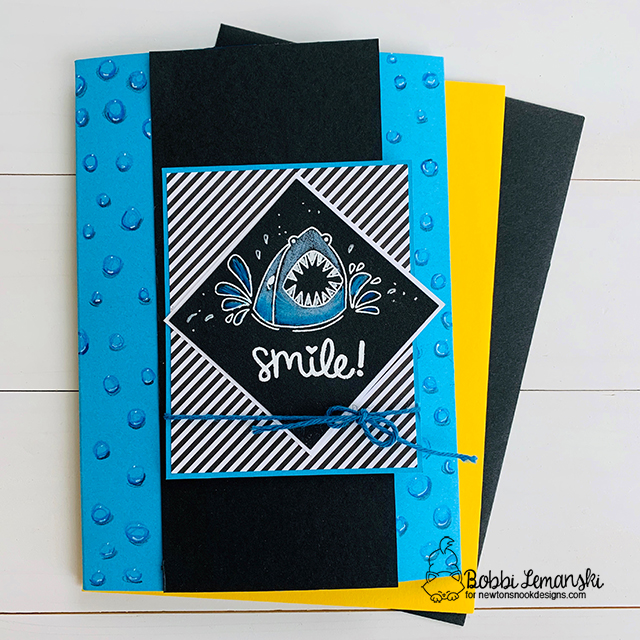
To make this card, I first created a 5″ X 7″ gatefold card scored at 2.5″ and 7.5″ from the left side. I drew raindrops on the front side of each gatefold side using Copics in blues and a Signo Uni-ball white pen, too.
To make the front focal point, I followed the sketch and used a black/white diagonal striped pattern paper for the background of the shark. I heat embossed the shark image using white powder on black cardstock and used my colored pencils to color in the image slightly. I also heat embossed the word, “smile” from Uplifting Wishes in white, too. All layers were adhered together including the blue twine bow and the long black piece of cardstock down the middle to match the sketch. This black piece will also camouflage your gate fold opening if it is not perfectly aligned and keep your card front closed, too!
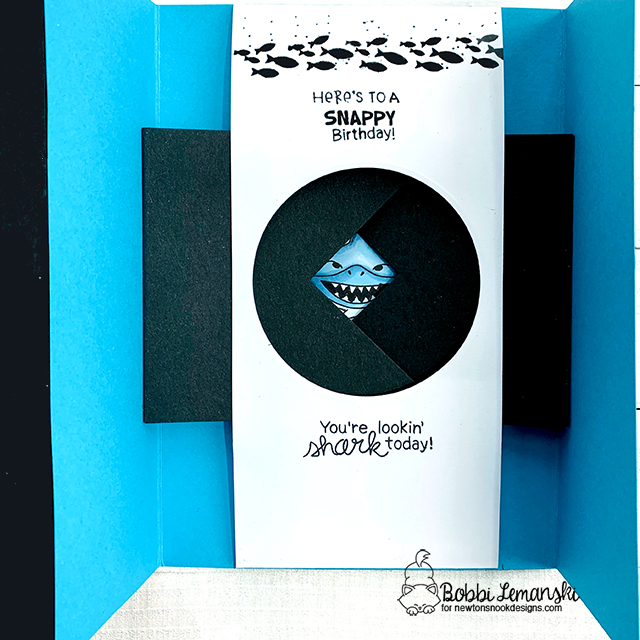
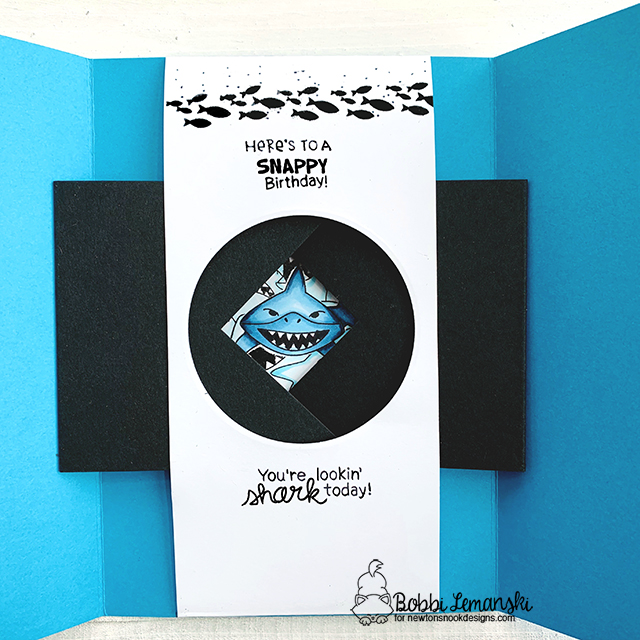
To make the shutter design,
- I started by cutting two rectangles 3.75″ X 3.5″ in size out of black cardstock. I used my Marvy Jumbo square paper punch to cut out two triangles from one of the short sides of each rectangle. I also used my Scor-Pal to score at 1/4″ on the other short side. I attached these rectangles to the inside of the gatefold card, centering them for placement. I find using a double adhesive tape works best for this.
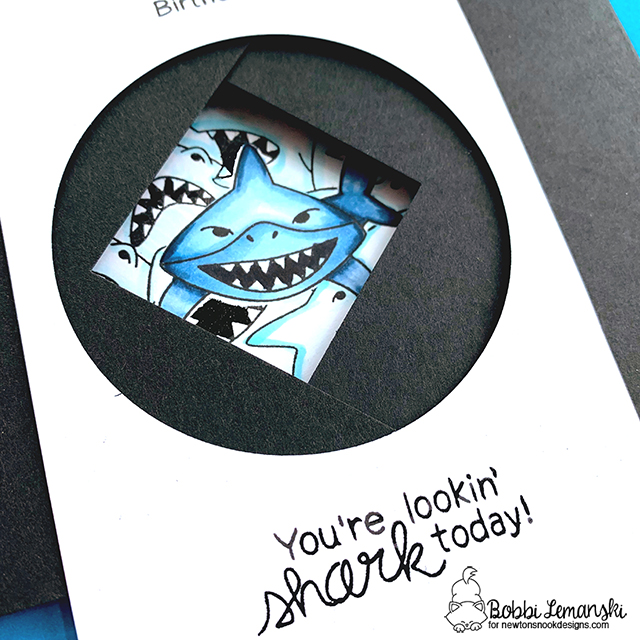
- I needed a vertical piece that would keep the shutter pieces in place so I cut a piece of white 3.25″ wide by 7.5″ long and scored both short sides by 1/4″ and folded them in for a finished length of 7″ to match my card base. Before attaching the white piece, I die cut a 2.75″ circle right over where the shutter comes together and then stamped the phrases and fish school image in black ink on the front.
- Before adhering the white piece, I needed to create the focal image for inside the shutter. I stamped the individual shark in the middle of a 3″ square piece and then masked it. I then stamped the Shark frenzy image over the masked shark to create a “selfie-portrait” of the shark with friends in the background. After coloring the image, I adhered it to the gatefold card center fold, carefully making sure it is centered with the shutter opening. The the card gates are opened, they black shutters split open to reveal the image behind them.
- Next, I attached the white piece, centering the circular opening over the shutter mechanism. This piece keeps the black folded flat v. popping up when the card is opened.
This card loooks complicated, but it’s not. There is a die on the market that will cut your pieces, but it is pricey and really not necessary. The die only works for a specific card size, too. If you simply cut your squares yourself you can make this any size you want with no added expense or tools. All you need is a ruler and scissors or a punch you already have. Now it’s your turn. Link your card by Friday, May 31, 2019 at InkyPawsChallenge.com for a chance to be the random winner of a $20 store credit to Newton’s Nook. 
Thanks for visiting! Take a bit out of this challenge and link up your card today!
Adding h♥art into every design
Bobbi ♥ Design


Awesome card Bobbi, what a fun surprise when the card is opened.