
It’s that time of the year when the graduation invitations start rolling in. I have two kids in high school and many friends with kids a little older and graduating. May/June is the season for parties so I’m getting some cards ready now. Sometimes I don’t know the graduate’s school colors (if they don’t live close by) so I generally make a few cards using clean and simple colors like – whites, blacks and grays with a pop of color. They work for any grad – college, high school, female or male.
I also received some fun new items in my last Honey Bee Stamps order that I couldn’t wait to use so why not use them on these cards, right?! Honey Bee Stamps has my all-time favorite, go-to graduation phrase set that I love to use and this year I dusted it off again. The products I’m using for BOTH of these cards today are:

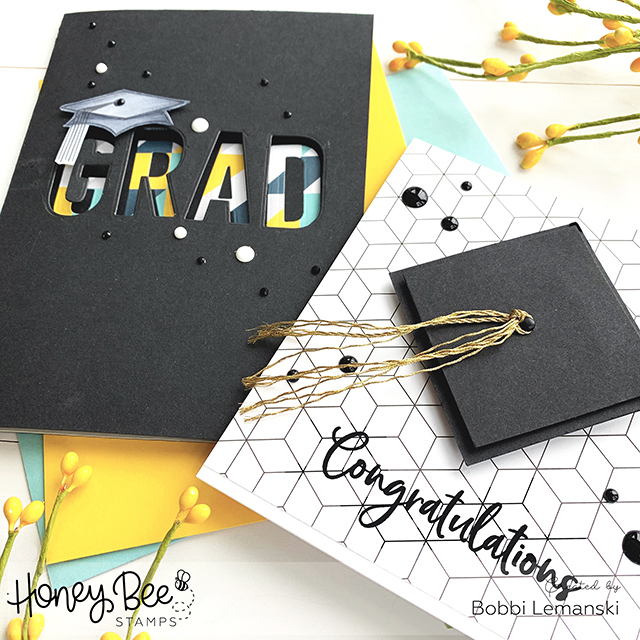
Both cards offer a little surprise inside. The Congratulations card has a grad cap that opens to reveal a message underneath and the GRAD card opens to reveal an even bigger, bolder message inside. Here’s a closer look and some details for each card.
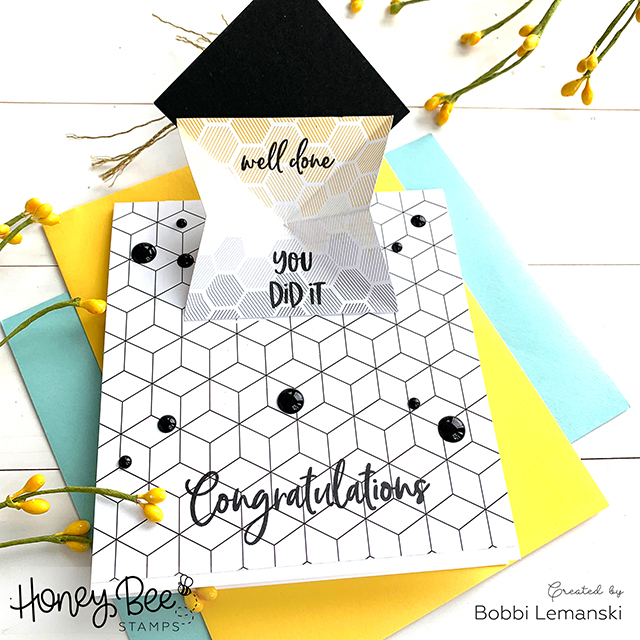
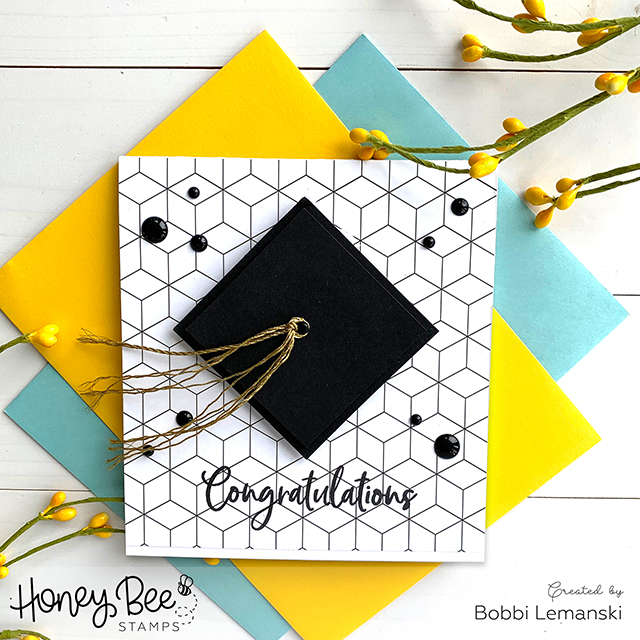
To make the Congratulations card, I created a pop-up grad cap for the front. I cut two pieces of black cardstock 2.5″ square and 2.25″ square. I also cut a piece of the new Bees Knees pattern pattern paper 3″ square. I punched a small hole in the center of the 2.25″ black square and added a mini black flat brad to the center. I tied pieces of gold cording around the brad for the tassel. I also adhered and “popped” up the small black square on the larger black square with some dimensional foam. The foam was added around the brad prongs on the back side so that the two pieces would allow room for the prongs to hold the cording in place and still appear flat. It also added a nice edge around the grad cap, too.
For the message underneath, I first used my Scor-Pal to score from corner to corner and from mid-section to mid-section on the 3″ square pattern paper. I scored all of the folds and then stamped my message on it. By scoring first then stamping, you can position your words to fit within the folds for a perfect fit. Now to fold in the message, I held it square and simply folded in the sides so that it folds down to a triangle shape. I attached the top side of the triangle to the bottom of the grad cap.
TIP: If you make this grap camp, make sure when you adhere the two together, you are positioning the message triangle deep into the black corner of the cap. This allows clearance for the cap when you open it.
I stamped the “Congratulations” message on the card front (another piece of pattern paper from the Bee’s Knees card pack) before adhering the cap so that I didn’t have “bulk” in My Sweet Petunia MISTI tool. Once the message is stamped on the pattern paper on the card front, I attached the cap. I added enamel dots to the front for added interested.
TIP: I added an enamel dot right under the grad cap and then an adhesive dot on top. It’s easy to remove it off the dot (unlike cardstock) and it keeps the grad cap closed, too!
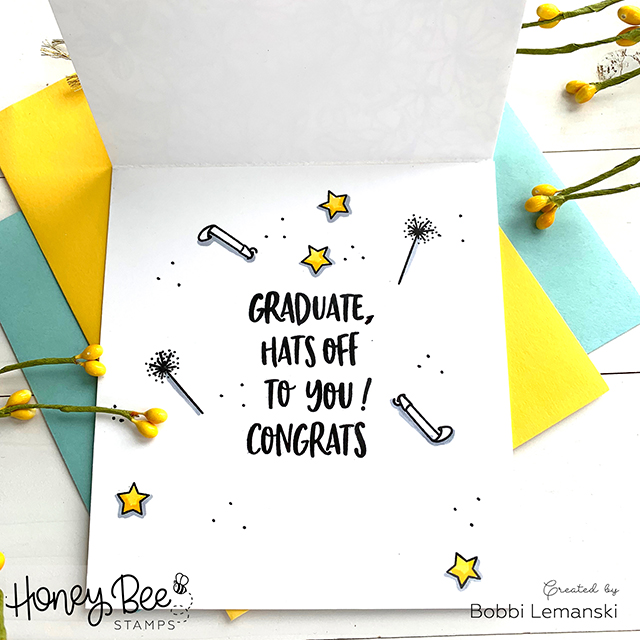
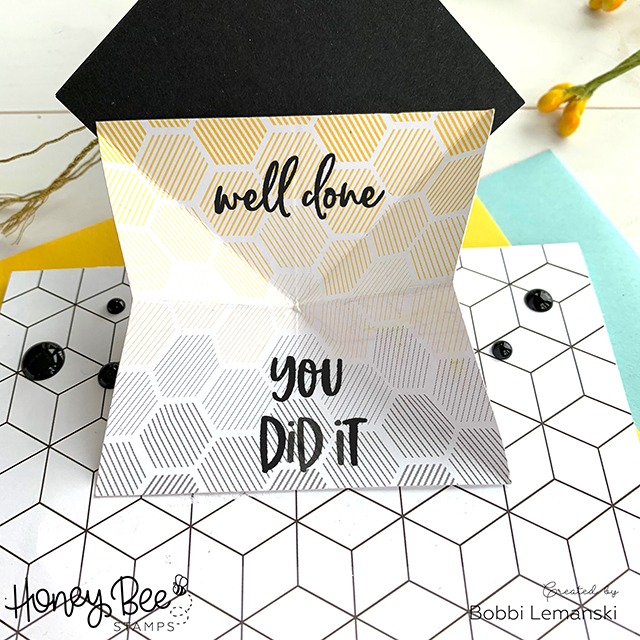
For the inside, I used words from the Congrats Grad stamp set and a few extras around it, too. Pinky the Pig has all the fun party accessories so I added some fun stuff from her set. The star is from Warm Wishes. A few black tiny confetti dots using a black marker finished off the look.
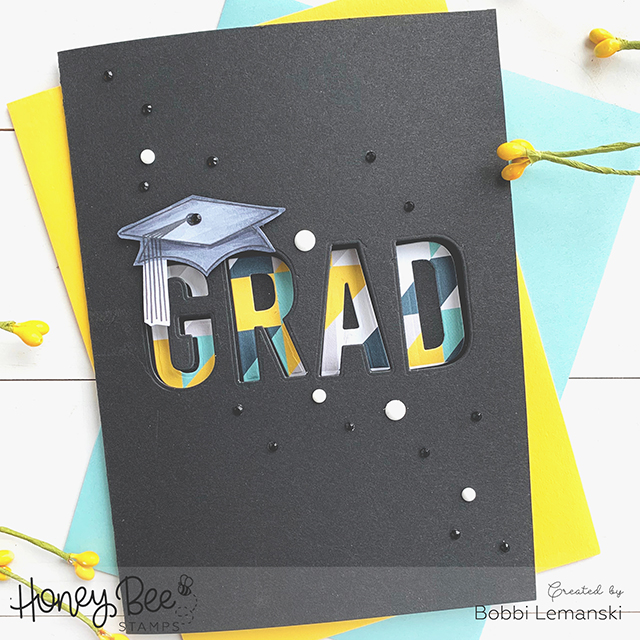
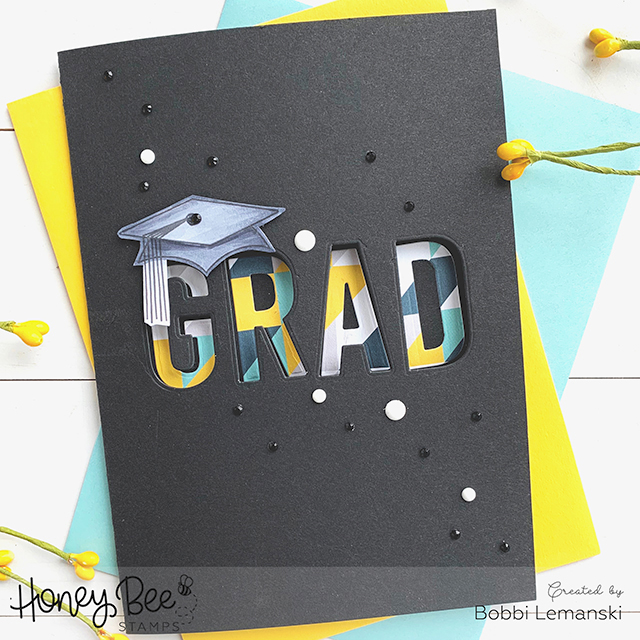
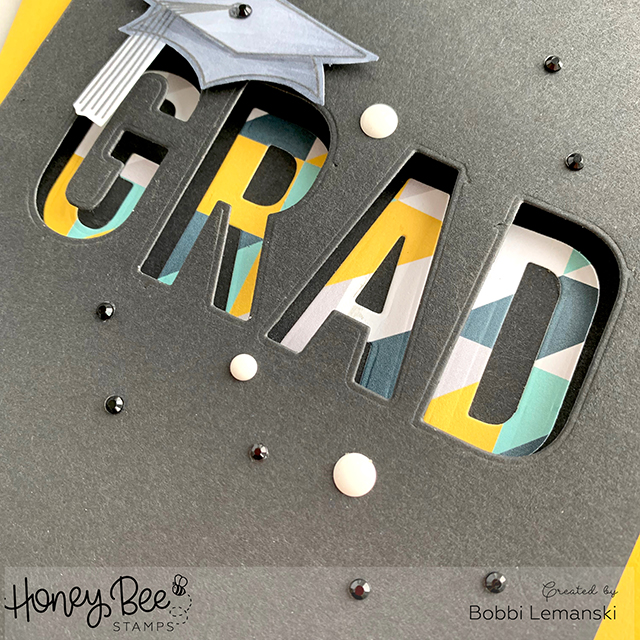
For my next card, I created the GRAD cutout using the Bee Bold Alphabet dies.
TIP: I used a piece of tape across the letters to keep them in perfect alignment. It’s also easy to work with multiple dies at one time.
I added a cap that I stamped and colored with Copics above the letters and “popped” it up with some foam. I added the enamel dots in white and and the gem stickers to give some dimension and interest to the clean black front. I love these embellishments. The black gem stickers would be great for eyes on animals and people, too!
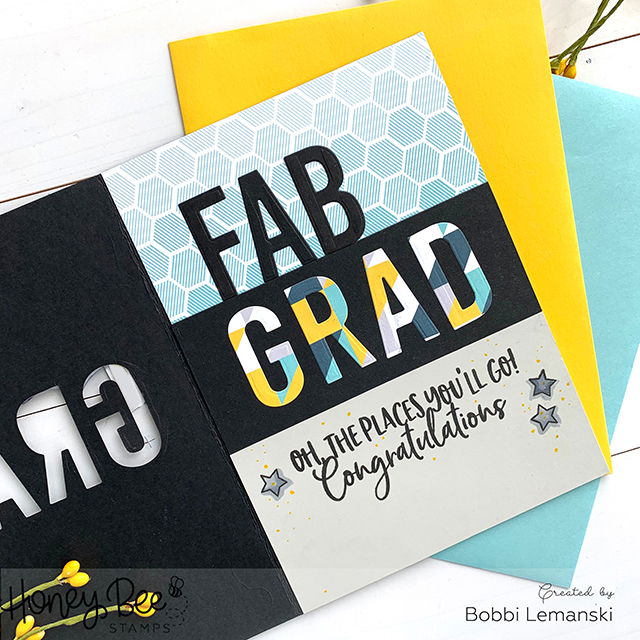
Inside, is where this card really comes to life, Using another pattern from the Bee’s Knees pattern paper pack, I cut out more letters and aligned them perfectly with the front cutouts. I added “FAB” in black over some more pattern paper to the top and stamped my sentiment at the bottom. The colorblocking of the pattern and black cardstock makes this card graphic and bold which I love. I added a few more stars again at the bottom to create a sense of celebration/excitement around the phrases.
TIP: If you make this card, the grad cap tassel will show through to the inside, through the front G cutout. Make sure to back your cap tassel cutout with white or black cardstock so it looks clean and perfect!
Here’s a quick glance of both cards below.
Thanks for visiting! Have a FAB day today.
Adding h♥art into every design
Bobbi ♥ Design


