
Hello, Friends! Today is day one of The Greeting Farm October 2020 release. We’re sharing the Star Couple stamp set. The set includes this adorable boy and girl as well as a few phrases and a star and heart accessory.
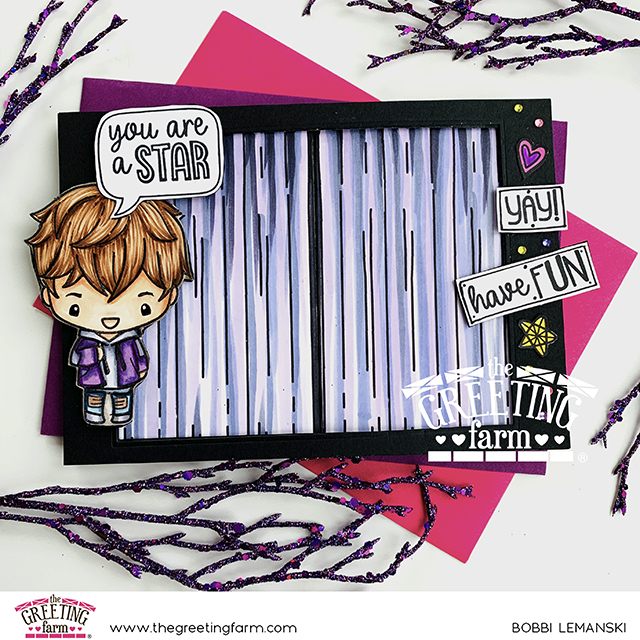
To showcase this stamp set, I decided to give a theater card a try. This is the first one I’ve made and it was super easy to do once you have all the measurements down! I made this into a 5″ X 7″ card so I had to create them as I made it. In addition to the Star Couple stamp set, I also used the curtain image from the Build-a-Bathroom digi set to make the stage curtain. When the curtain/card is closed, the Star Couple boy is out front, announcing the next stage act.
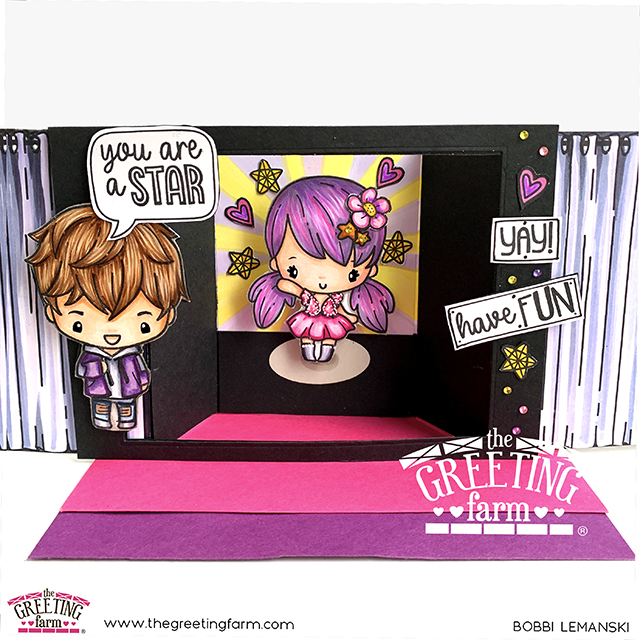
When the curtains open, the Star Couple girl is on the stage ready to perform for everyone! I put the singer on an action wobble so that she moves, too! I added an oval in tan below her feet like there is a spotlight on her. Here’s how the card works:
To make this card, I cut the following pieces of cardstock. Note: For the white, I used 80lb Neenah Solar White cardstock. I like the weight and it works great for Copic Coloring.
1- 5″ X 7″ piece in white for the card back
1 or 2 – 5″ X 7″ pieces in black with a window die cut from the center for the card front. My window is 5-1/2″ wide X 4-1/2″ tall, but this could be any size opening. I did double up my front frame (2 identical pieces) to make it stronger since I have such a large window opening. It keeps the card front more sturdy.
2- 5″ X 7″ pieces in white and scored at 3-1/2″ and 5-1/4″ These will be the stage curtains and sides of the stage. Fold at the scored lines, alternating direction to create a z-shape.
2- 1-3/4″ X 5″ pieces in black for the stage sides inside the card. These will simply be adhered to the white pieces above between the scored lines.
1- 3-7/8″ X 1-1/2″ piece in black for the stage floor.
1-3-7/8″ X 3-1/2″ piece in white for the stage backdrop. This is the piece that I created the yellow sunburst lighting design behind the star girl.
2- 1/2′ wide by 5-7/8″ scored at 1/2″ in from both short sides. These will be the stage curtain strip supports behind the black frame.
I also printed to curtains sized 3-1/2″ wide X 4-7/8″ tall and cut them out. These were printed and colored using Copic BV shades. I also stamped the boy, girl, the three phrases from the set, four stars and 3 hearts to embellish the stage and front of the card. They were all colored with Copics and fussy cut out. As stated, I also hand drew the gray/yellow starburst behind the singer. Next, I added 1/2″ wide strip supports on each side of the back of the black frame for the curtains to slide through. These supports keep the curtains in place. It’s also a good idea to punch out half circles from the black frame on each short side so that you can grab the curtain to open. I did not do that on this one (forgot!).
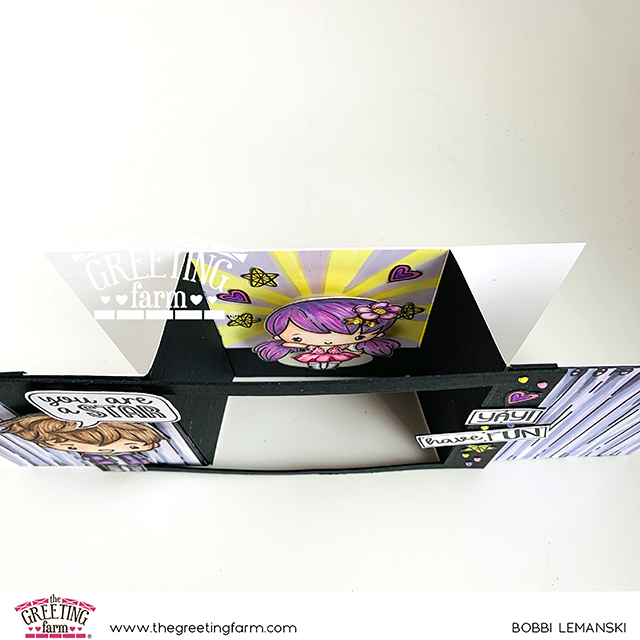
The curtains Z-shaped sides were attached to the card base back at 1-3/4″ in from each short side edge of the back. Only the section, from the score line was glued in place with the glued edge facing inward. See photo above. The stage starburst was adhered right over these edges. I also added the black cardstock pieces to the interior sides of the stage and the stage floor, positioned below the yellow/gray starburst. All the images were glue in place including a few sequins on the outside to finish this card.
Hey, STAR – thanks for stopping by today. If you want to see more ideas and inspiration from me, subscribe to my blog, BobbiHartDesign.com. I’ll send you updates on new posts! You can also find me on Instagram as @BobbiHartDesign and on Facebook as BobbiHartDesign. Bobbi Hartmann Lemanski, Bobbi Hart♥ Design, Adding h♥art into every design


