
Hi friends! I’ve got another holiday card idea using the new Stencils 360° Starter Kit by Penguin Palace Stamps. This time, I’ve created a wreath card using the Orbit Stencil. Because this stencil system and orbit barrel result in very large circular designs, I made this card a gatefold card, allowing the wreath to extend beyond the 5″ center panel of this 5″ X 7″ card. Let’s take a look…
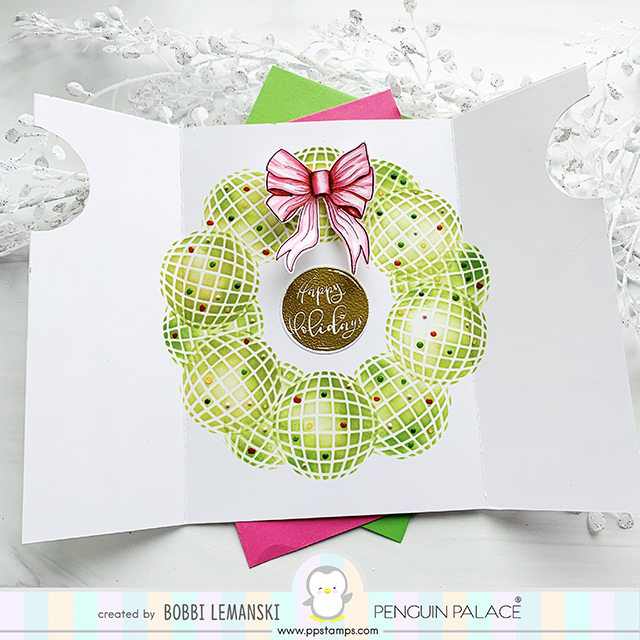
I started with a 10″ X 7″ card base and used the stencil system and the Orbit stencil to create the wreath inside. I used Ranger Mowed Lawn Distressed Ink for the green. I used a heavier hand around the the edges of the design, keeping the centers very light. I stenciled a few more orbits designs around the wreath to fill it in. You can use any placement interval you like to fill it in. I made sure the first orbit was directly at the top. In the middle I stamped and heat embossed in gold the “Happy Holidays” image from the Warmest Wishes set. I also scored in 2-1/2″ from both side edges to make the gatefold design.
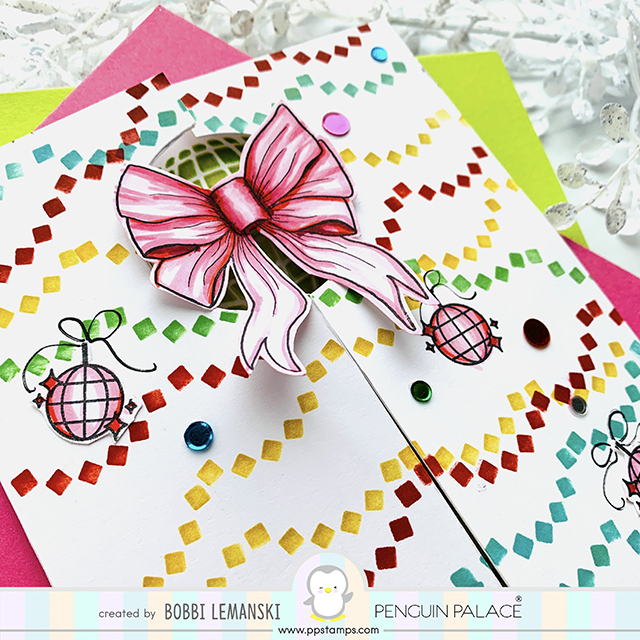
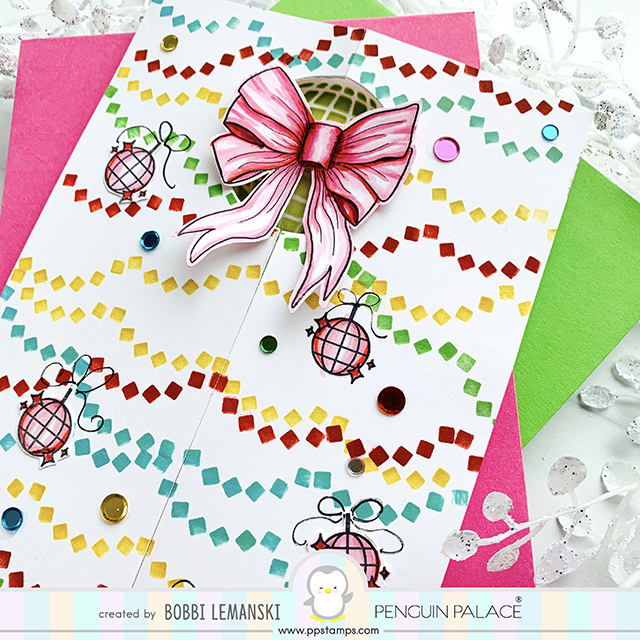
On the outside, this card has a very festive look. I started with a 5″ X 7″ front panel and the used the Mega Summer Stencil barrel 2 to create the colorful garland across the front. I added a few ornaments using the mirror ball image from the stamp set, Fun Night Out, too.
Next, I die cut a circle near the top, measuring the inside to ensure the top orbit of the wreath lines ups with the die cut circle. Once the hole was die cut using the Warmest Wishes circular die, I cut the 5″ X 7″ panel down the center, creating the left and right side panels to cover the front of this gate fold card sides. I also punched out the circle shape from the card base to allow part of the wreath to show through from inside.
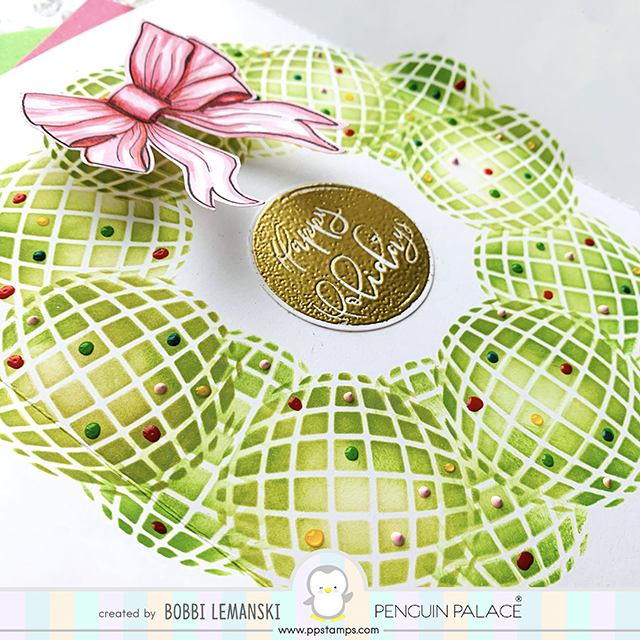
To finish the wreath, a pink bow from the Honey Bee Stamp set, Pretty Poinsettias (available at Simon Says Stamp) was added to the wreath. I adhered it using two Scrapbook Adhesives White Foam Squares to the top of the wreath. The bow will keep the gatefold closed. I also added Glass Effect Gel dots to the wreath in colors that match the front garland.
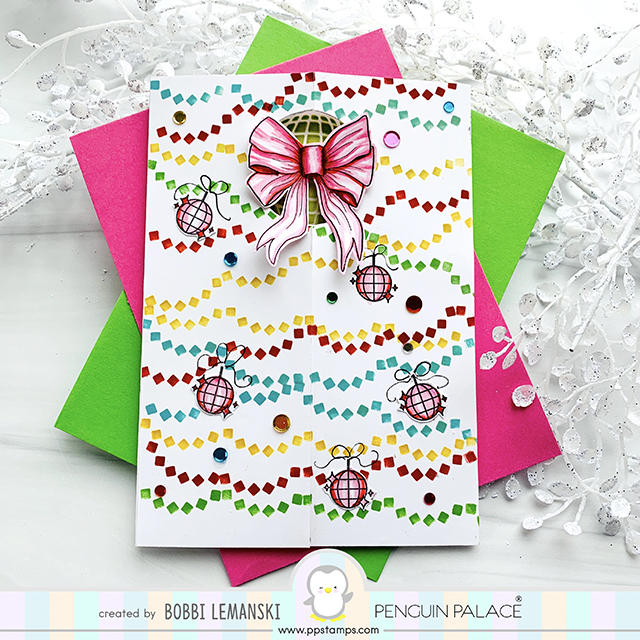
Sequins were also added to the card front for extra shine to complete the look. You can see how the bow holds the card’s side gates in the closed position.
Thanks for stopping by today. If you want to see more ideas and inspiration from me, subscribe to my blog, BobbiHartDesign.com. I’ll send you updates on new posts! You can also find me on Instagram as @BobbiHartDesign and on Facebook as BobbiHartDesign. Bobbi Hartmann Lemanski, Bobbi Hart♥ Design, Adding h♥art into every design


