
Hey, friends, Bobbi Lemanski here (@BobbiHartDesign) with two punny cards featuring some of the new products from Honey Bee Stamp’s Love Letters Release. Both cards feature the cute little sets, A Waffle Lot stamp and die sets and a surprise mini notecard, too. I love a little hidden surprise inside. It’s just like cereal box prizes when I was a kid. 🙂 I’m using the following Honey Bee Stamp’s products:
A Waffle Lot stamp and die sets
Whimsical Hearts A2 Cover plate die
Love you S’more stamp and die sets
Gal Pals stamp and die sets
Whimsical Hearts Background stencil
Farmhouse Check Background stamp set (from a previous release)
Sip, Sip, Hooray stamp set (from a previous release)
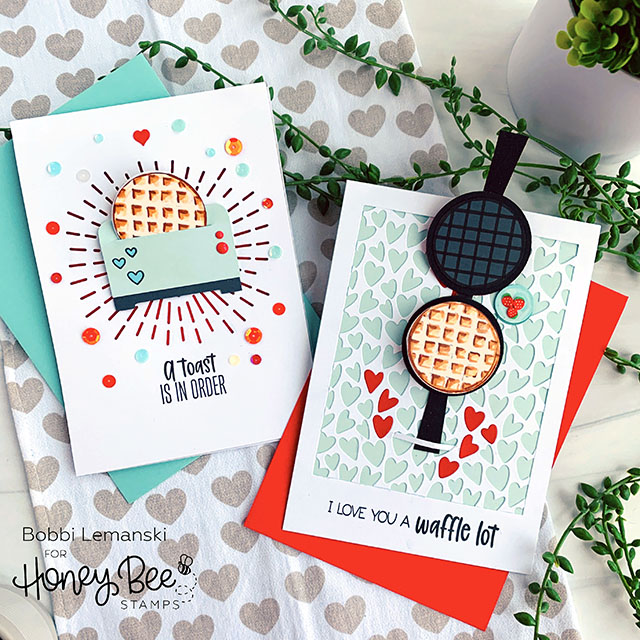
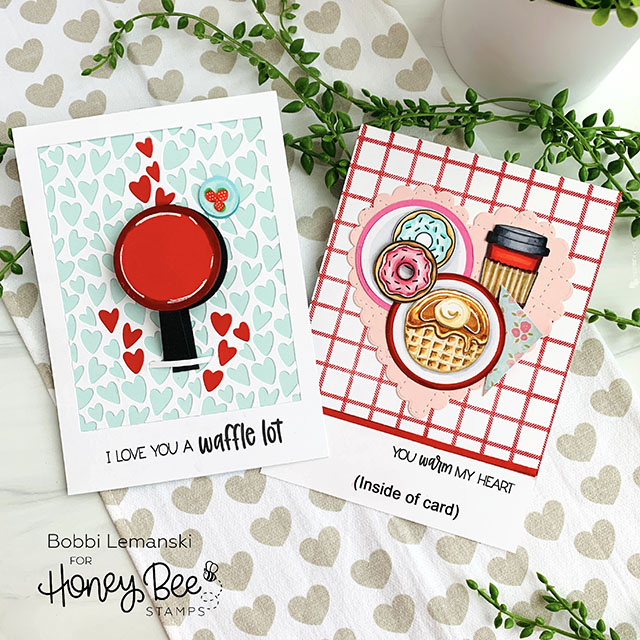
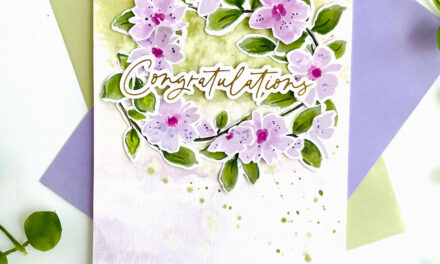
Card 1: Toaster Waffle
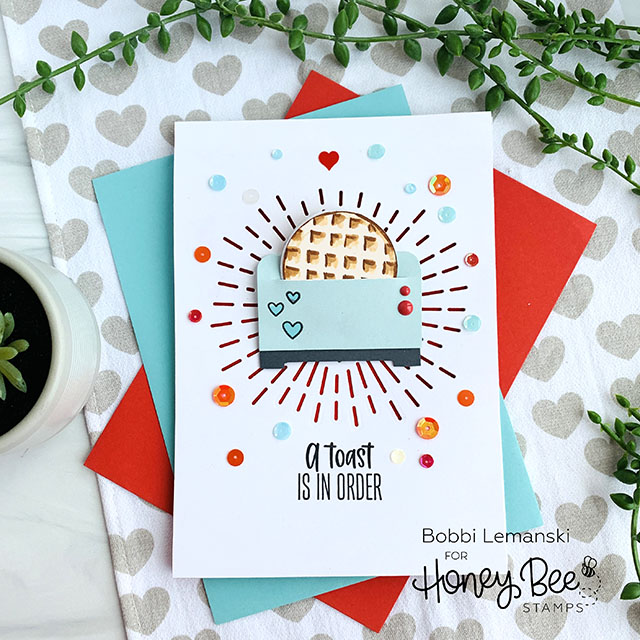
Leggo my Eggo?! For my first 5″ X 7″ card, I created a simple toaster to place a mini waffle notecard inside. To make this toaster, I cut aqua blue cardstock to 2-1/2″ wide X 3″ tall and scored down the center to make the toaster 2-1/2″ wide X 1-1/2″ tall. While folded, I used a corner rounder to round the top edges to make the toaster look retro-shaped. I used my Fiskars cutter to cut the slit at the top on ONE SIDE ONLY for the waffle to tuck in. I glued the toaster together using Bee Creative Precision Glue at the bottom after sliding in the little hand-punched dark gray base. I stamped hearts on the front from the Love you S’more stamp set and attached two enamel stickers (black and white available only) for the control dials.

The waffle in the Honey Bee set has syrup on it. I needed these waffles to be dry so I just hand drew a grid to match the syrup one in the set and colored it in. I made two (front and back) and attached it to a hinged circular notecard die cut using a 1-3/4″ circle die to match the waffle size in the set.
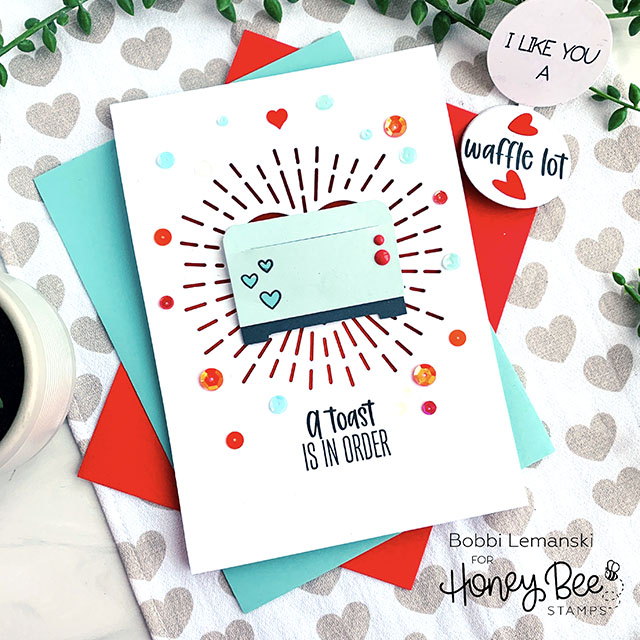
I stamped the phrase from the A Waffle Lot stamp set inside and attached some red hearts cut from the Whimsical Hearts A2 Cover plate die. The “toast” phrase from the Sip, Sip Hooray stamp set was also stamped on the front of the card.
For the card front background, I die cut Neenah 80lb Solar White cardstock using the Radiant Heart Background Die and backed it with a 5″ X 7″ red cardstock panel. Before adhering the two layers, I slipped in the back panel of the card at the top (cut at 5″ wide X 7-1/4″ tall and scored at 1/4″ to create the concealed, top-hinge for this top-fold card.) Vitamin Sea and red sequins were added for extra sparkle on the front.
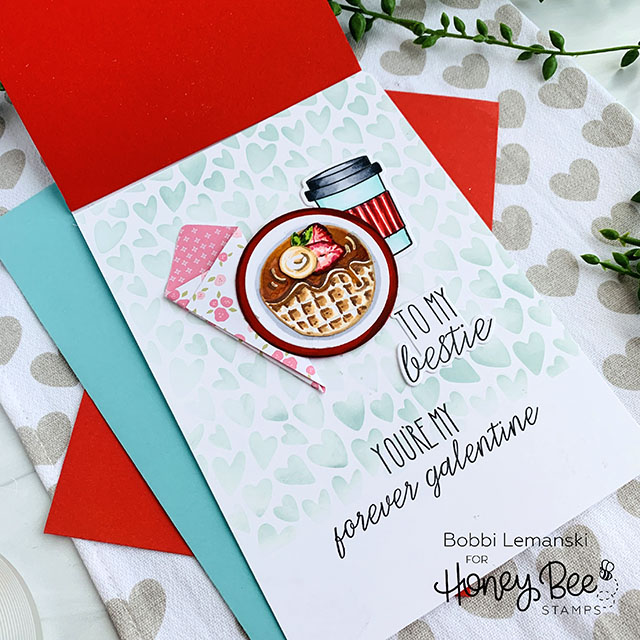
Inside the card, I stenciled aqua hearts using the Whimsical Hearts Background Stencil, Speckled Egg Distressed Oxide ink, and a Background Blender Brush. The waffle, and coffee were stamped, colored and die cut. I added a plate made from circle cuts and attached the waffle. I also hand drew and colored a dollop of whip cream and the strawberries and added it to the top of the syrup for fun. I also used a white gel pen for highlights on the syrup. Pattern paper folded like a napkin was added, too. Lastly, the phrases were stamped / die cut from the Gal Pals stamp and die sets and added to the inside. Note: I like to create the inside panel design on a separate 5″ X 7″ white panel and then attach inside the card. It makes the 80lb cardstock more sturdy.
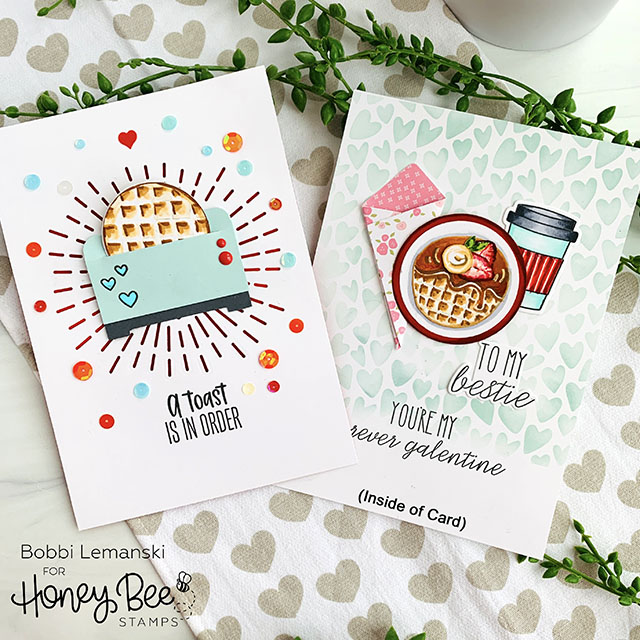
Here’s a quick look at the front and inside panels, side-by-side. This card fits inside an A7 envelope.
Card 2: Waffle Iron
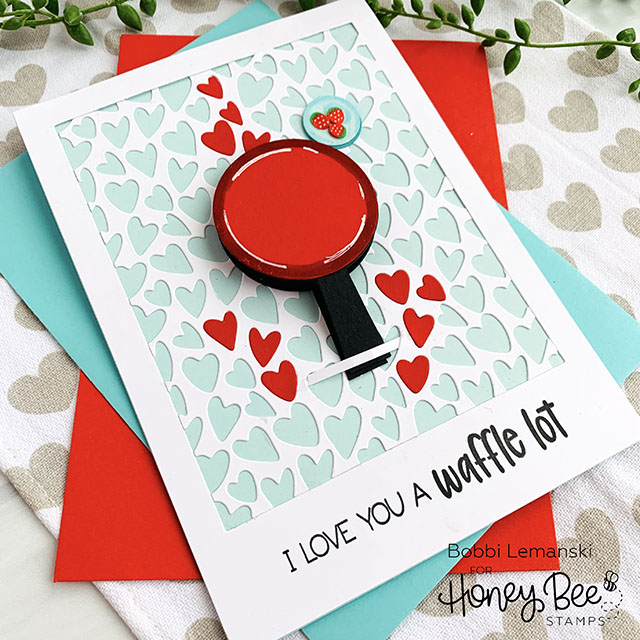
For the waffle iron card, I started by die cutting the heart background using the Whimsical Hearts A2 Cover plate die from a 5″ X 7″ Neenah 80lb Solar White cardstock panel. I backed it with a light aqua cardstock and attached them together. Before adhering the two layers, I slipped in the back panel of the card at the top (cut at 5″ wide X 7-1/4″ tall and scored at 1/4″ to create the concealed, top-hinge for this top-fold card.) I also stamped the waffle phrase on the front at the bottom.
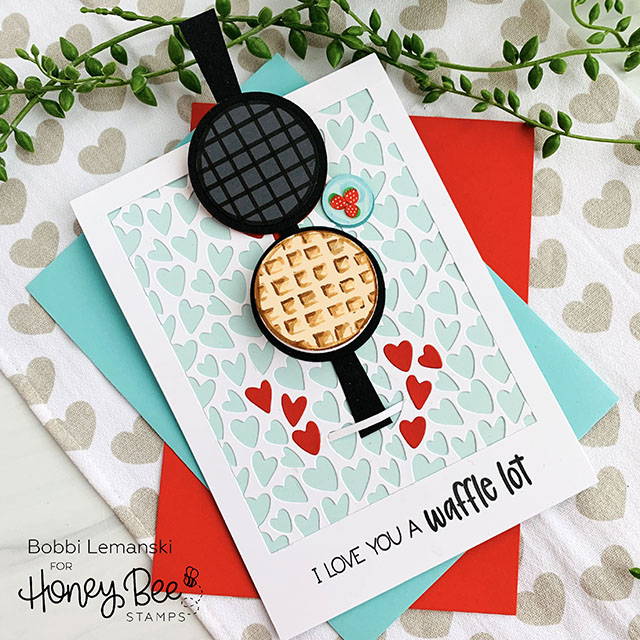
I created the waffle iron by cutting one red and two black 2″ circles. I also die cut two 1-3/4″ circles in a dark gray for the griddle elements. I hand cut two handles using a scissors from black cardstock. I hand drew the black grid lines on the gray and adhered everything together, hinging the top and bottom using a 1/4″ wide black strip concealed between the layers at the top of the iron.
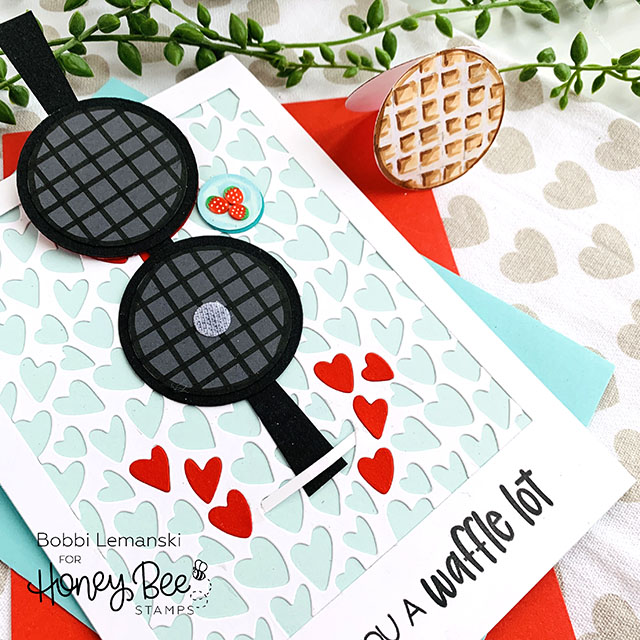
I created another mini waffle notecard just like the one I made in the first card. To keep the notecard in place on the waffle iron, I added a self-adhesive Velcro dot to the inside of the iron and on the back of the note card. I also created a small strip to hold the iron handle in place and covered the strip ends using red hearts (cut using the same coverplate die). Red hearts were added to the front and a bowl of strawberries to complete the look.
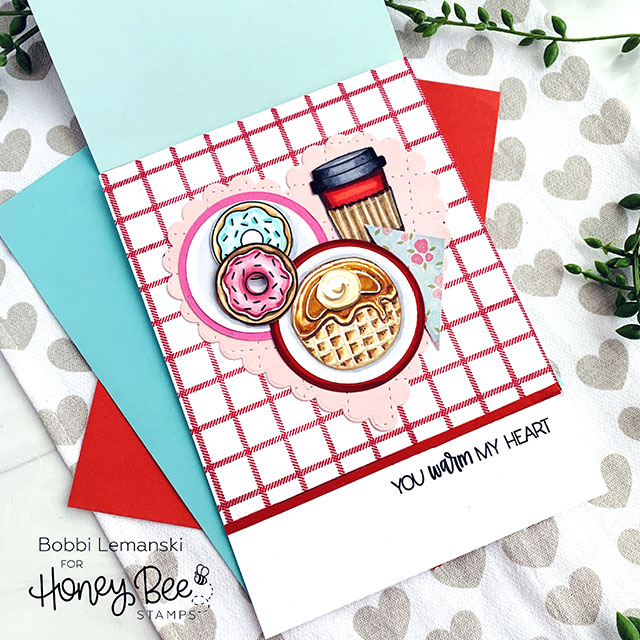
Inside the card, I stamped the Farmhouse Check Background stamp set in red and added the 4-1/4″ wide Scallop Heart cut from pink cardstock (ran through the die cutting machine with the Quilted A2 Cover Plate.) I don’t think the heart “placemat” is necessary, but just kind of cute. 🙂
Next, I added the donuts and coffee and the waffle. I hand drew and colored the dollop of whip cream. The napkin was made using the same pattern paper I used in the first card. I added the phrase at the bottom to finish the card.
You can shop the entire Love Letters release now!
Thanks for stopping by today. If you want to see more ideas and inspiration from me, subscribe to my blog, BobbiHartDesign.com. I’ll send you updates on new posts! You can also find me on Instagram as @BobbiHartDesign and on Facebook as BobbiHartDesign.
Bobbi Hartmann Lemanski, Bobbi Hart♥ Design, Adding h♥art into every design


Very cute cards. Love the waffle!