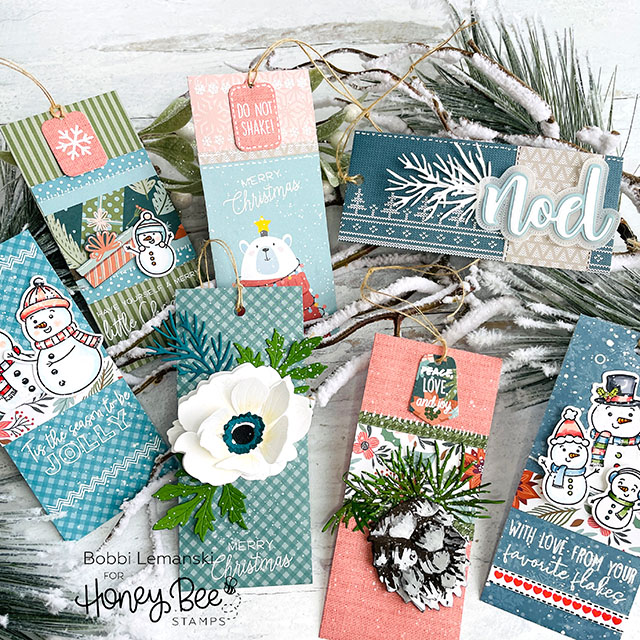
Hi Bee friends. Bobbi Lemanski here with a crafter’s confession. I have holiday tag envie. Yep. I have made seven tags for the holidays and all seven are made using ENVIES (i.e., envelopes!) These A2-sized envelopes make the perfect “jacket” to pair with a gift tag. I’m using the following Honey Bee Stamps Vintage Holiday release products:
Tag Builder Honey Cuts die set
Noel stamp set and coordinating die set (I used the die only)
Tag You’re It: Holidays stamp set and coordinating die set
Snow Family Like Ours stamp set and coordinating die set
I am also using the Lovely Layers: Pine Cone die set from last year’s holiday release.
To create these envelope tags, I used the Vintage Holiday A2 envelopes as the base. You get 12 really beautifully patterned envelopes, each made from coordinating patterns inside and out. Some of the envelopes even have holiday messages on the envelope flap inside. 
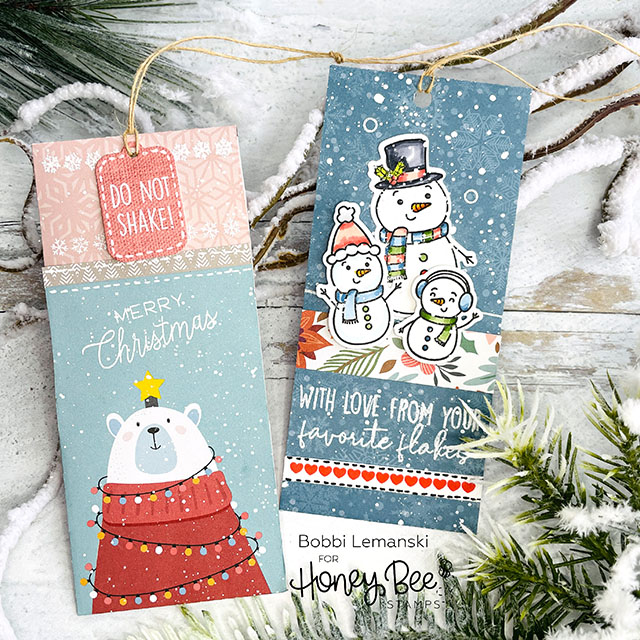
Each tag jacket is decorated with either the graphics from an envelope in the pack or stamped images and/or dies from other Honey Bee Stamps products. For example, the bear design on the tag on the left was from an envelope in the pack. I love this bear design. I stamped / heat embossed in white the “Merry Christmas” and the “Do Not Shake” phrases on the tags and added a little coordinating print and faux stitching to complete this one.
On the second tag, I used pattern papers from the envelope and stamped snowmen and the phrase from the Snow Family Like Ours stamp set and coordinating die set. The heart border is from the Tag You’re It: Holidays stamp set. Both cards were splattered with white paint for a snow effect.
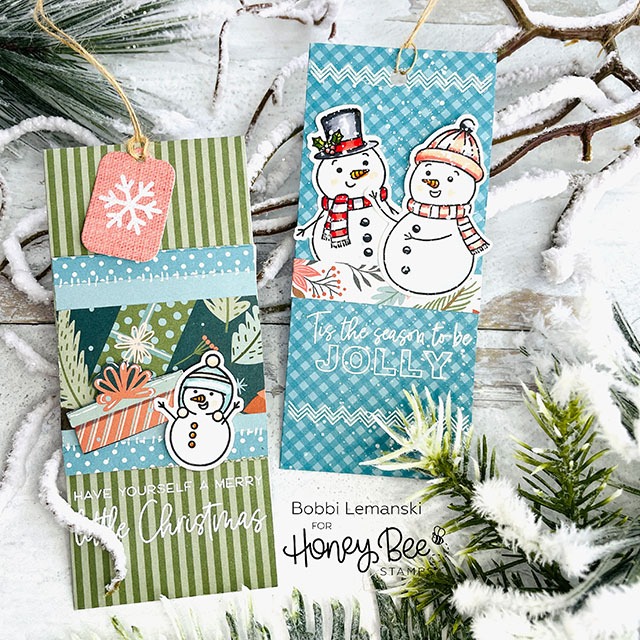
On the two tags above, I used a combination of the envelope papers, using the flaps for coordinating paper options and added stamped/die cut images to the fronts. One each tag I punched a 1/2 circle out of the back side panel for easy access to the to/from tag that is housed inside the jacket (You’ll see this below). I also punched a whole at the top and added a natural hemp twine string to each tag.
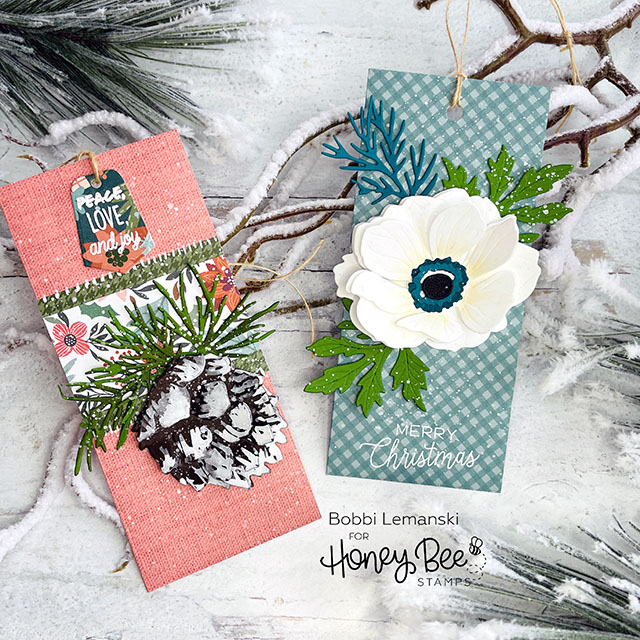
For the two tags above, I added Lovely Layers die cuts to the tags for a dimensional, botanical look. I used the Lovely Layers: Pine Cone die set and the Lovely Layers: Anemone Flower die set on these tags. The Tag Builder Honey Cuts die set includes smaller tags that can be layered with larger tags. For example, the tag on the left includes a smaller tag where I added the “Peach LOVE and joy” phrase to it. Faux stitching was also added using my Gelly Roll white pen.
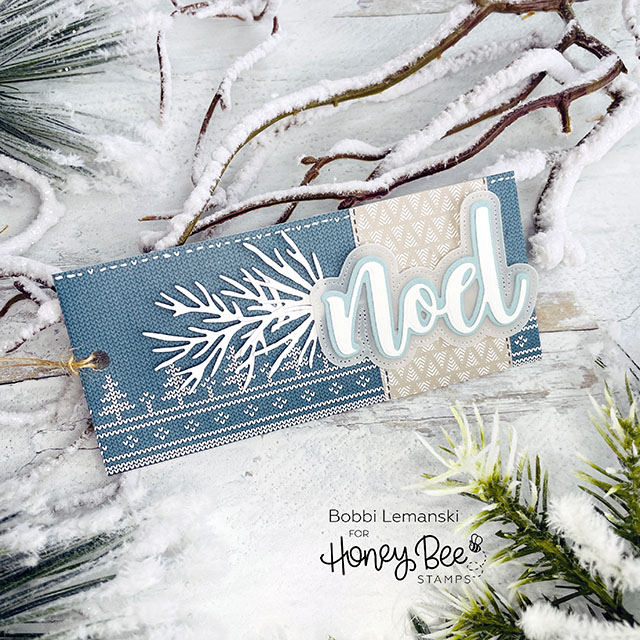
On the Noel tag, I used the Noel Honey Cuts die set as well as pine branches from Lovely Layers: Pine Cone die set to accompany this sweater looking pattern envelope. This tag opens on the top since it is landscape-oriented.
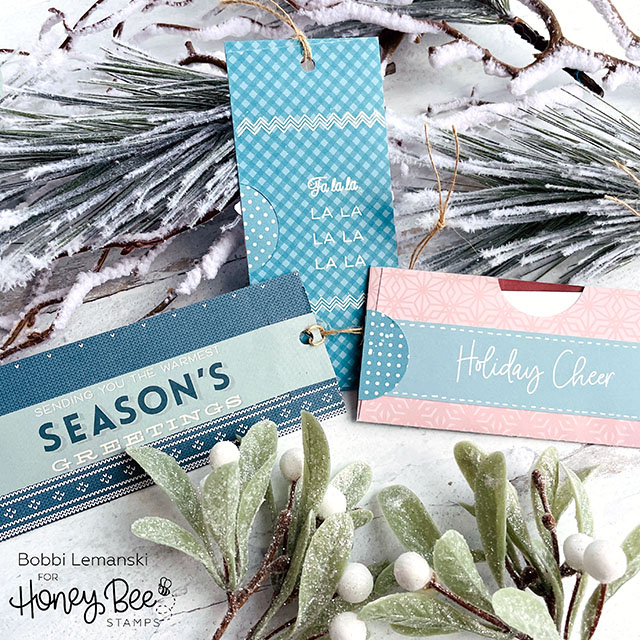
On the back side of the tags, I punched a half circle in the center back to allow easy access to the tag that is tucked inside each tag jacket. I also used stamps and words pre-printed on the envelopes to make the backs pretty, too. 
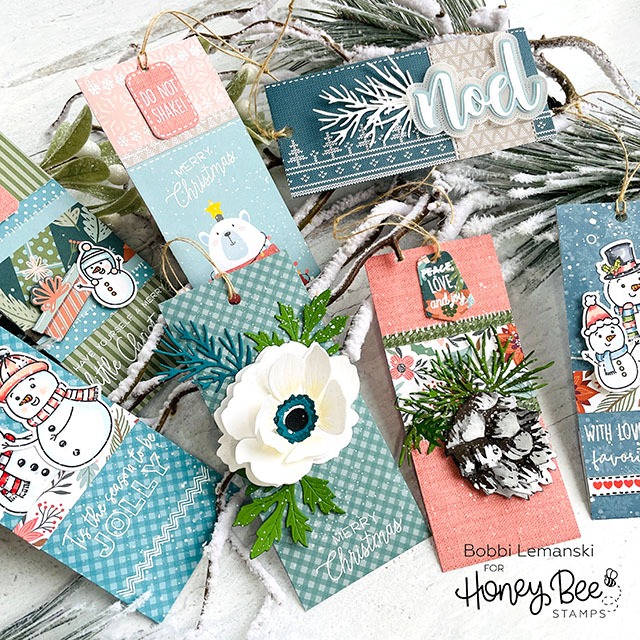
Here’s one last look at all seven tags. Thanks for stopping by today. If you decide to place an order, please use the links in this post so that Honey Bee Stamps knows what inspired you. I appreciate it very much. It helps me to continue to bring more ideas to you!
Thanks for stopping by today. If you want to see more ideas and inspiration from me, subscribe to my blog, BobbiHartDesign.com. I’ll send you updates on new posts! You can also find me on Instagram as @BobbiHartDesign and on Facebook as BobbiHartDesign.
Bobbi Hartmann Lemanski, Bobbi Hart♥ Design, Adding h♥art into every design

