
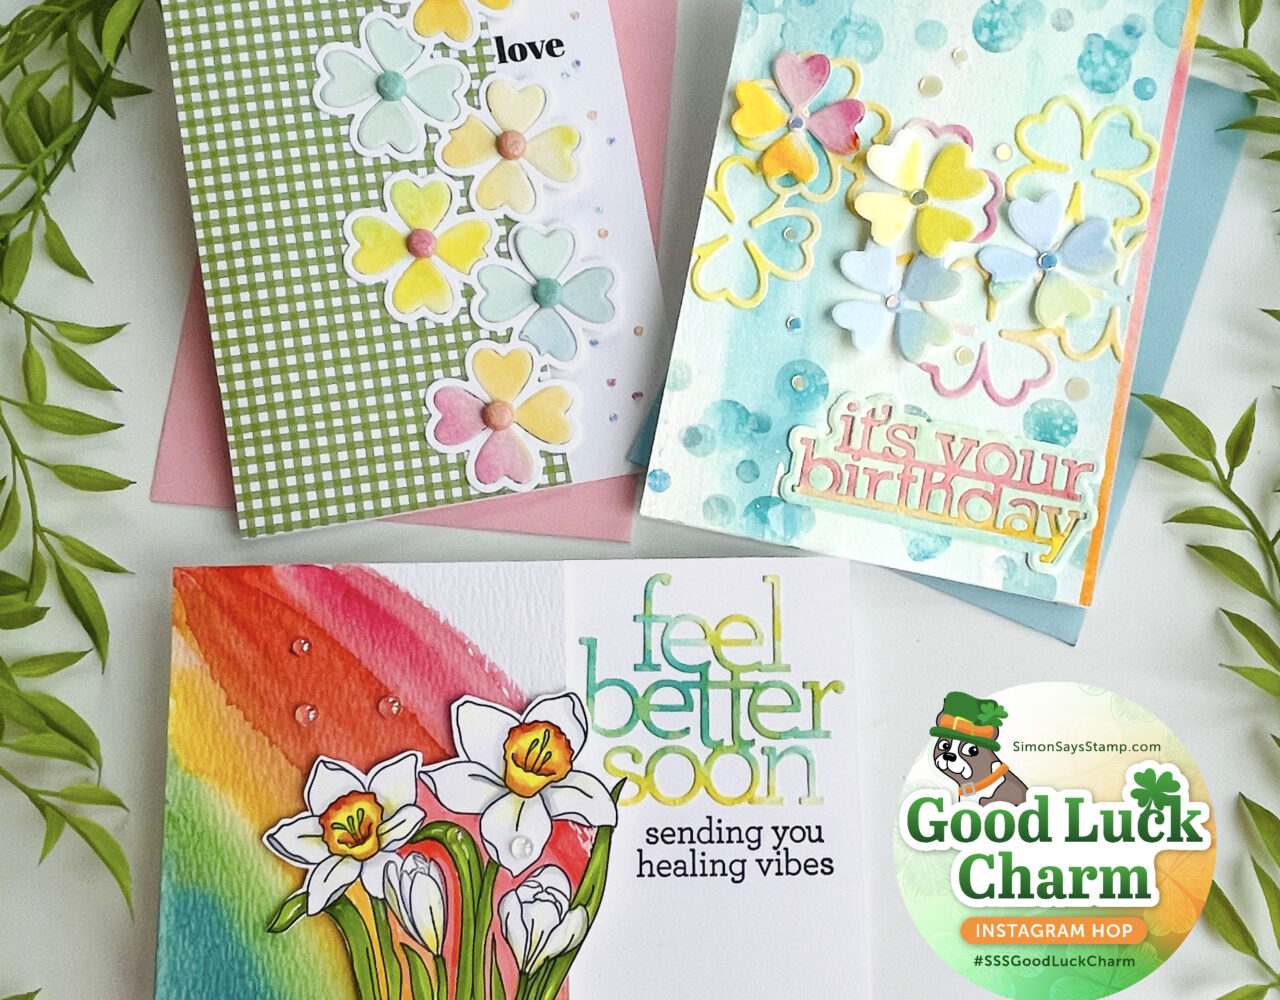
 Hello Simon Says Stamp fans. I am excited to be participating in the Good Luck Charm Instagram Hop today sponsored by Simon Says Stamp! I’ve got three cards to share with you and they feature the following new release products:
Spring Stems stamp set (Bundle includes coordinating dies)
Well Wishes stamp set and coordinating die set (Bundle option)
Also, check out the Shamrock Background Stamp for more festive fun, and the It’s Your Birthday die and XL Birthday Greeting Stamp sets that I use in the second and third cards! Shop all of the fun, new products today! The release is live and ready for you to shop now! Also, head over to my Instagram page, @bobbihartdesign and hop along with us for a chance to win prizes!
My cards measure 5″ X 7″ and fit inside an A7 envelope. I’m using 80lb Neenah Solar White cardstock for the card fronts and card bases unless noted. Everything is stamped using Hero Arts Intense Black Ink. I use Simon Says Stamp Dot Runner Tape Adhesive to attach the elements together. Here’s the details.
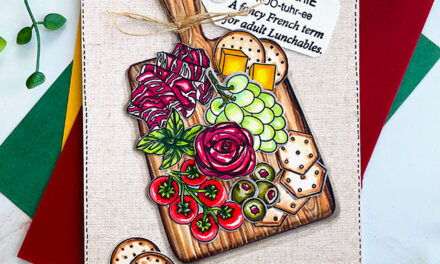
Feel Better Soon Card
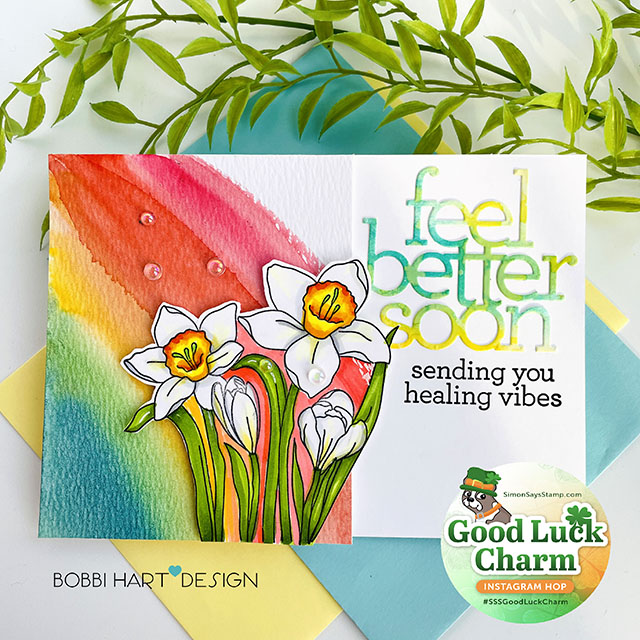
For my first 5″ X 7″ card, I cut the 80lb Neenah Solar White cardstock front panel down to just fit the Feel Better Soon die on the right side of the inside panel. I used watercolor paper for the rainbow design to cover the remaining left side of the front panel piece. I used Kuretake Gansai Tambi watercolors (48) to create the watercolor rainbow. By applying multiple layers, you can achieve nice intense colors.

I also stamped and cut out the spring jonquil daffodil flowers from the Spring Stems stamp set. I colored them in using the following colors:
- Greens: YG67, YG25, YG23, YG03, YG01
- Reds/Oranges/Yellows: R17, R14, R05, YR68, YR65, Y38, Y19, Y13
Using matching colors, I filled in the appropriate color between the stems to look as if the rainbow is continuous behind the stems (even though I did not fussy cut them out. :)) I also added a few dew drops on the rainbow and the leaves of the stems.
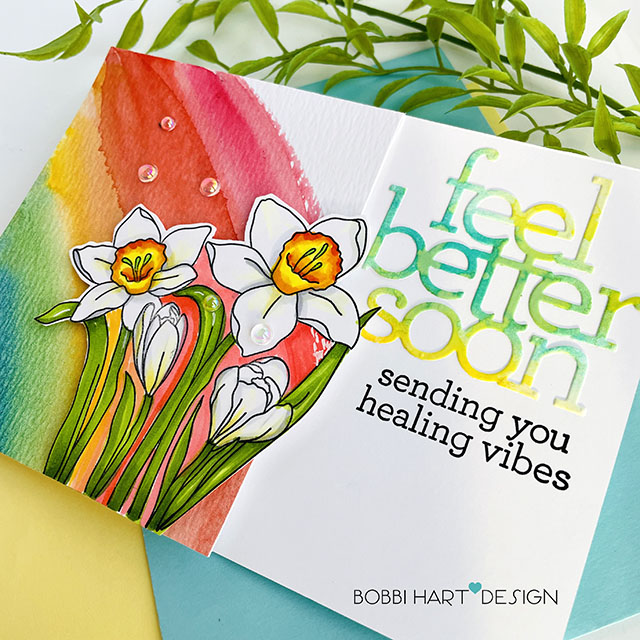
To create the phrases, I die cut the Feel Better Soon die from a scrap of watercolor paper that was colored with blues, yellows and a mix of greens. Never throw your scraps. They work great for this use!
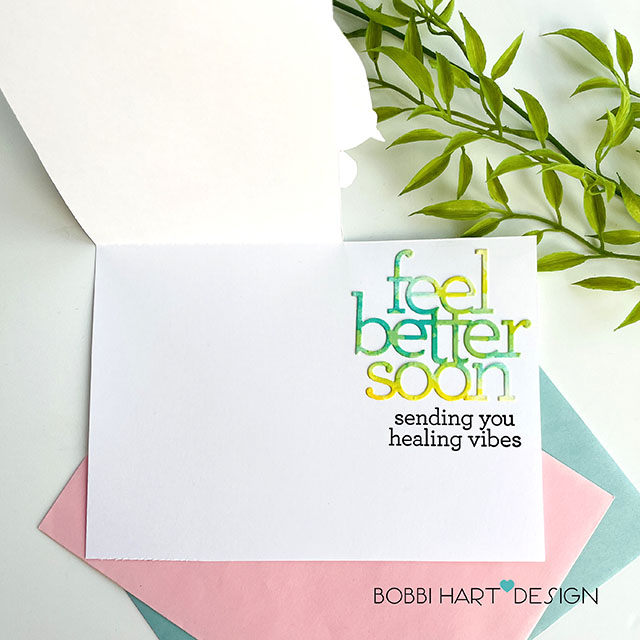
Right below the large phrase die cut, I stamped the supporting phrase from the Well Wishes stamp set. Here you can see that there is room for a personal note under the front panel flap on the left.
It’s Your Birthday Watercolor Card
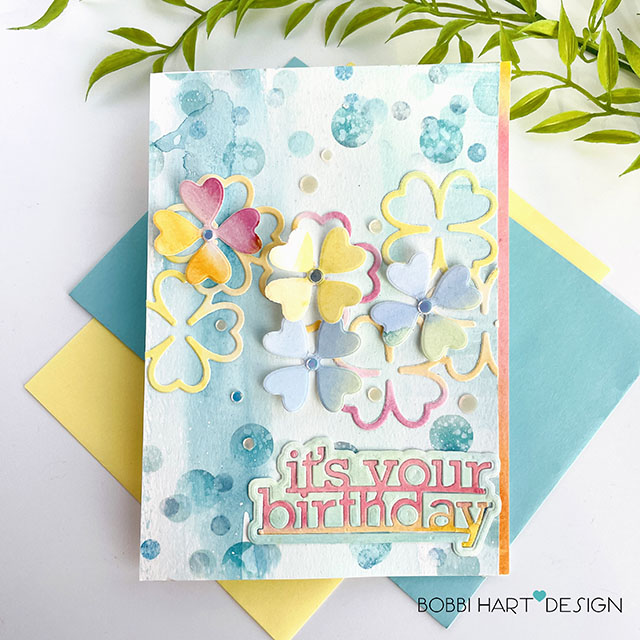
For this card, I used a simple aqua blue wash on watercolor paper and then stenciled layers of confetti dots over the background using Distressed Oxide Ink in Mermaid Lagoon. Once it was stenciled, I splattered water over the dots and blotted them to get this splotchy look. It also subdues the color a bit by lifting ink. I like the worn/washed look for this card.
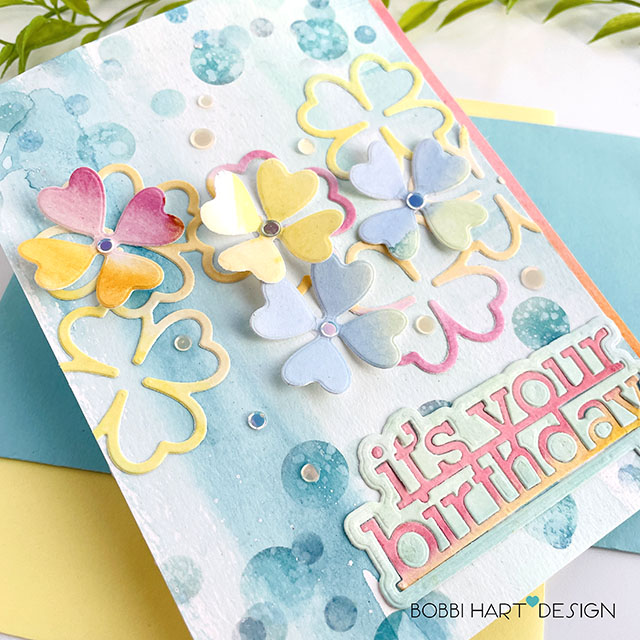
Next, I used some watercolor scraps I had on hand and die cut the Linking Lucky Clovers die. I attached them to my watercolor 5″ X 7″ front panel using glue to attach them. I made sure to crease my petals upward for more dimension! Shamrocks in March, flowers the rest of the year….
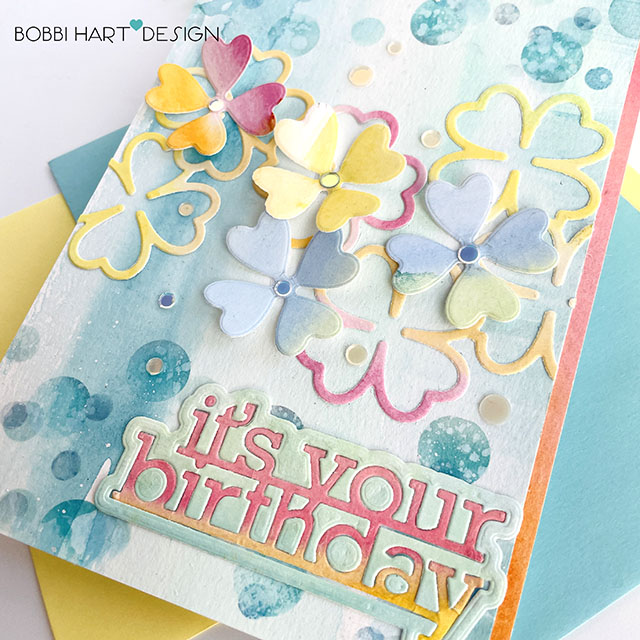
From more watercolor scraps, I die cut the It’s Your Birthday die from a minty green color and a more vibrant piece of pinks and yellows and paired them together for the phrase. I also attached a strip of the pink/orange/yellow mix and attached a 1/4″ strip on the right hand side. Lastly, I added sequins to the centers and around the flowers for a bit of pizzazz! The entire card front was attached to a card base made from 80lb Neenah Solar White cardstock.

Inside the card, I stamped the XL Birthday Greeting inside and used the Layered Confetti Stencil Set in Mermaid Lagoon, Mustard Seed and Salvaged Patina.
Gingham Love Card
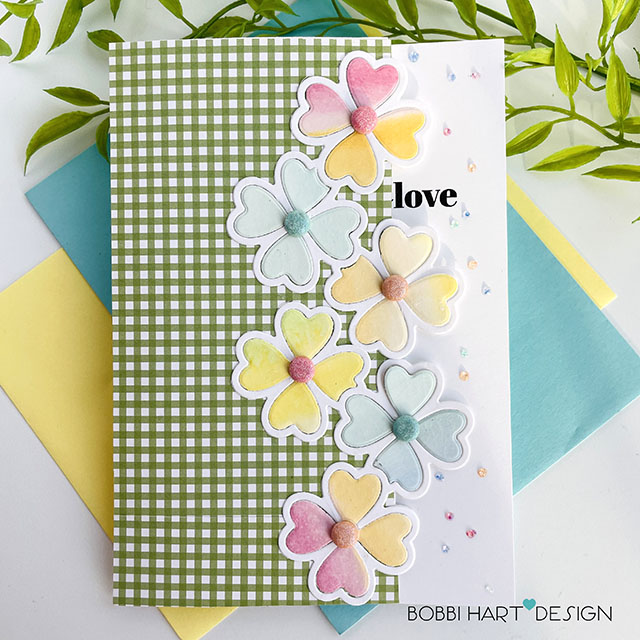
On this 5″ X 7″ card, I trimmed down the front panel of the card base by 1-1/4″ and added Honey Bee Stamps Gingham Galore pattern paper on the left side. Gingham is so fresh for Spring.
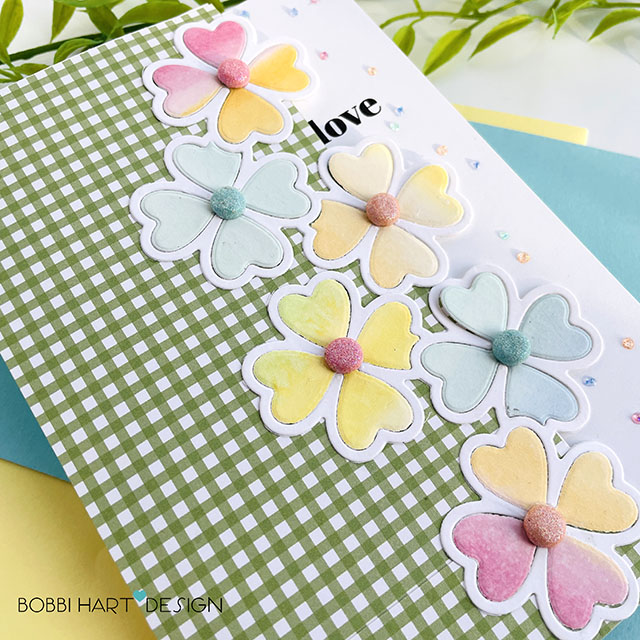
I die cut the Linking Lucky Clovers die from 80lb Neenah Solar White cardstock and watercolor paper in bright pastels. I attached them, allowing the flowers andoutline to fall off the gingham cut edge. I backed them with white die cuts for a clean finish inside. This placement allows the flowers to show over the interior white background. I used glitterly enamel dots for centers of the flowers.
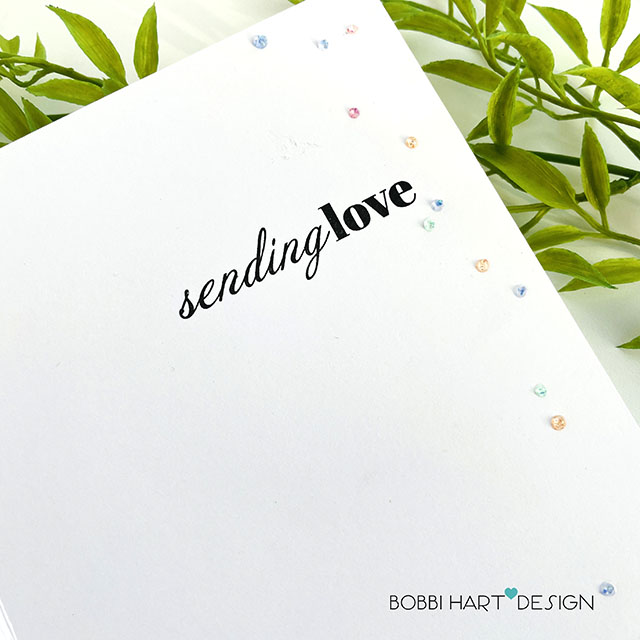
Inside, I stamped “sending love,” positioning it so that only 1/2 the phrase, (“love”) shows from the front. Once the front panel is opened, you see the entire phrase “sending love. I added a little glitz using Pearl Pen Glitter Drops in coordinating pastel colors in the white space that shows from the card front. They sparkle!
I hope you like my cards! If you decide to place an order, please use the links in this post so that Simon Says Stamp knows what inspired you. I appreciate it very much. It helps me to continue to bring more ideas to you!
Thanks for stopping by today. If you want to see more ideas and inspiration from me, subscribe to my blog, BobbiHartDesign.com. I’ll send you updates on new posts! You can also find me on Instagram as @BobbiHartDesign and on Facebook as BobbiHartDesign.
Bobbi Hartmann Lemanski, Bobbi Hart♥ Design, Adding h♥art into every design


