
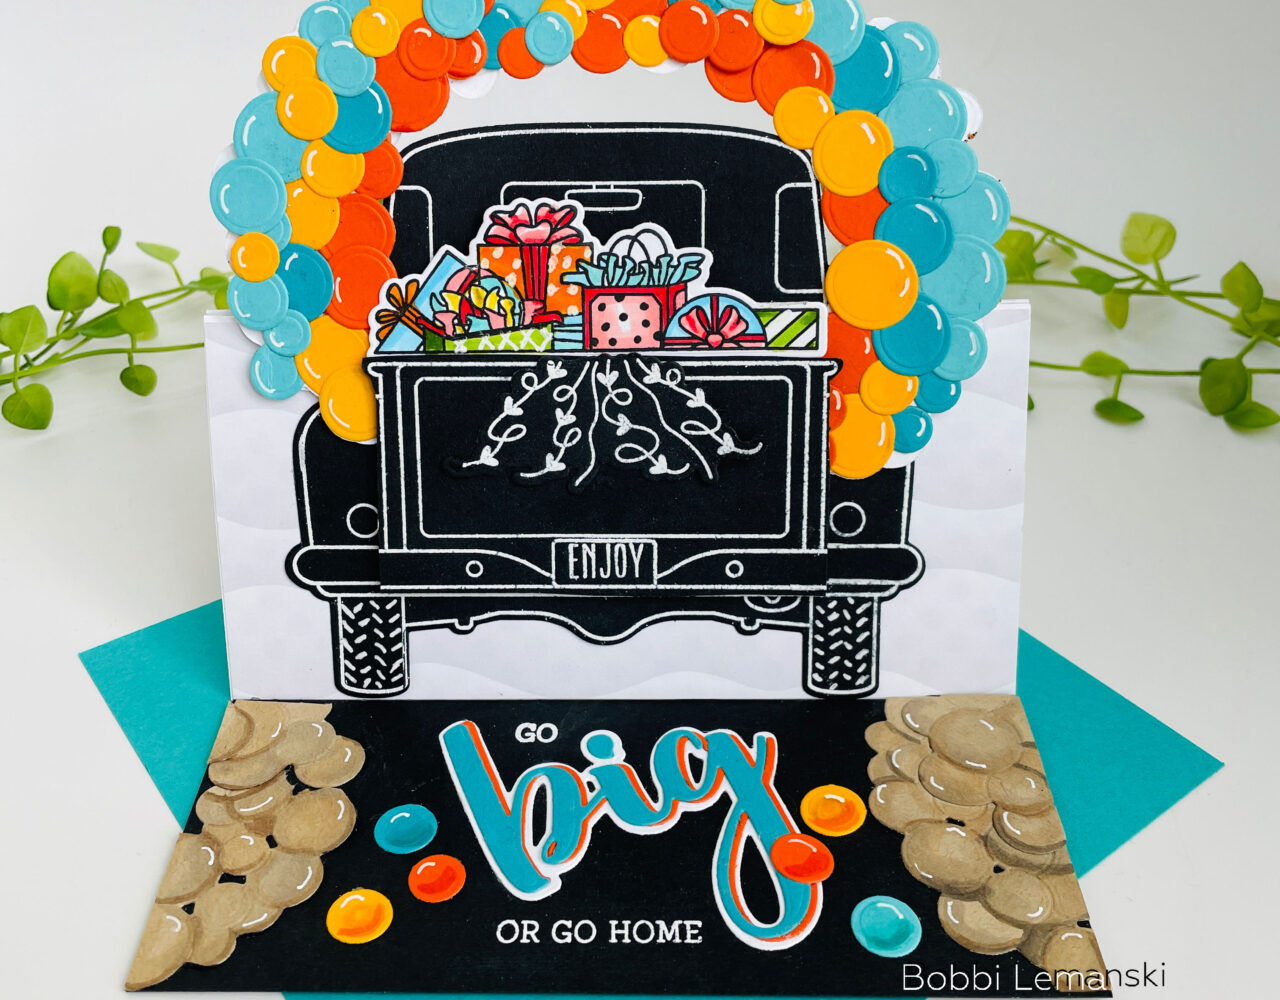
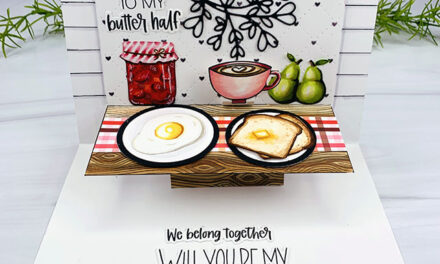
Hello Honey Bee friends. It’s Bobbi Lemanski here with one big birthday card that stands up and out to celebrate another trip around the sun! Perhaps the next trip is driven in a cool, retro truck like this one!  My brother is restoring a vintage truck and his birthday is in June. I think this will be a fun card for him. Whether you like trucks or not, everyone loves a big balloon extravaganza to celebrate the big day! I’m using the following Honey Bee Stamps products for my card today:
Big Buzzword stamp set and coordinating die set
Big Tailgate stamp set and coordinating die set
Loads of Love stamp set and coordinating die set
The featured project below is made from Neenah 80lb Solar White cardstock for the card base. All of the black ink stamping was done using Honey Bee’s Bee Creative Intense Black Ink. I use the Bee Creative Clear Embossing and Watermark Ink Pad for all heat embossing and Honey Bee Stamps Bee Creative Precision Glue for adhering my elements together. My card measures 6″ square.
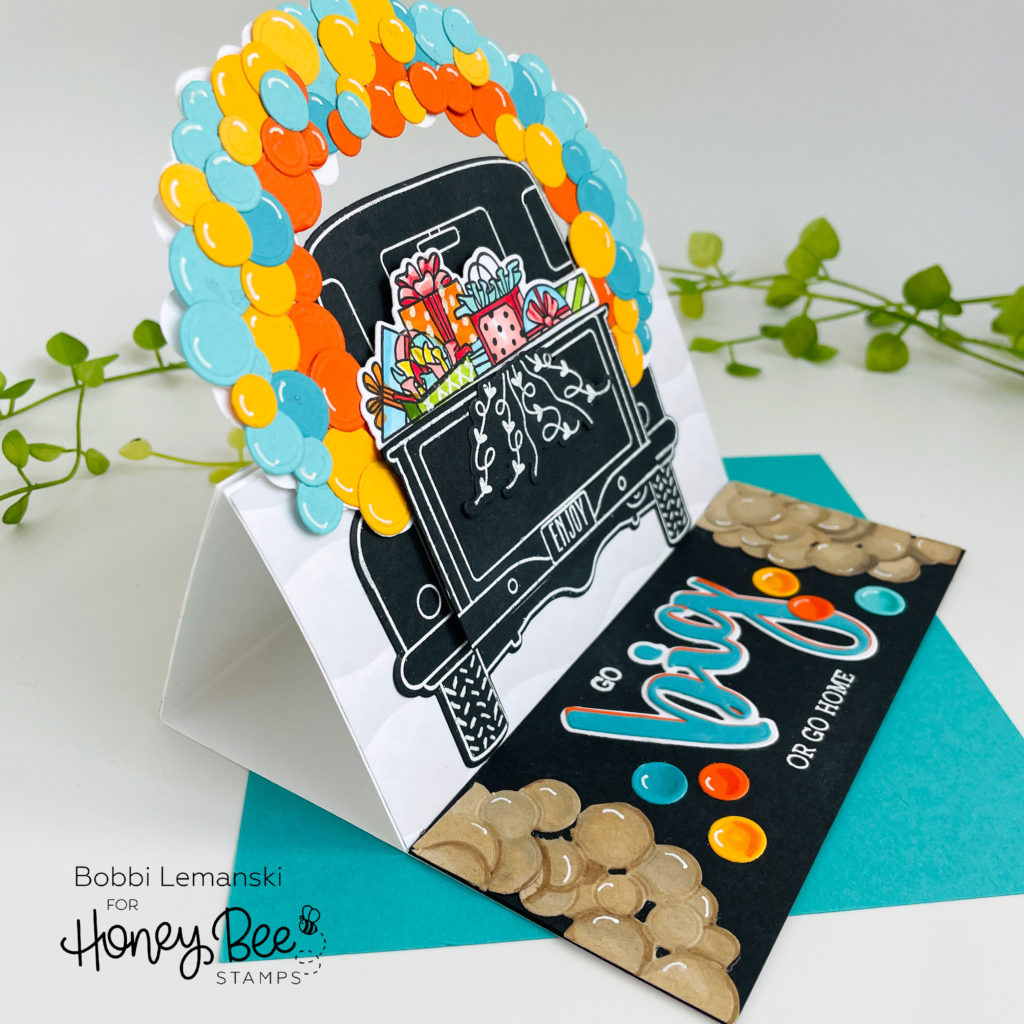
This 6″ square easel card puts this truck in an upright position using the self-contained easel behind it. It also fold flat for mailing. The easel design allows the card to be displayed on any shelf or mantel in the cutest way.
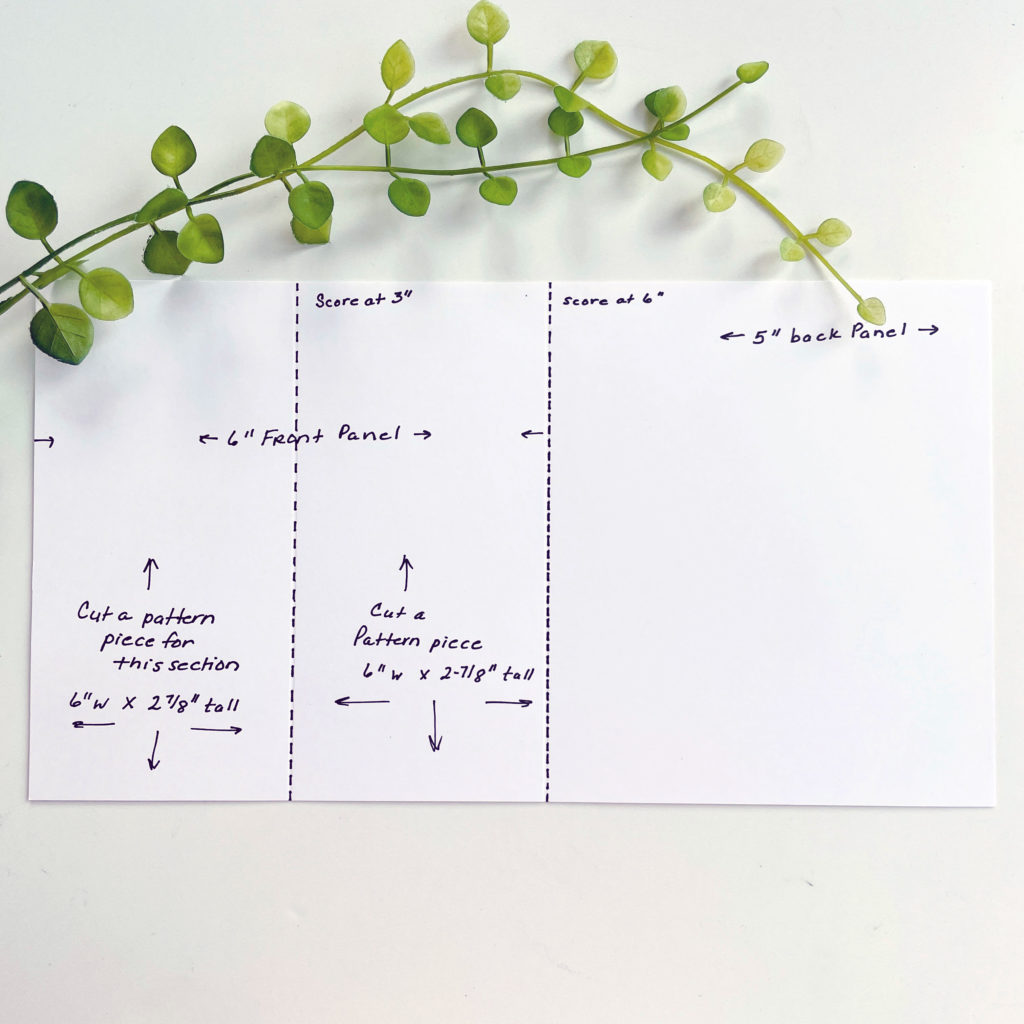
To create the card base, I used Neenah 80lb Solar White cardstock cut 6″ wide by 11″ long from a letter size sheet. I scored at 3″ and 6″ to create the easel. I folded in opposite directions on both score lines, creating a z-shape from the side. The 5″ section will create the inside, back panel of the card. I cut two pattern pieces to fit the scored sections – both measuring 6″ wide X 2-7/8″ tall. This allows the pattern paper to fold with the base nicely. I used a very subtle gray background paper from the Beach Vibes pattern paper pack. It reminded me of clouds in the sky. There is so much going on with the balloon arch, I wanted the background to be simple.
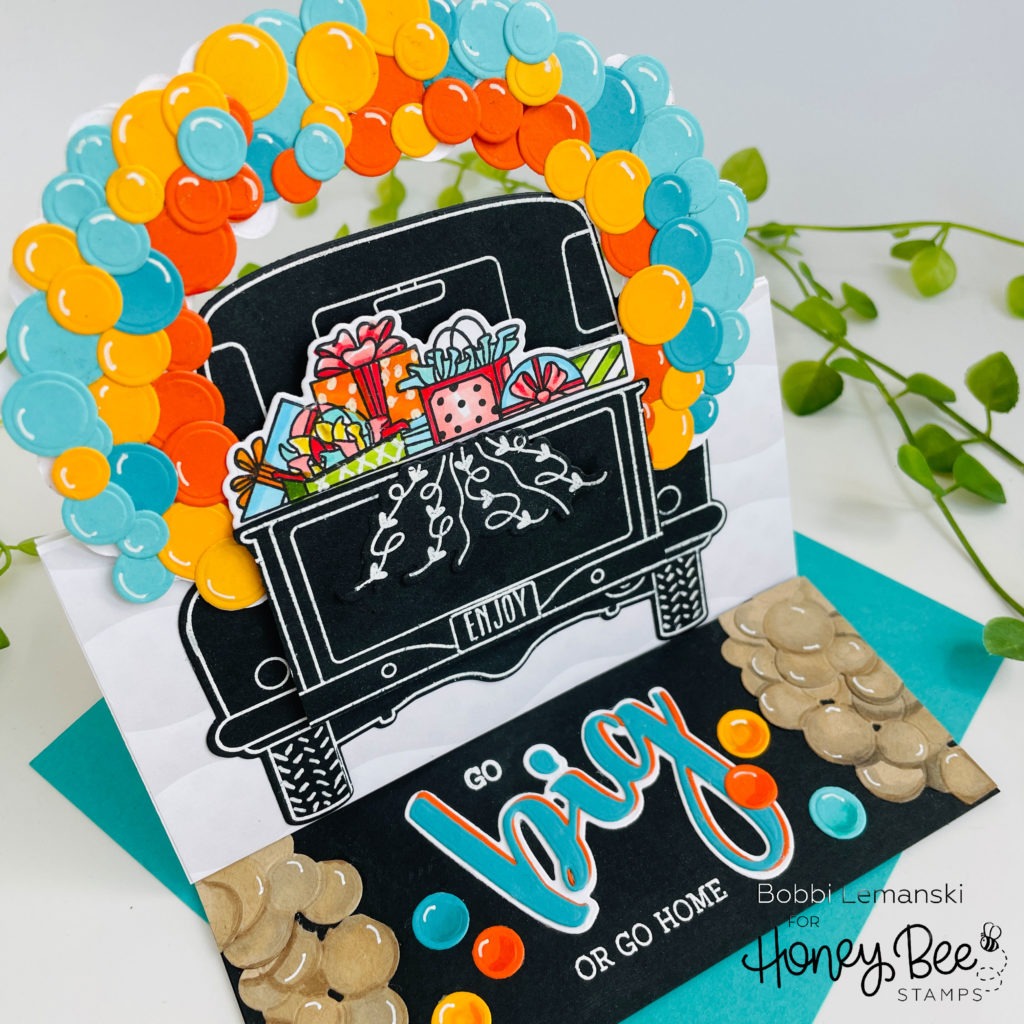
For the front, I embossed in white on black cardstock and cut out the truck using the Big Tailgate stamp set and coordinating die set. I embossed another tailgate and attached it using Scrapbook Adhesives .25 Foam Squares in white to make the gate dimensional from the front. This also gave me a place to attach the balloon arch on the sides. I stamped and colored the gift packages in colorful colors using Copic Markers: R29, R22, R20, B04, B00, YR68, YR61, Y38, Y18, YG67, YG23, and YG03 and attached the image right behind the dimensional gate. Streamers were embossed, die cut, and attached to the tailgate for added decoration.
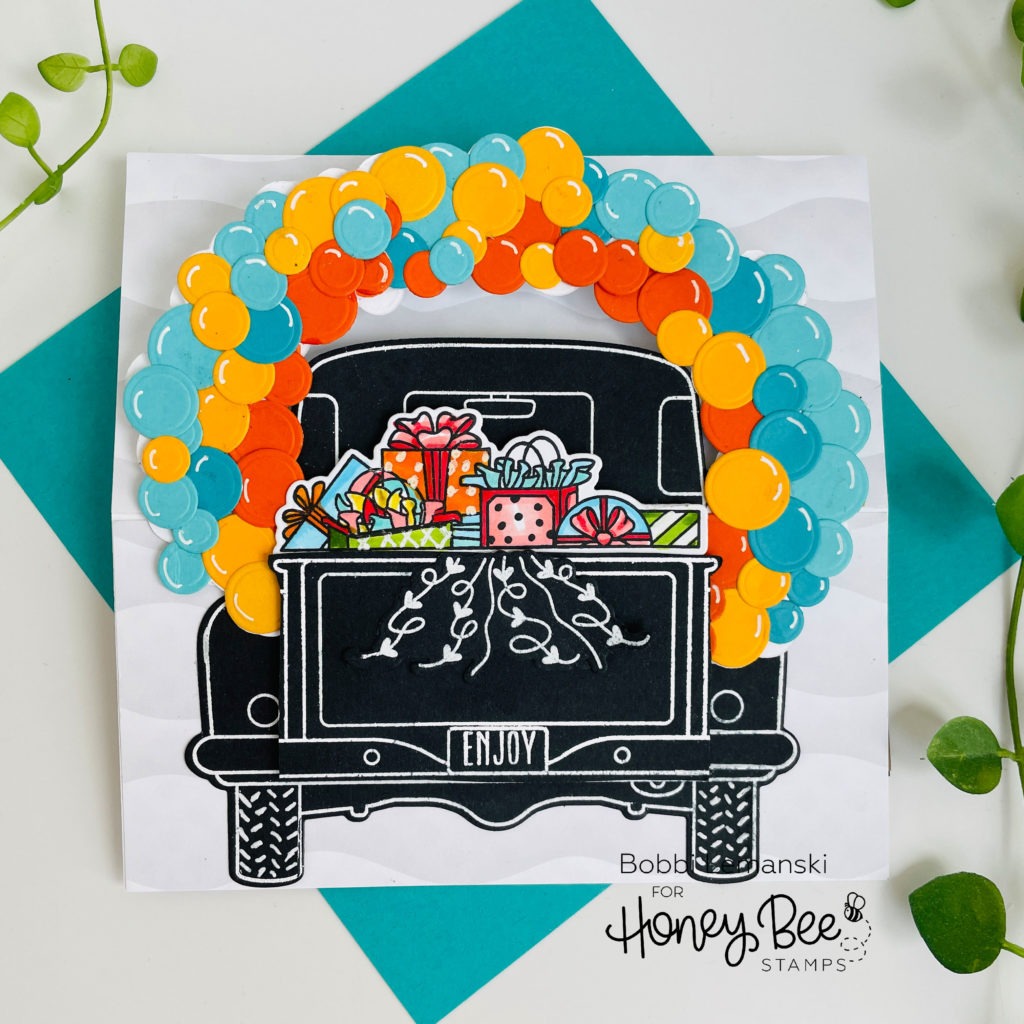
To make the balloon arch, I cut two longer arch pieces and one smaller length piece from the set. I attached them together, using the smaller length at the top and backed the entire arch with more plain white die cuts for a clean, white back. Note: The back will show when the card is in its upright position, using the easel. Next, I added balloons in orange, yellow, aqua and teal to create the festive arch. The arch was attached to the truck bed on both sides.
The entire truck/balloon arch ensemble was attached to the front card panel, under the 3″ score line, only. The 3″ score line should bend out (like a mountain peak) when the easel is upright.
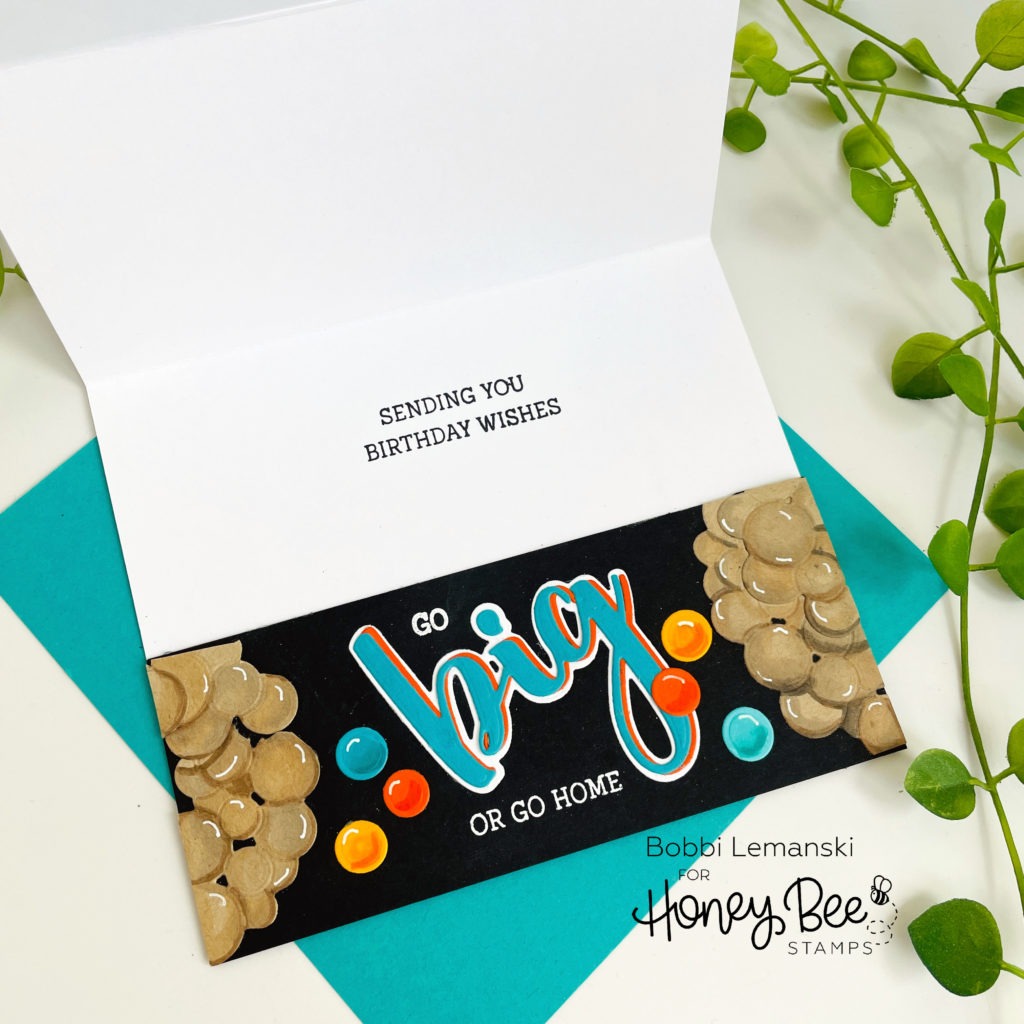
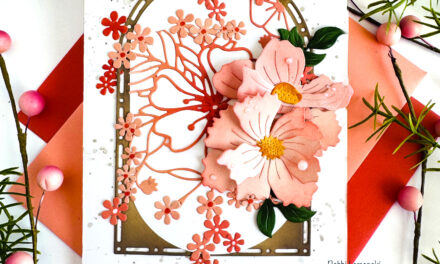
On the inside of the panel, I created a fun road design for the truck to rest on using more balloon arch pieces as stones/rocks on the side of the black road. I die cut them from a khaki cardstock and used Copics in E44, E43, E53, E57. W2, C3 and C1 to color the rocks so that they would look like they are stacked on each other. More balloons and the “go big or go home” phrase were added using the Big Buzzword stamp set and coordinating die set.
I created a “lip” for the front panel to rest on (and keep it in place) by attaching one piece of black cardstock measuring 6″ wide X 2-1/2″ tall on the bottom of the panel. On top of it, I attached the phrase strip of the same size to make the lip a double layer thickness. I stamped more phrases from the Big Buzzword stamp set right above the panel on inside. Lastly, I added white highlight marks on the balloons and rocks and tread marks on the tires using my Gelly Roll white gel pens to finish this card.
You can shop Honey Bee Stamps here. If you decide to place an order, please use the links in this post so that Honey Bee knows how you found these products!
Thanks for stopping by today. If you want to see more ideas and inspiration from me, subscribe to my blog, BobbiHartDesign.com. I’ll send you updates on new posts! You can also find me on Instagram as @BobbiHartDesign and on Facebook as BobbiHartDesign. Bobbi Hartmann Lemanski, Bobbi Hart♥ Design, Adding h♥art into every design


