
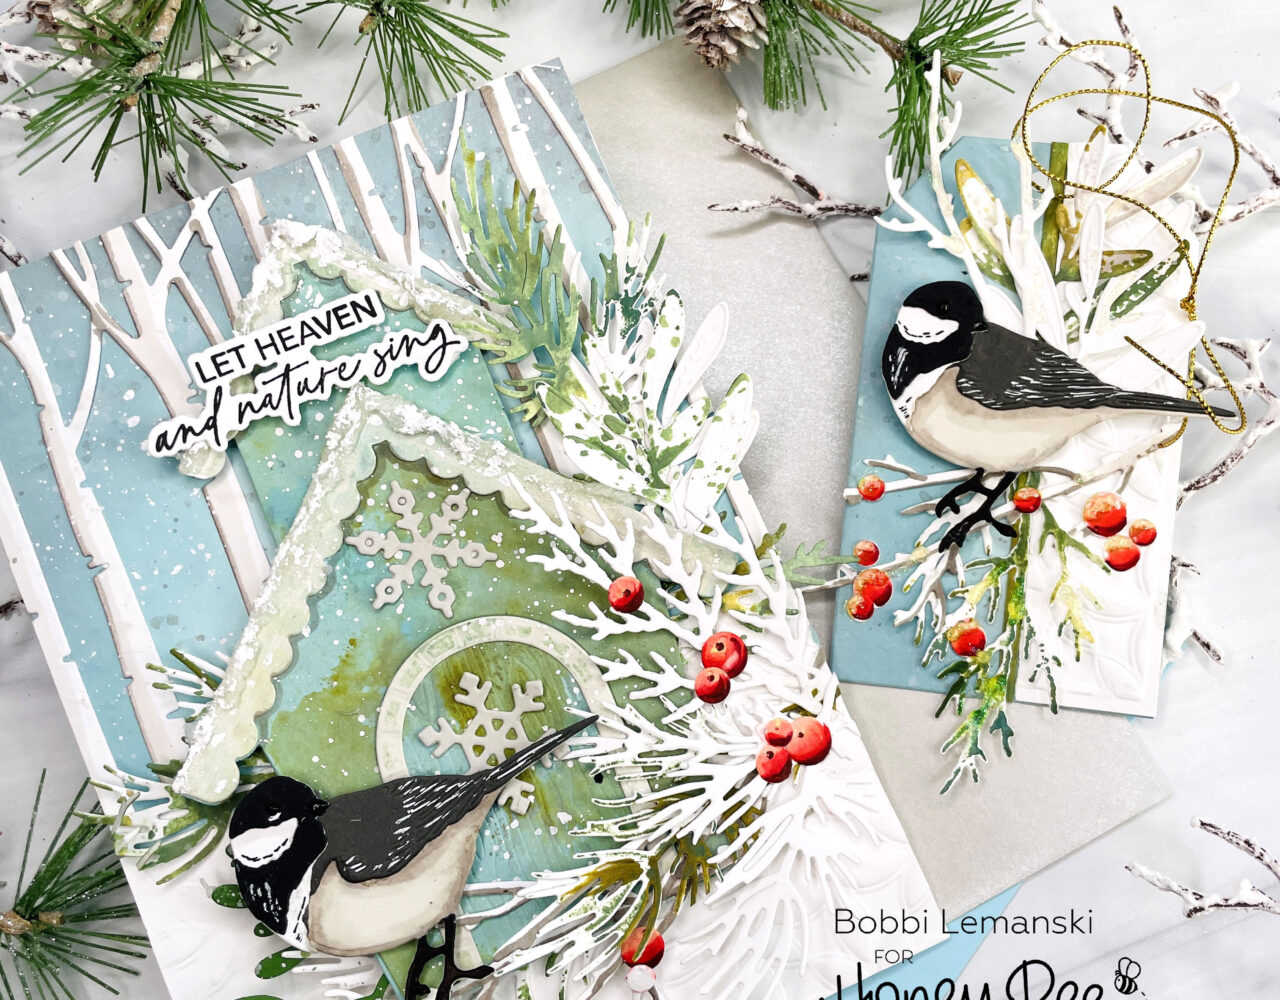
Hello Bee friends! It’s Bobbi Lemanski here with a card and tag featuring the new winter birds from the Make It Merry release by Honey Bee Stamps. Last week, I shared a card using the red cardinal. Today, I’m sharing the second bird from the die set. I’m using the following Honey Bee Stamps products:
Lovely Layers: Winter Birds – Honey Cuts
Lovely Layers: Winter Greenery Honey Cuts
Bird House A2 Card Base – Honey Cuts
Birch A2 Cover Plate Base – Honey Cuts
Let Nature Sing stamp set and coordinating die set
The featured project below is made from Neenah 80lb Solar White cardstock for the card base and the lower half of the card front panel. All of the black ink stamping was done using Honey Bee’s Bee Creative Intense Black Ink. I use Honey Bee Stamps Bee Creative Precision Glue for adhering my elements together. My card is 5″ X 7″ in size.
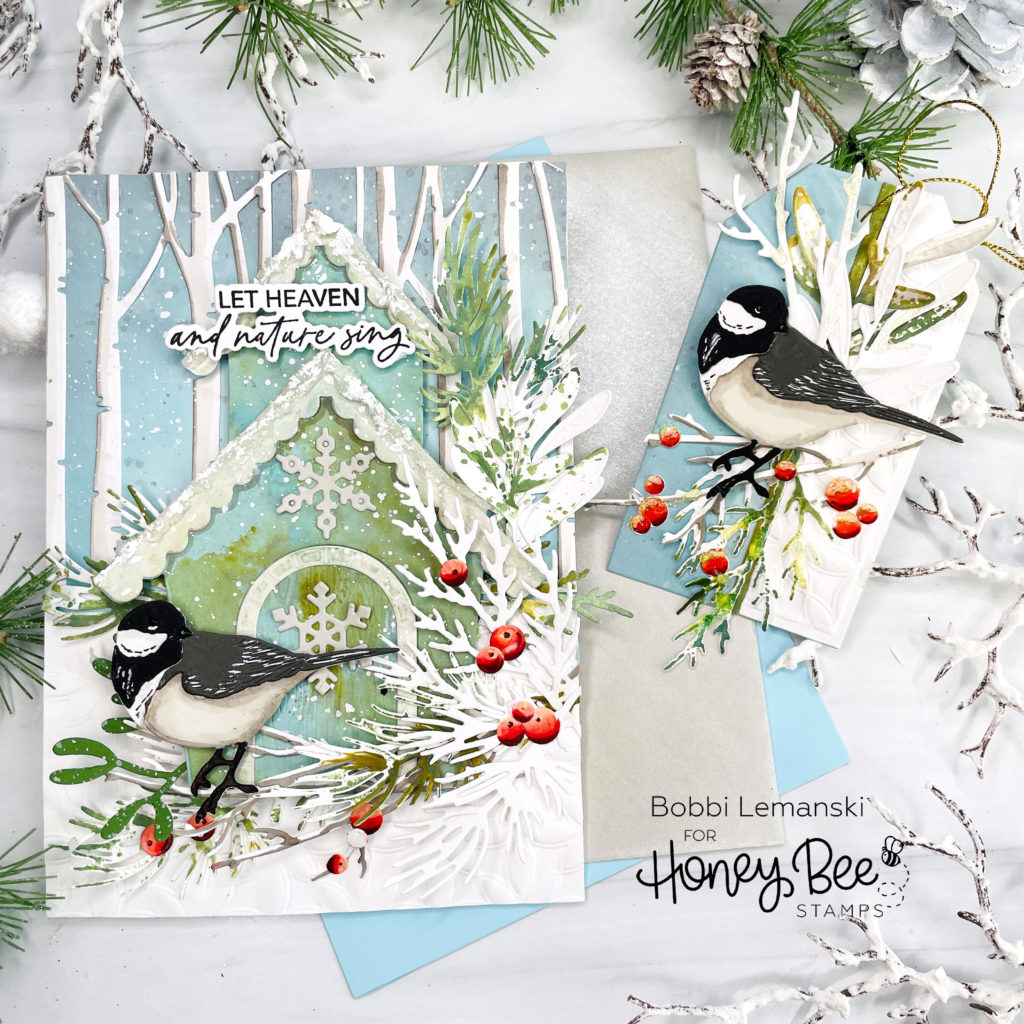
Let Nature Sing Birdhouse Card
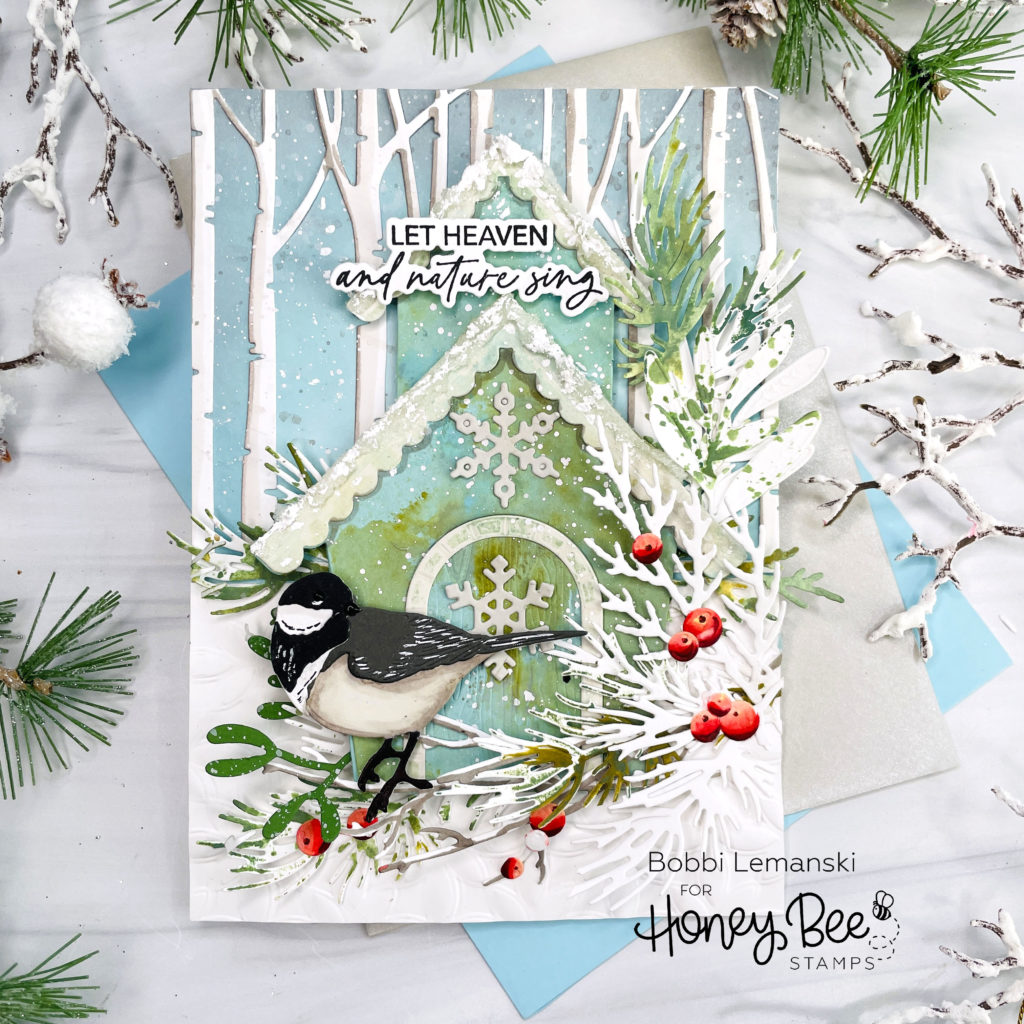
My card is 5″ X 7″ (A7 card size) and made from Neenah 80lb cardstock. On the top half of the front panel, I added a 5″ wide X 4″ tall inked blue sky to the top by blending on Ranger Distress Oxide Ink in Pumice Stone and Speckled Egg on a light blue cardstock. I splattered water on the wet ink and lifted some of the color. I attached the birch tree trunks, cut from white cardstock, over the background sky and glued it in place. I added some shading to the birch tree trunks using a W3 and W1 Copic Sketch Markers.
On the bottom half of the front panel, I embossed a piece of white cardstock measuring 5″ wide X 3″ tall using the Kaleidoscope Embossing Folder and glued it in place.
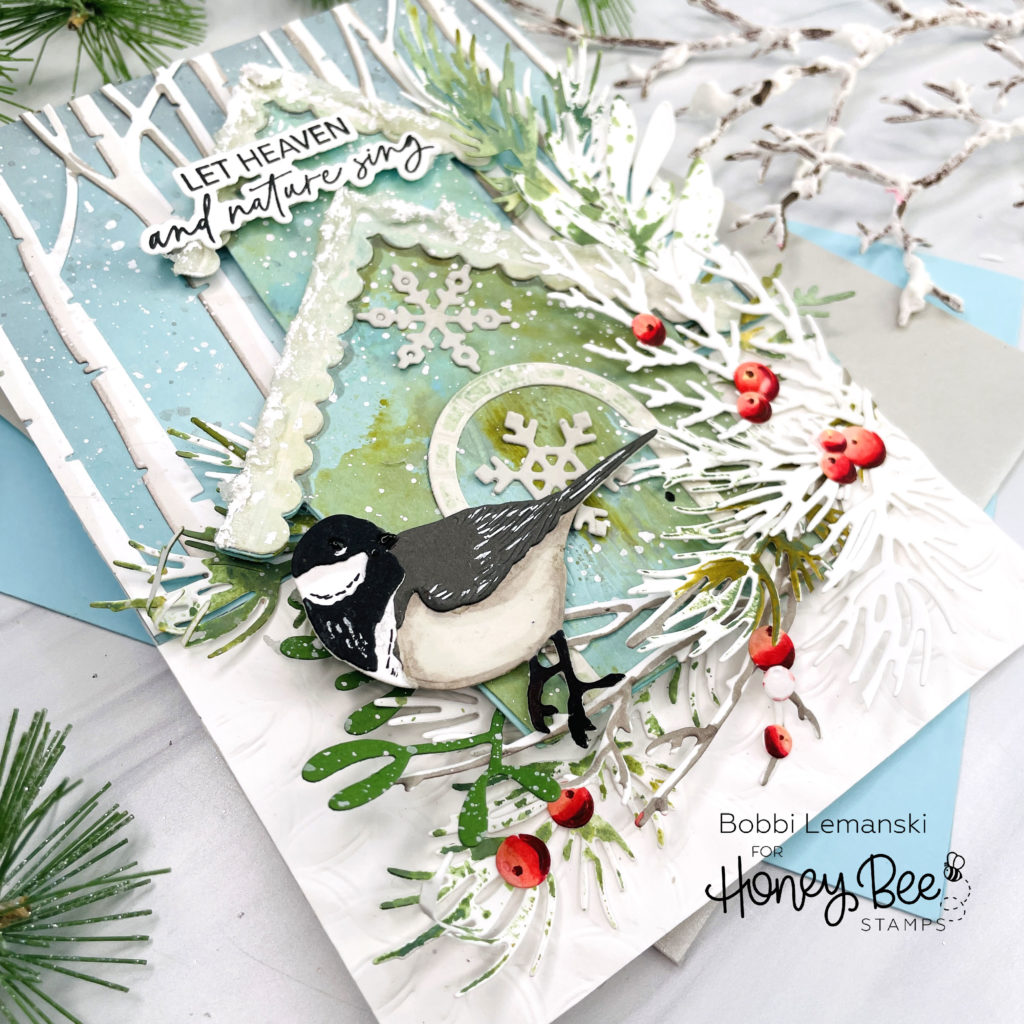
To make the two-story birdhouse, I die cut the house base from a light dusty aqua-colored cardstock and the roof and door trim from a warm gray cardstock. I touched my Salvaged Patina and Forest Moss Distress Ranger Oxide Inks to my craft mat, sprayed a little water on the ink, and dragged the cardstock pieces through the ink to make them look a bit weathered with a patina and/or a mossy look on the exterior. I lifted some ink using water and a paper towel, too. I wanted it to look aged, weathered and imperfect. I added some Distress Holiday Grit Paste Snowfall and a sprinkling of glitter to the rooftops, berries and branches for a sparkly, snowy look. I assembled the house and added snowflakes to the house for a festive appearance.
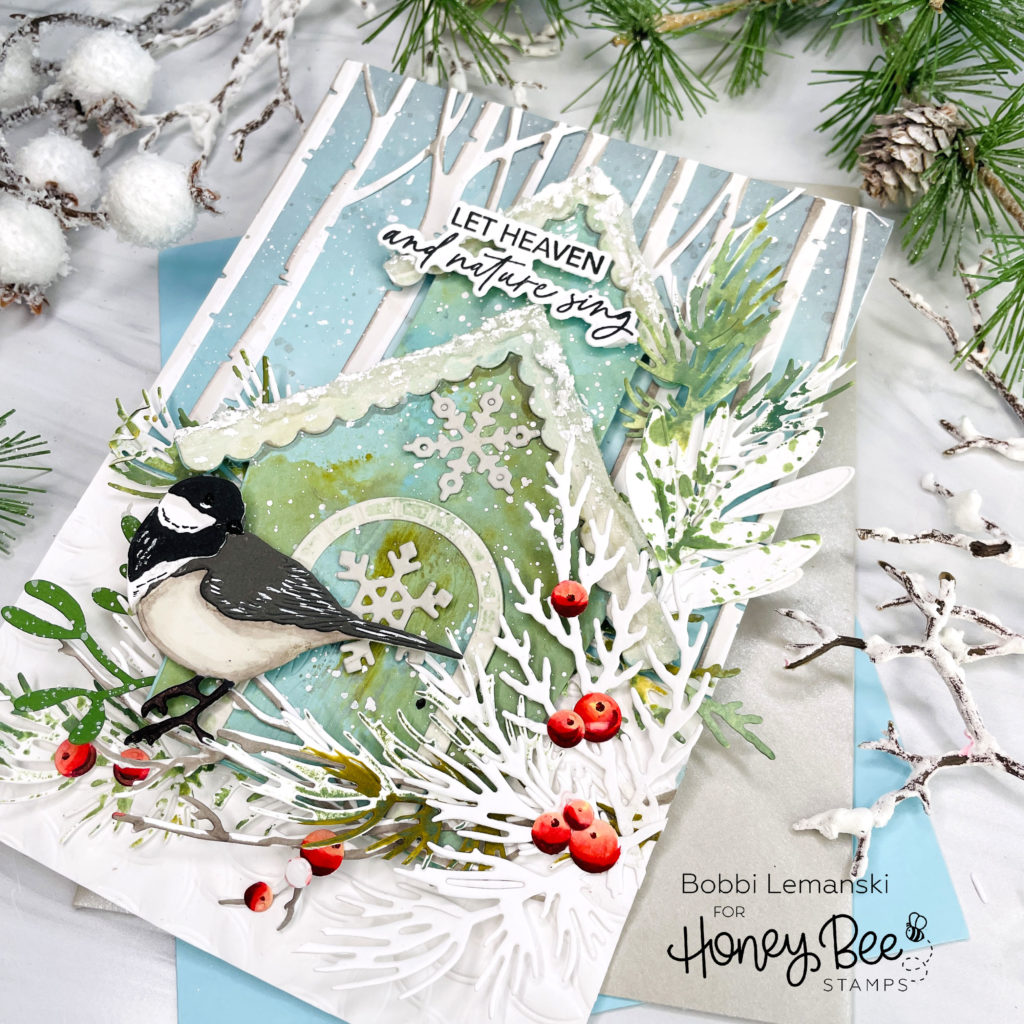
For the winter bird, I used warm gray, black and white cardstock to make the focal point. I added black Pearl Pen to the eye and beak and colored the legs black. I assembled the entire front, carefully layering the elements in place and using glue to secure everything in place. The bird is resting on a branch. I splattered on white snow using Dr. Ph Marten’s Bleed Proof white ink and a fan brush. Lastly, I attached a sentiment using the Let Nature Sing stamp set and coordinating die set. I used Scrapbook Adhesives .25 Foam Squares in white (cut to fit) to attach the sentiment.
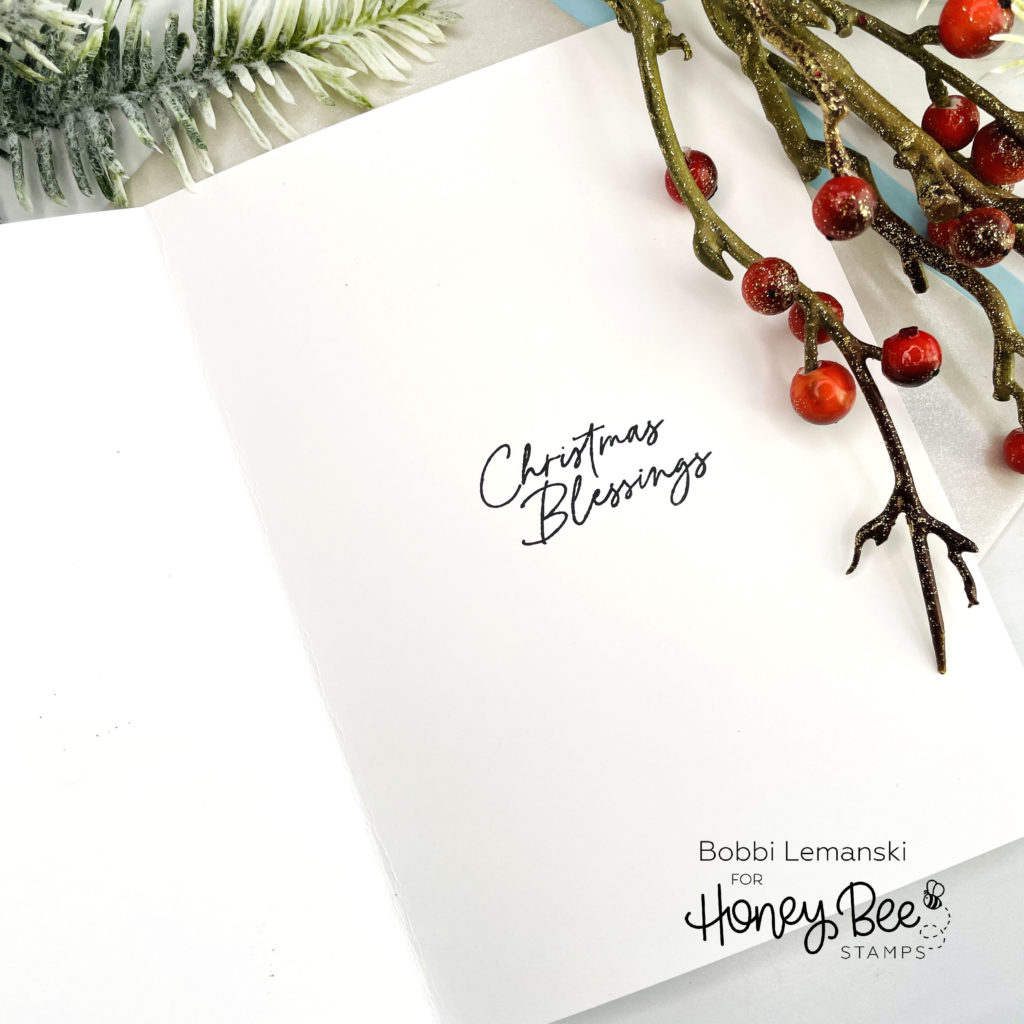
Inside the card, I stamped the “Christmas Blessings” sentiment from the Let Nature Sing stamp set.
Let Nature Sing Tag
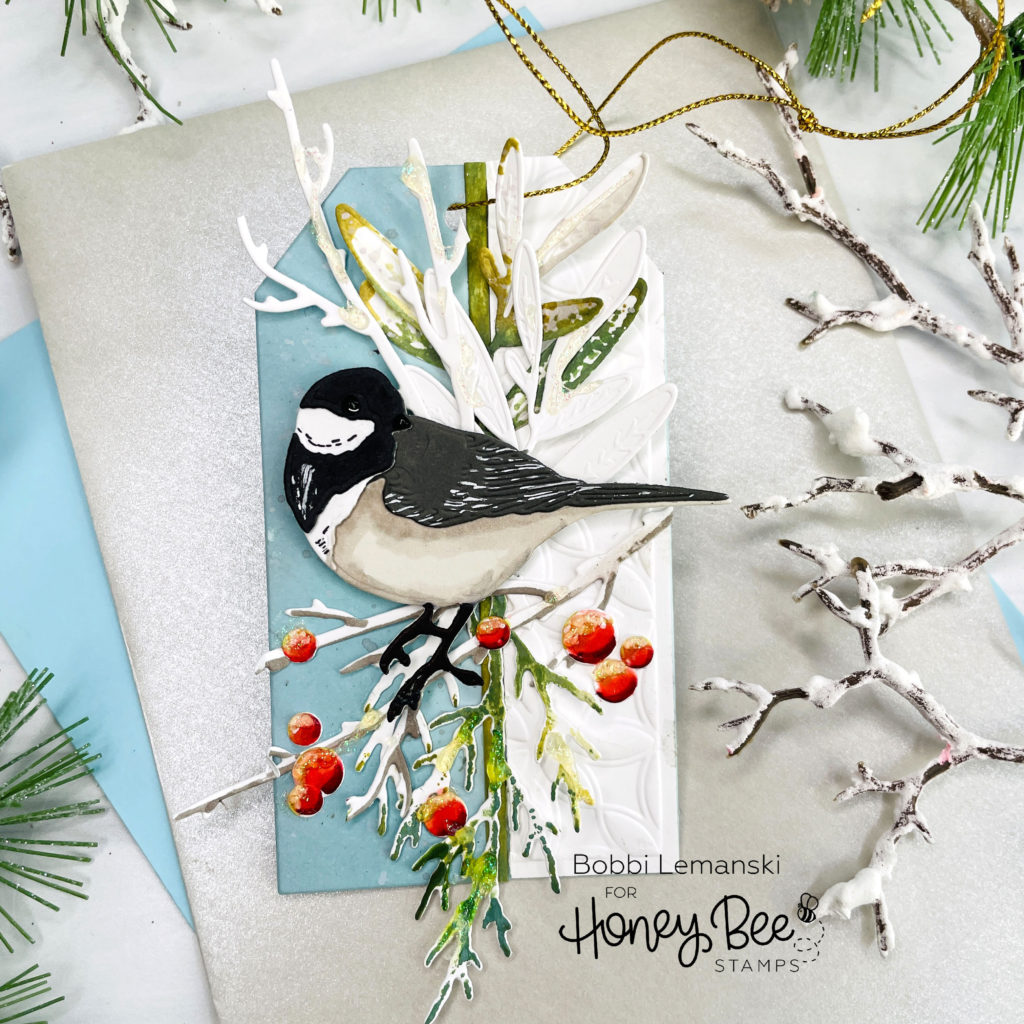
I created a coordinating tag for the gift. I assembled a separate bird and then used my scraps from the card to make this sweet bird tag.
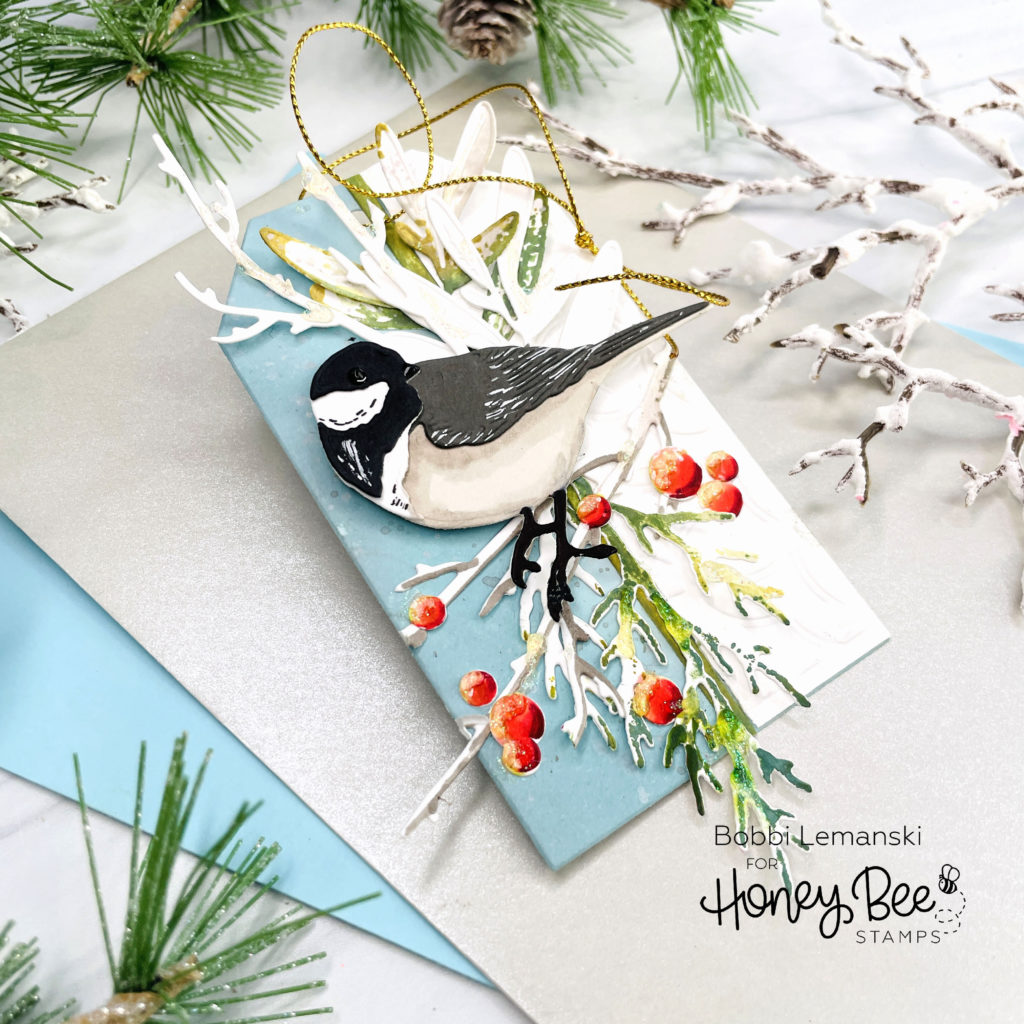
Some snow and a gold metallic string finishes off the tag. You can shop the entire Honey Bee Stamps Make It Merry release here. If you decide to place an order, please use the links in this post so that Honey Bee knows which ideas inspired you!
Want to see my other bird card? Here is a link to the blog post.
Thanks for stopping by today. If you want to see more ideas and inspiration from me, subscribe to my blog, BobbiHartDesign.com. I’ll send you updates on new posts! You can also find me on Instagram as @BobbiHartDesign and on Facebook as BobbiHartDesign.


