

- Footlocker Dies
- Our Heroes Stamps and dies
- Cardstock: Light olive green (border and lockers), warm gray (card front panel), Kraft (boots) black (black panel band, locker trim and straps, binoculars, boot laces, etc.), white (badge, 1/8″ border strips and stars) and metallic silver cardstock (locker metal embellishments, tags, binoculars).
- Copic Sketch Markers: YG99, YG95, YG93, E57, E55 (camo pattern on locker and boot), W4, W3, W1 (shadowing)
- Foam tabs for dimension (used under the badge and under the closed locker)
- White Gelly Roll Pen for the locker strap stitching
- Black Fine Tip Marker for tiny shadow details
- Black Pearl Pen (dimensional design on the open locker trim pieces)
- Black watercolor paint (background splatters on warm gray cardstock.)
- Ranger Distress Oxide Inks: Black Soot, Forest Moss
- Black dye Ink
- Glue and tape runner
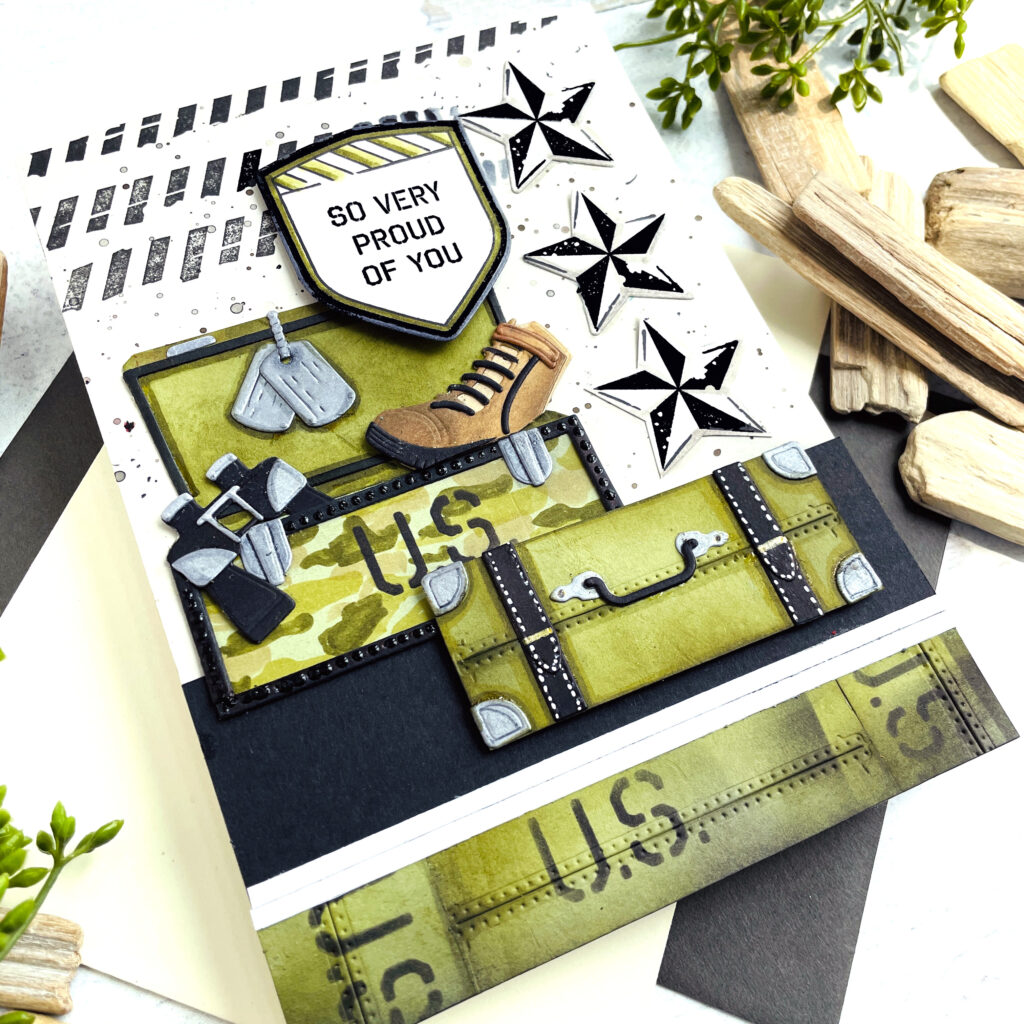
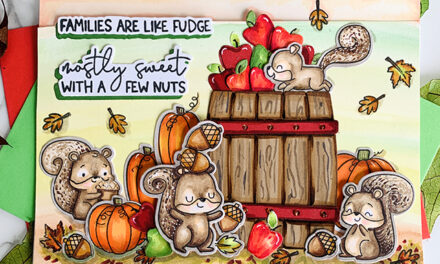
I have a few tips to share for this 5″ X 7″ card. I used the “U.S.” dies from the Footlocker die set to make a stencil. This allowed me to stencil the letters onto the open locker front using Ranger Distress Oxide Ink in Black Soot. It’s a quick way to add the “US without gluing the individual pieces of the abbreviation.
To create the bottom border pattern, I cut three olive rectangles using the closed locker die from the set and stitched them using the straight double seam die also from the Footlocker die set. I ran two vertical and one horizontal for a patchwork design. I added Forest Moss Distress Oxide Ink to the edges to create dimension and grunge it up a bit! I love how masculine and “used” this looks! Next, I used my homemade “U.S.” die stencil (from above) to stencil the letters on to olive cardstock pieces randomly. This was quick and simple using the homemade die and Black Soot ink. I added two 1/8″ strips of white above the border to finish the edge.

I created the camouflage pattern on the open locker by making simple, organic shapes on the light olive cardstock, allowing the background to show through. I used Copic Sketch Markers in the following colors to create the small pattern: YG99, YG95, YG93, E57, E55. This goes quickly since you don’t have to be precise in anyway. It’s the combination of the colors that makes this work! I love the look and it fits with the whole theme of the card.
To make the luggage straps stand out a bit more, I added white faux stitching using my white Gelly Roll pen. Stars were added from the Our Heroes stamp and dies to add more interest. I also stamped some cool graphic designs from the left side to make the whole card come together. Lastly, I added the badge with the sentiment (all from the Our Heroes set) and attached it using a dimensional foam tab to make it stand out from the rest of the design.
Thanks for stopping by today. If you want to see more ideas and inspiration from me, subscribe to my blog, BobbiHartDesign.com. I’ll send you updates on new posts! You can also find me on Instagram as @BobbiHartDesign and on Facebook as BobbiHartDesign. Bobbi Hartmann Lemanski, Bobbi Hart♥ Design, Adding h♥art into every design


