
Giveaway
Alex Syberia Designs is giving away a £85 ($100) gift certificate to 1 lucky winner and a £15 ($18) gift card to 5 winners. Leave a comment at each hop. All six winners will be drawn from the entrants that have played along with this Blog hop by midnight BST November 26th, 2023. Winners will be announced on the Alex Syberia Designs blog ‘Giveaway Winners’ page on November 27th, 2023. Open internationally. You can find all the details here.
A list of blog hops are listed below. Your next stop after my stop is the talented, Bonnie!
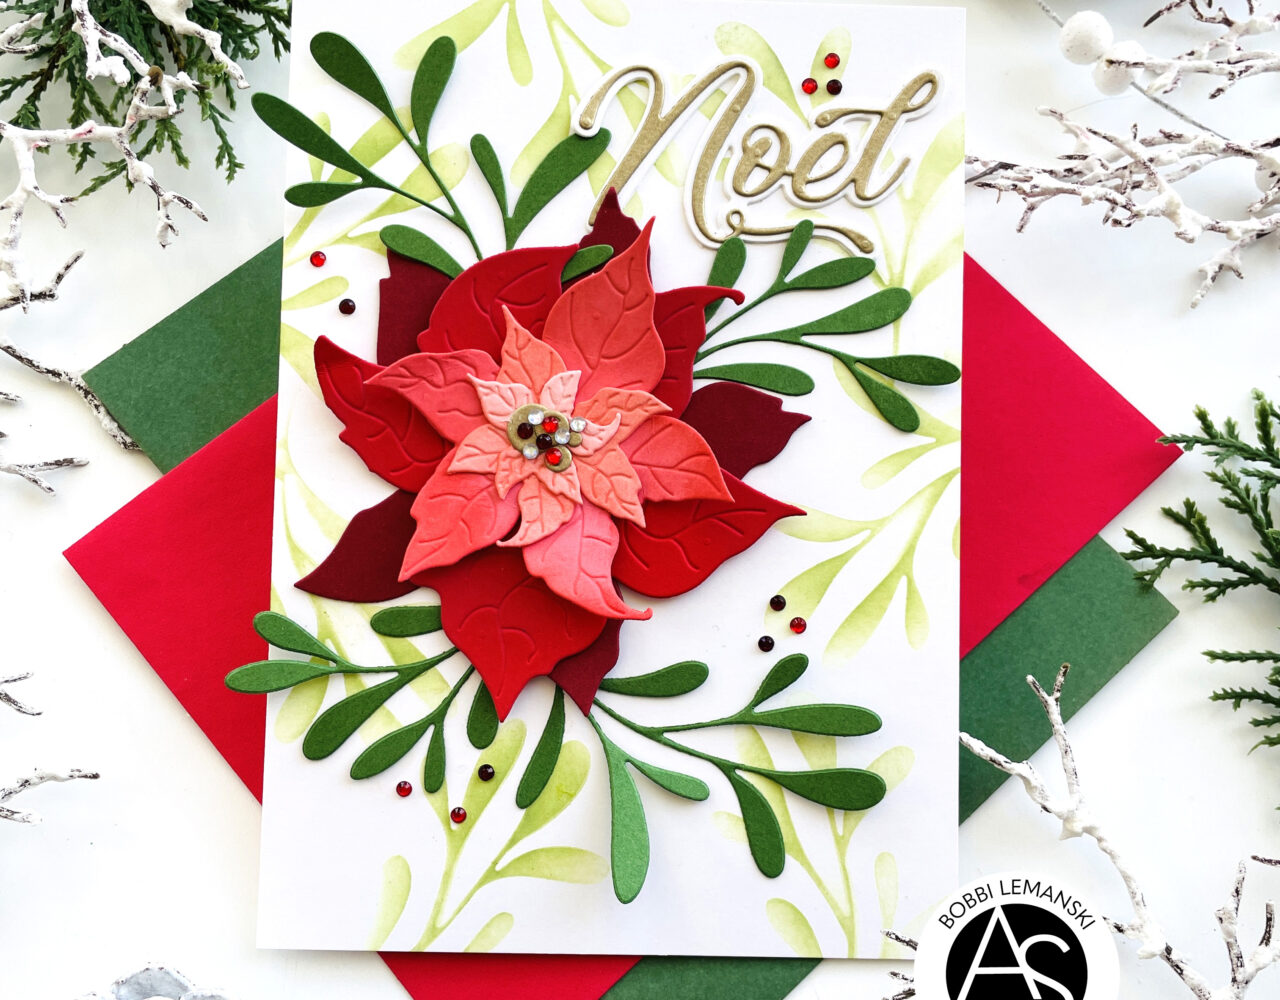
Noel Poinsettia Card
Now for a little inspiration. I’m using the following new products from the November release:
Noel dies (also available: Noel Hot Foil Plate )
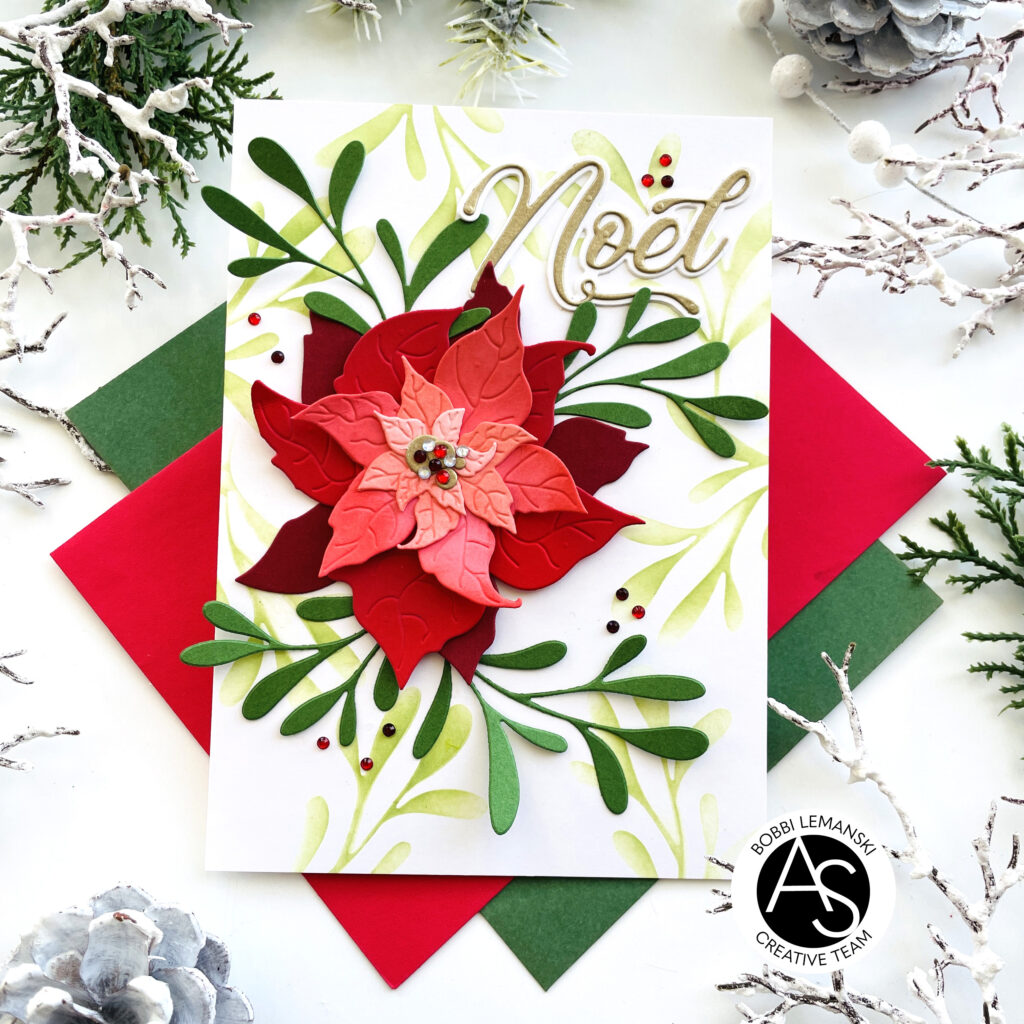
My inspiration card is 5″ X 7″ and is made from 80lb Neenah Solar White cardstock. To create this card, I cut out some mistletoe sprigs using the Joyful Poinsettia Dies and green cardstock. Using the negative cutout, I stenciled on spring to the white background of the card front.
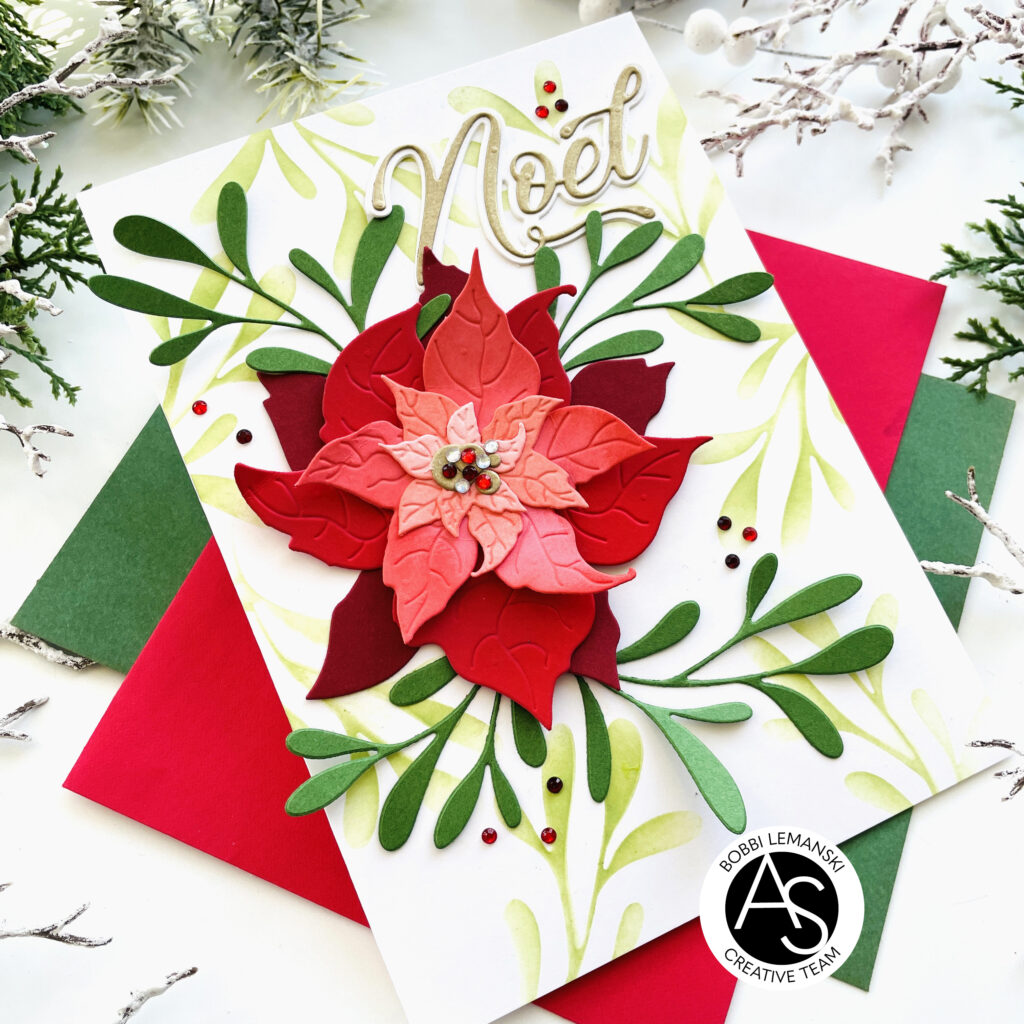
I die cut the layers of the poinsettia from various shades of red, starting with the bottom layer in the deepest shade and working up to the lightest pink shade. I used Distress Oxide inks in Worn Lipstick and Festive Berries to darken the edges and migrate the colors between layers. I attached the layers, adding a foam dot between the second and third layers to make the poinsettia more dimensional. I cut the berries in the set out of gold metallic cardstock and glued them to the center. I added gem stickers to the center for some sparkle.
I attached the mistletoe to the card front and layered the assembled poinsettia to the leaves.
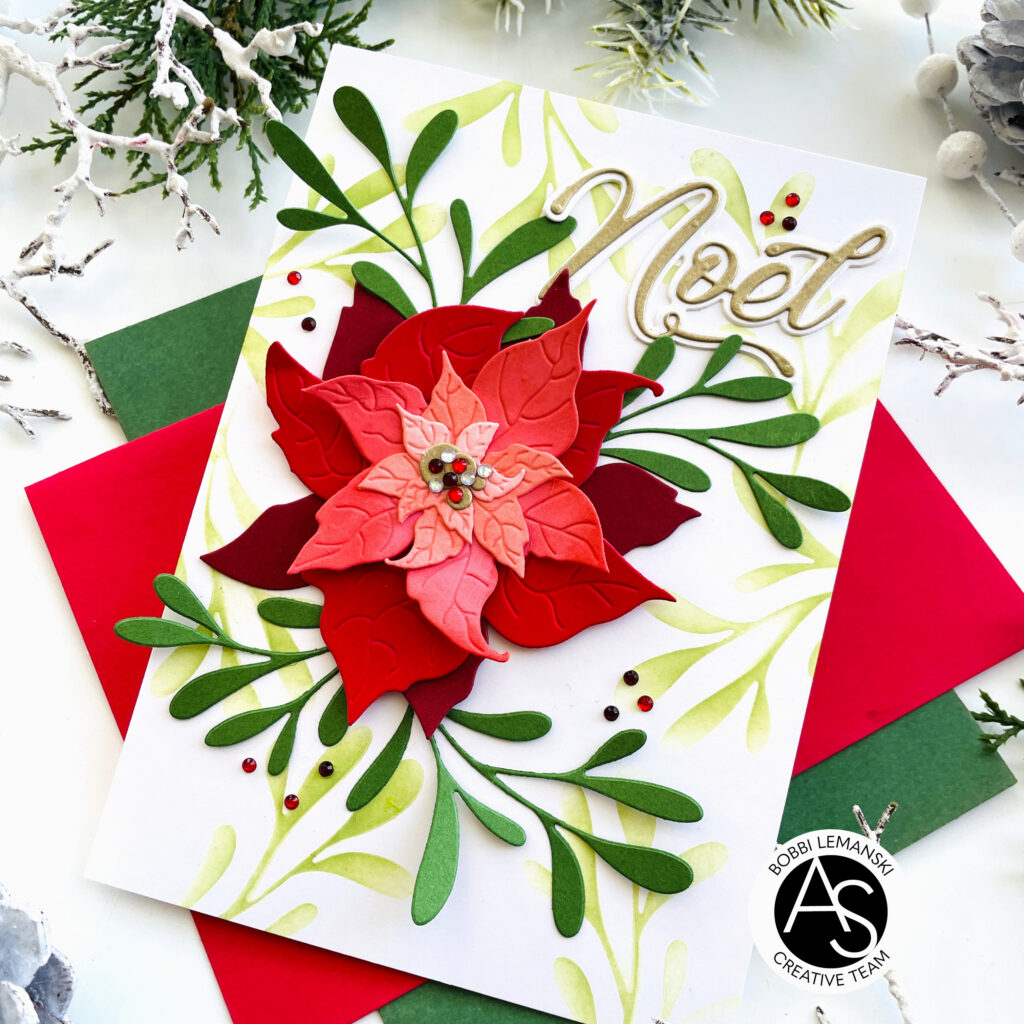
I die cut the two “noel” sentiment layers. I cut the top die out of gold metallic cardstock and the bottom shadow layer from white cardstock. I glued them together and attached the assembled sentiment to the top, right corner. I added additional gem stickers in shades of red around the poinsettia to complete the card.
Thanks for stopping by today. If you want to see more ideas and inspiration from me, subscribe to my blog, BobbiHartDesign.com. I’ll send you updates on new posts! You can also find me on Instagram as @BobbiHartDesign and on Facebook as BobbiHartDesign.


so lovely, I love that you used the die cut negative as a stencil
Beautiful pinks and reds!
The inking on the card adds so much. What a great idea! Definitely a technique for me to try going forward. Beautiful card!!
This is absolutely gorgeous! I adore the colour choices, and the mix of the poinsettia die cuts, and the stencilling is just brilliant ❤️🥰
A striking card. The colors are striking!
Beautiful card! Stenciling a background with the diecut negative is so creative.
Very pretty card. I love the mistletoe stenciled background you made using the negative die cut
I LOVE the background and stunning design!
Beautifully festive card!
Love all the detail here. Creative use of the die cut is inspired.
I love the poinsettia on this card, very nice design.
Gorgeous! Such a fresh, pretty card
Just adore this card!
Beautiful design! The Poinsettia is fabulous!
Beautiful, festive card 😍
What a beautiful Christmas card. Love the idea of using the negative sprigs to do the stenciling through it. I would not of thought of doing that. Thank you for the inspiration and tutorial you have done. X X
Wow! I love how your poinsettia turned out. They varying shades of red just make it so realistic!
Love your flower and the different colors for the layers
Fabulous traditional colours and I love how you’ve used different shades for the poinsettia.
Breathtaking! Love the traditional colors of the poinsettia.
Your card is beautiful. Love that poinsettia.
What a beautiful card. The poinsettia is perfect, especially with the shades of red and dimension.
Beautiful colors and layering! Gorgeous card with this awesome poinsettia flower!
Oh how beautiful! I love all of the layers of your gorgeous poinsettia!
Thank you for your inspiration Bobbi, such a gorgeous card. Love those layers so much and the stenciling through the negative element genius. Another one for my wish list which gets bigger every month. Such a beautiful Christmas card.
I love the traditional colors- beautiful design!
Just gorgeous. I love the variation of colour you used on your beautiful poinsettia and leaves. Thanks so much for the great inspiration!