

Hello Trinity friends! It’s Bobbi Lemanski here with a magical “congratulations” card fitting for the upcoming graduation season. My husband and I have twins that are graduating this June. I expect that we will be invited to many graduation parties in a few months so I’m stocking up on cards now.  I think this card will be a perfect graduation card for one of their friends. It offers a little unexpected element in the inside. I’m using the following Trinity Stamps products:
You’re Magic stamp and coordinating die set
Slimline Series: Stitched Strips die set
A Sentiment For (almost) Everything Stamp set
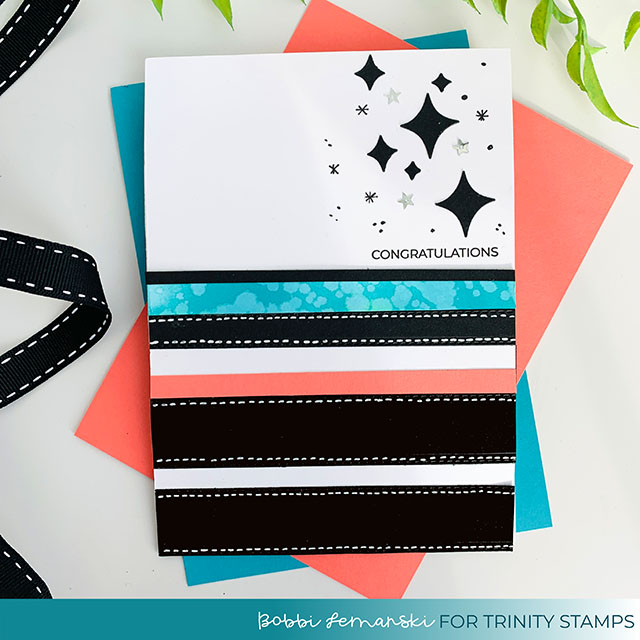
This 5″ X 7″ greeting card begins with a clean and simple front panel. I used the Slimline Series: Stitched Strips dies to make the wide and narrow strips on this top fold card. Before adding the teal strip, I brushed on Distressed Oxide Ink in Mermaid Lagoon and splattered water on it to make it splotchy. I added the distressed strip to the front.
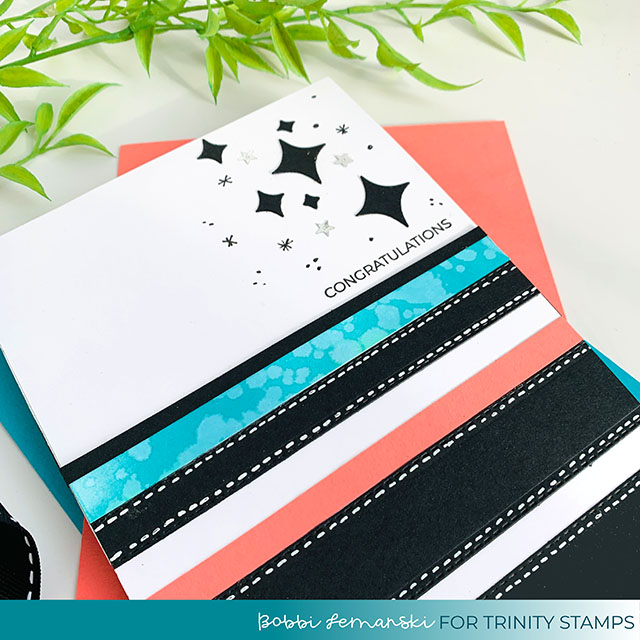
I wanted the stitching on the strips to stand out so I added faux stitches in white using my Uni-ball Signo white gel pen to the three wider black strips.
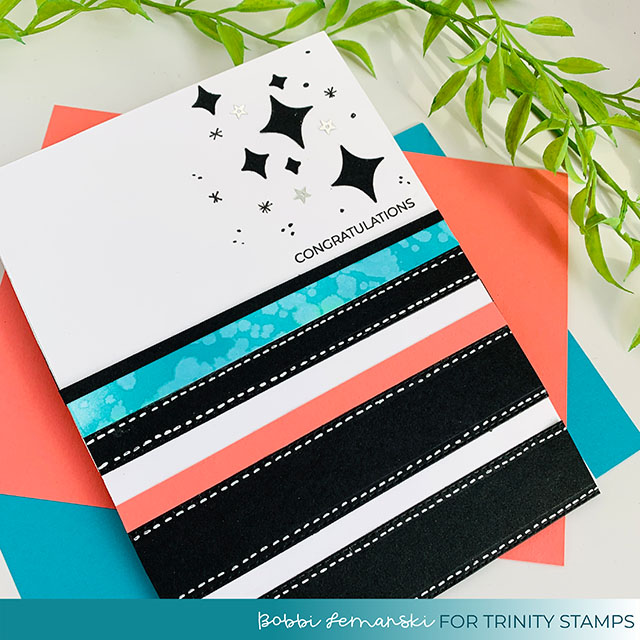
I stamped the word, “Congratulations” from the A Sentiment For (almost) Everything Stamp set and added the starburst die cuts from the You’re Magic coordinating die set. I also added silver metallic stars and random black dots to finish the front. The card front has a mid-century vibe with these diamond starburst shapes and the card’s colors.
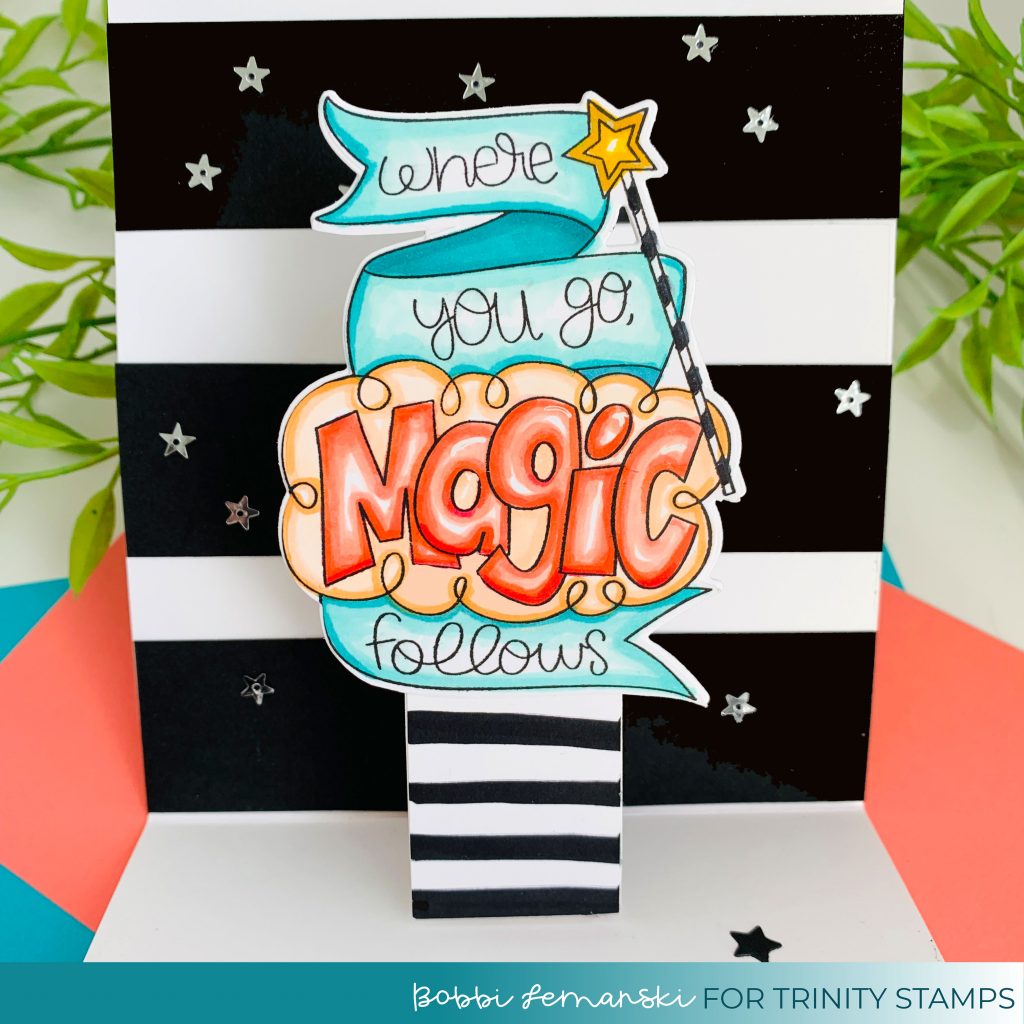
Inside the card, the image pops up and out for a bit of the unexpected. I stamped the image and colored it in Copics. I used BG09, BG23, BG11, YR000, YR00, R14, R22, R20, Y19, Y26 and 100. I die cut the design using the coordinating die.
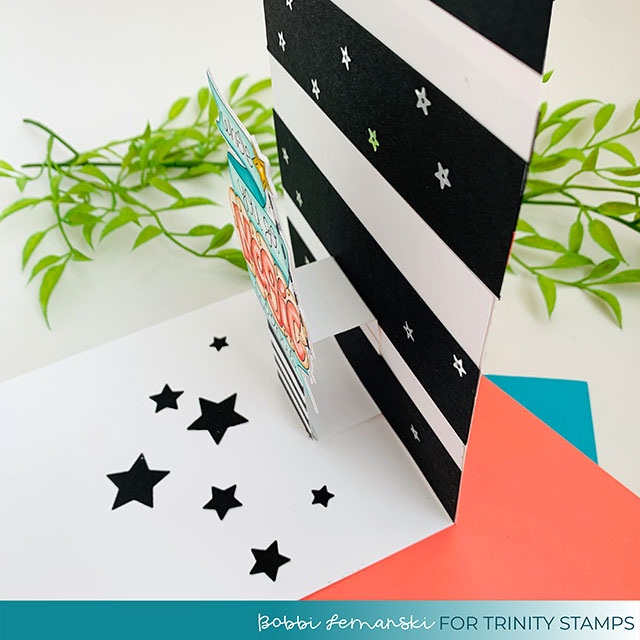
To create the pop-up feature, I first created the support box that the image is connected to on the inside. When the card is opened, the box is pulled up and out. I wanted the image to stand up higher since my card is 7″ tall so I made my support box taller, making sure my image would still tuck inside and be fully concealed when in the closed position.

To create the 2″ tall X 1″ deep X 1-1/4″ wide support box, I cut a strip of white cardstock measuring 1-1/4″ wide. Using my Scor-Pal, I scored the strip at 1″, 3″ 4″ and 6″ as seen in the photo above. I folded the score lines to form a box shape and adhered the ends together using double-sided, extra strength tape. Any extra strip was cut off. I wanted the front of the support box to be pretty since it would show, so I cut a 1-1/4″ wide X 2″ cardstock piece and hand drew black lines on it. This was adhered to the front of the box before I added the magic die cut.
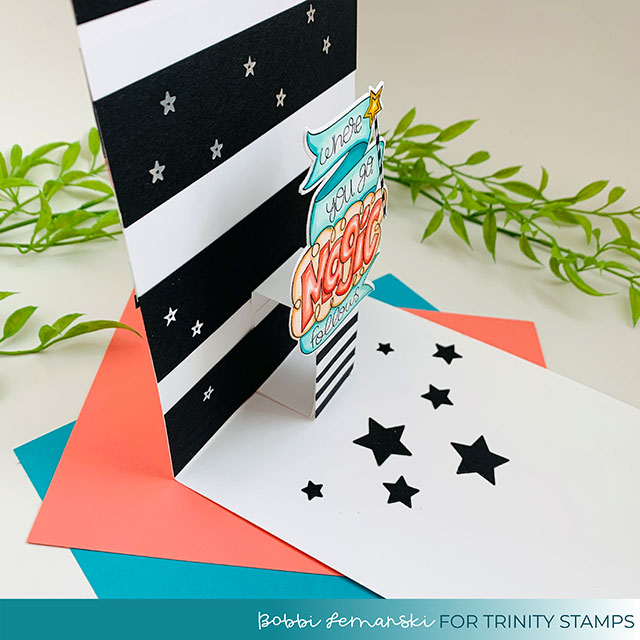
The box was positioned in the center and at a right angle to the interior panels and attached on the bottom and on side of the box to the interior card panels using Scor-Pal double-sided tape. Black wide stripes were added to the backdrop with the bottom strip concealing part of the box behind it. Silver stars were glued on the black to match the card front. I also added black stars to the bottom of the pop-up to complete this 5″ X 7″ interactive card.
You can shop all the Trinity Stamp products here. If you decide to place an order, please use the links in this post so that Trinity Stamps knows what inspired you today!
Thanks for stopping by today. If you want to see more ideas and inspiration from me, subscribe to my blog, BobbiHartDesign.com. I’ll send you updates on new posts! You can also find me on Instagram as @BobbiHartDesign and on Facebook as BobbiHartDesign.
Bobbi Hartmann Lemanski, Bobbi Hart♥ Design, Adding h♥art into every design


