
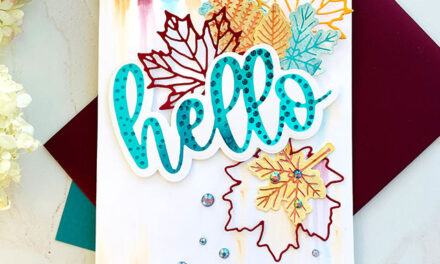
Hello SCT friends! It’s Bobbi Lemanski here from BobbiHartDesign.com (Instagram: @BobbiHartDesign). I’m guest designing on the blog today and have a fun card to share with you. My card was inspired by one of the PageMaps sketches in the recent Winter 2021 issue. Using one of the sketch layouts, I added a slight twist to the card by including an interactive, hidden message. I guess you could say I made this square card, a little more hip! 🙂
I’m using the following Honey Bee Stamps products on my card:
Lovely Layers: Roses Honey Cuts
Rooting for You stamp set and coordinating die cuts
Stitched Scallop Circles Honey Cuts
One-of-a-Kind stamp set (for “push” word, only)
How to Make a Square Card More Hip
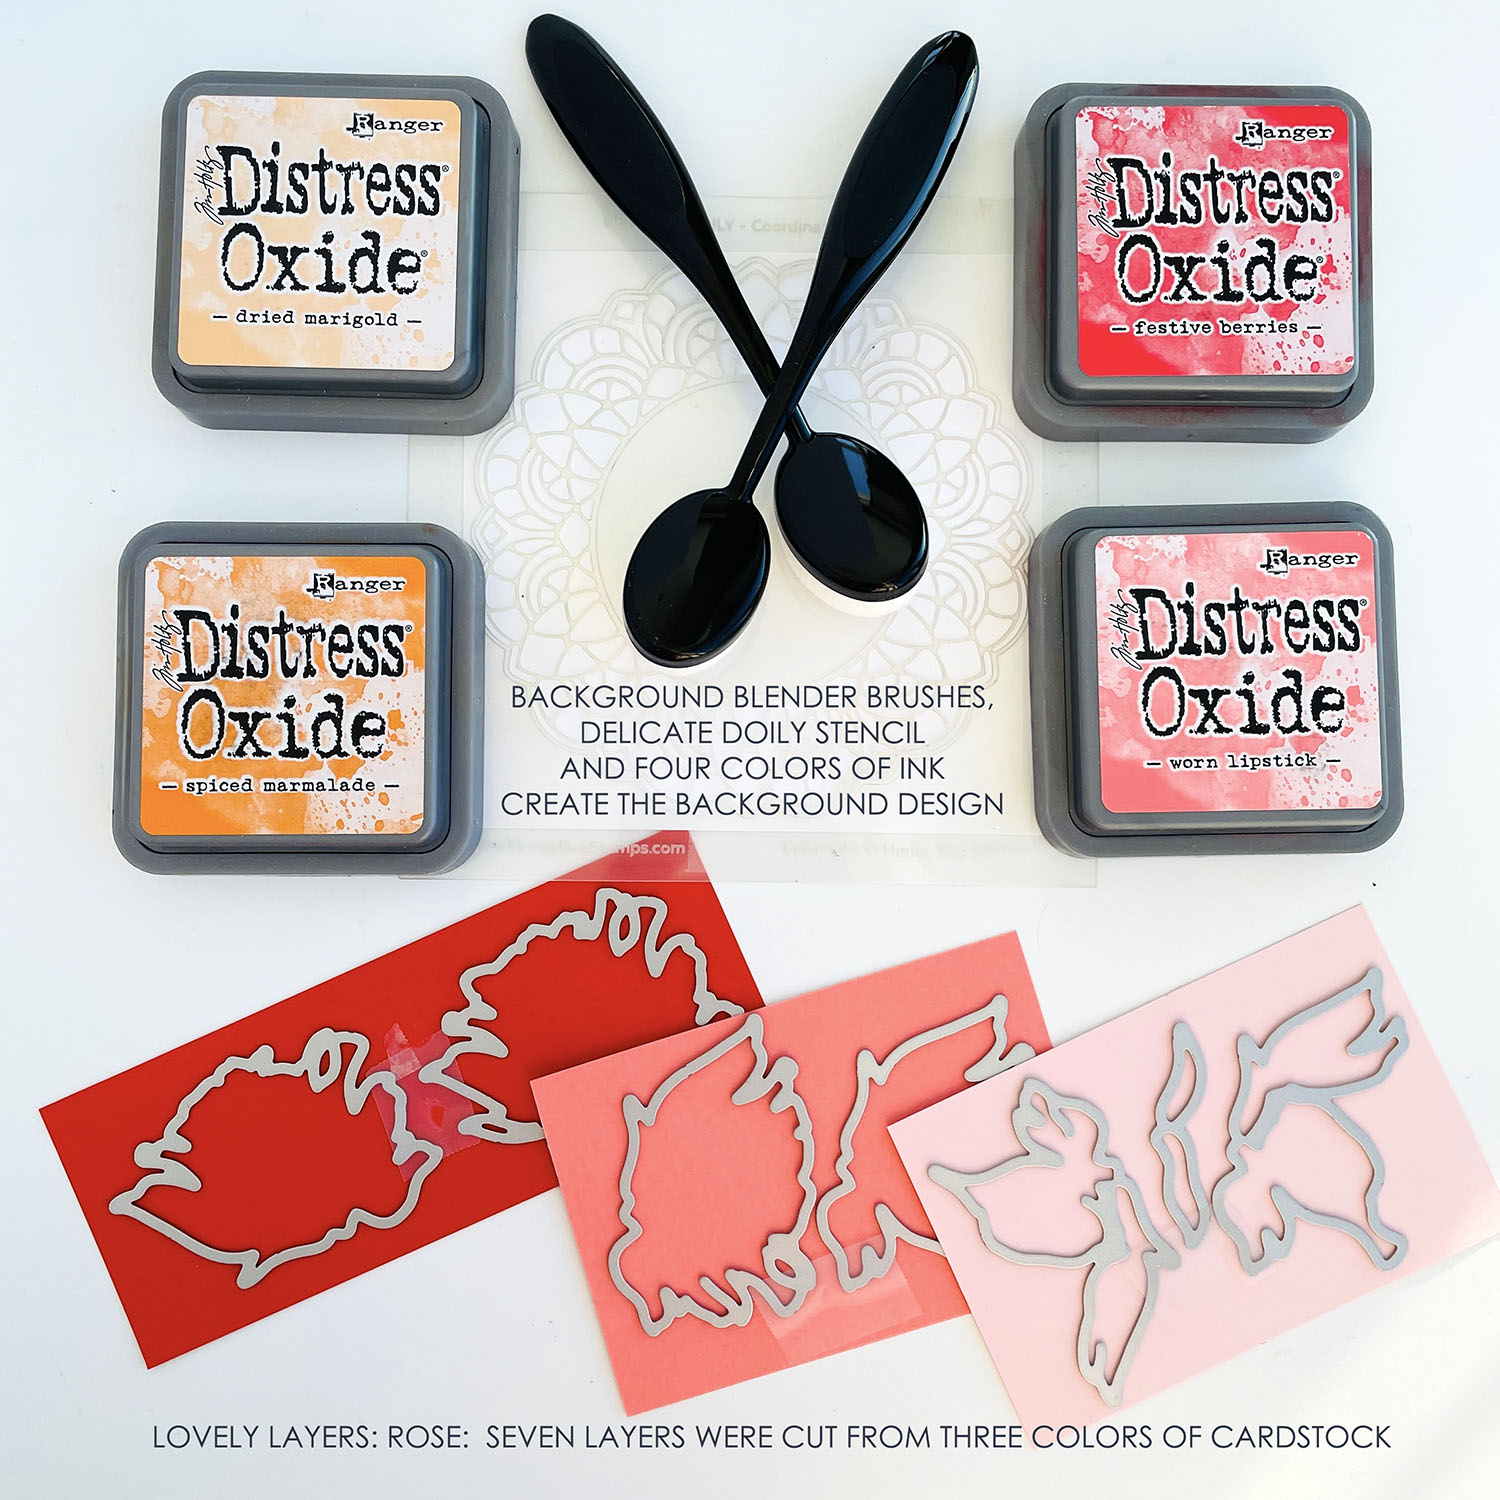
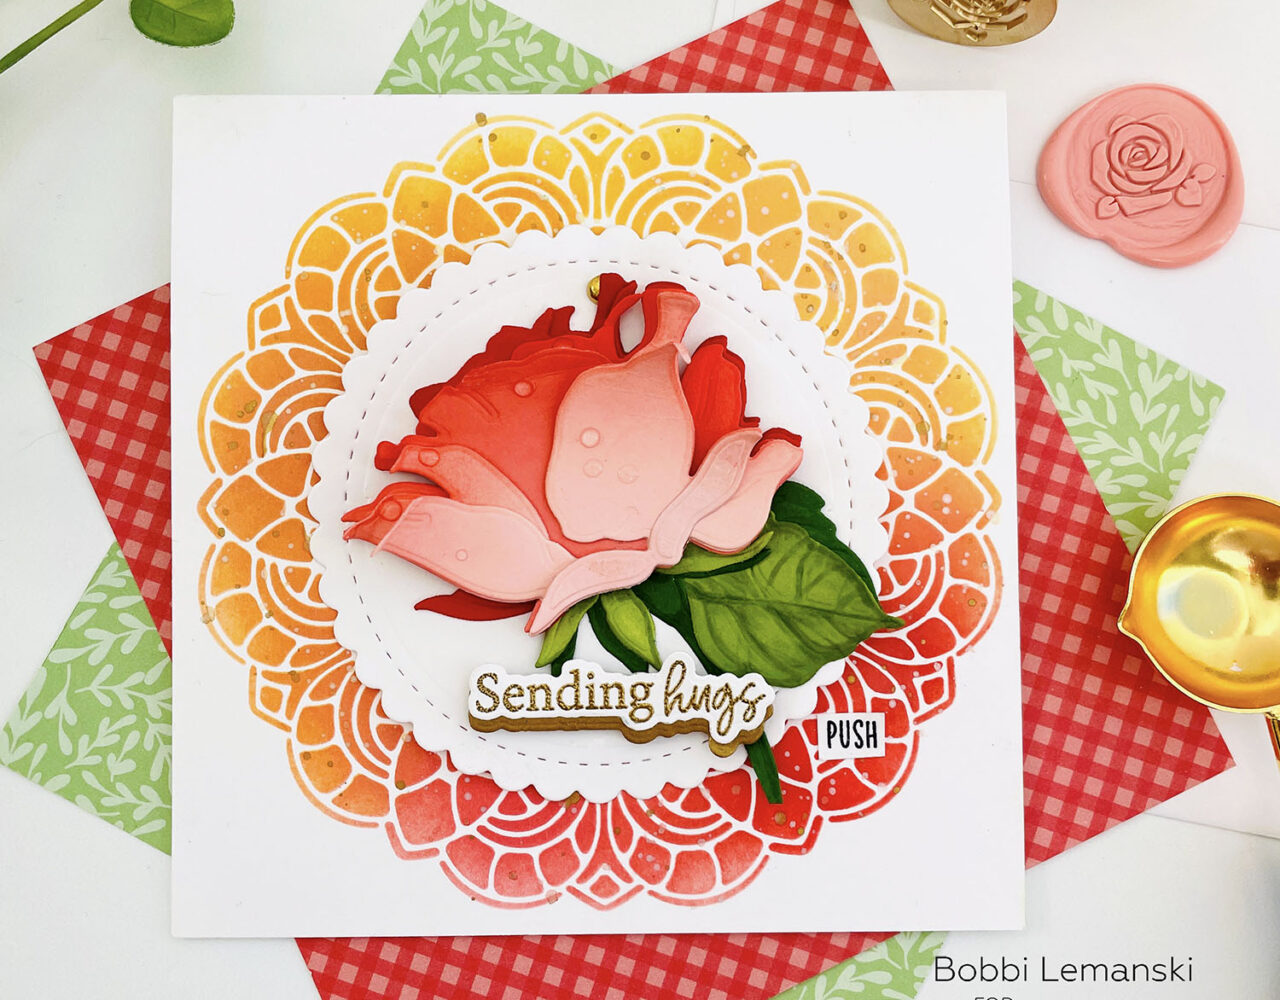
To make this 5″ X 5″ card, I started with a card base (cut 10″ X 5″ and scored down the center) and separate card front panel (cut 5″ square) made from Neenah 80lb Solar White cardstock. On the card front, I ink-blended four Distress Oxide Ink colors – Worn Lipstick, Festive Berries, Dried Marigold and Spiced Marmalade – over the Delicate Doily Stencil using my Background Blender Brushes. Colors were overlapped to create this continuous, colorful, circular, doily design on the card front. I also flicked on some gold metallic watercolor paint over the ink, while the stencil was still intact, for an elegant look.
Next, I die cut the layers of the rose using three colors of cardstock. The first two layers were cut from a poppy red color, the next two from the a coral and the final three of the seven rose layers, from a light pink.

I added some deeper tones to the edges of the petals using Festive Berries and Worn Lipstick. All seven layers were glued together using Honey Bee’s Easy Squeeze Precision Tip Glue. A few drops of Glossy Accents on the rose petals adds the look of realistic dew drops. I used two colors of green for the stem and leaves, layered them together, added a little shading with Copics in YG67, YG63 and YG61, and attached to the rose.
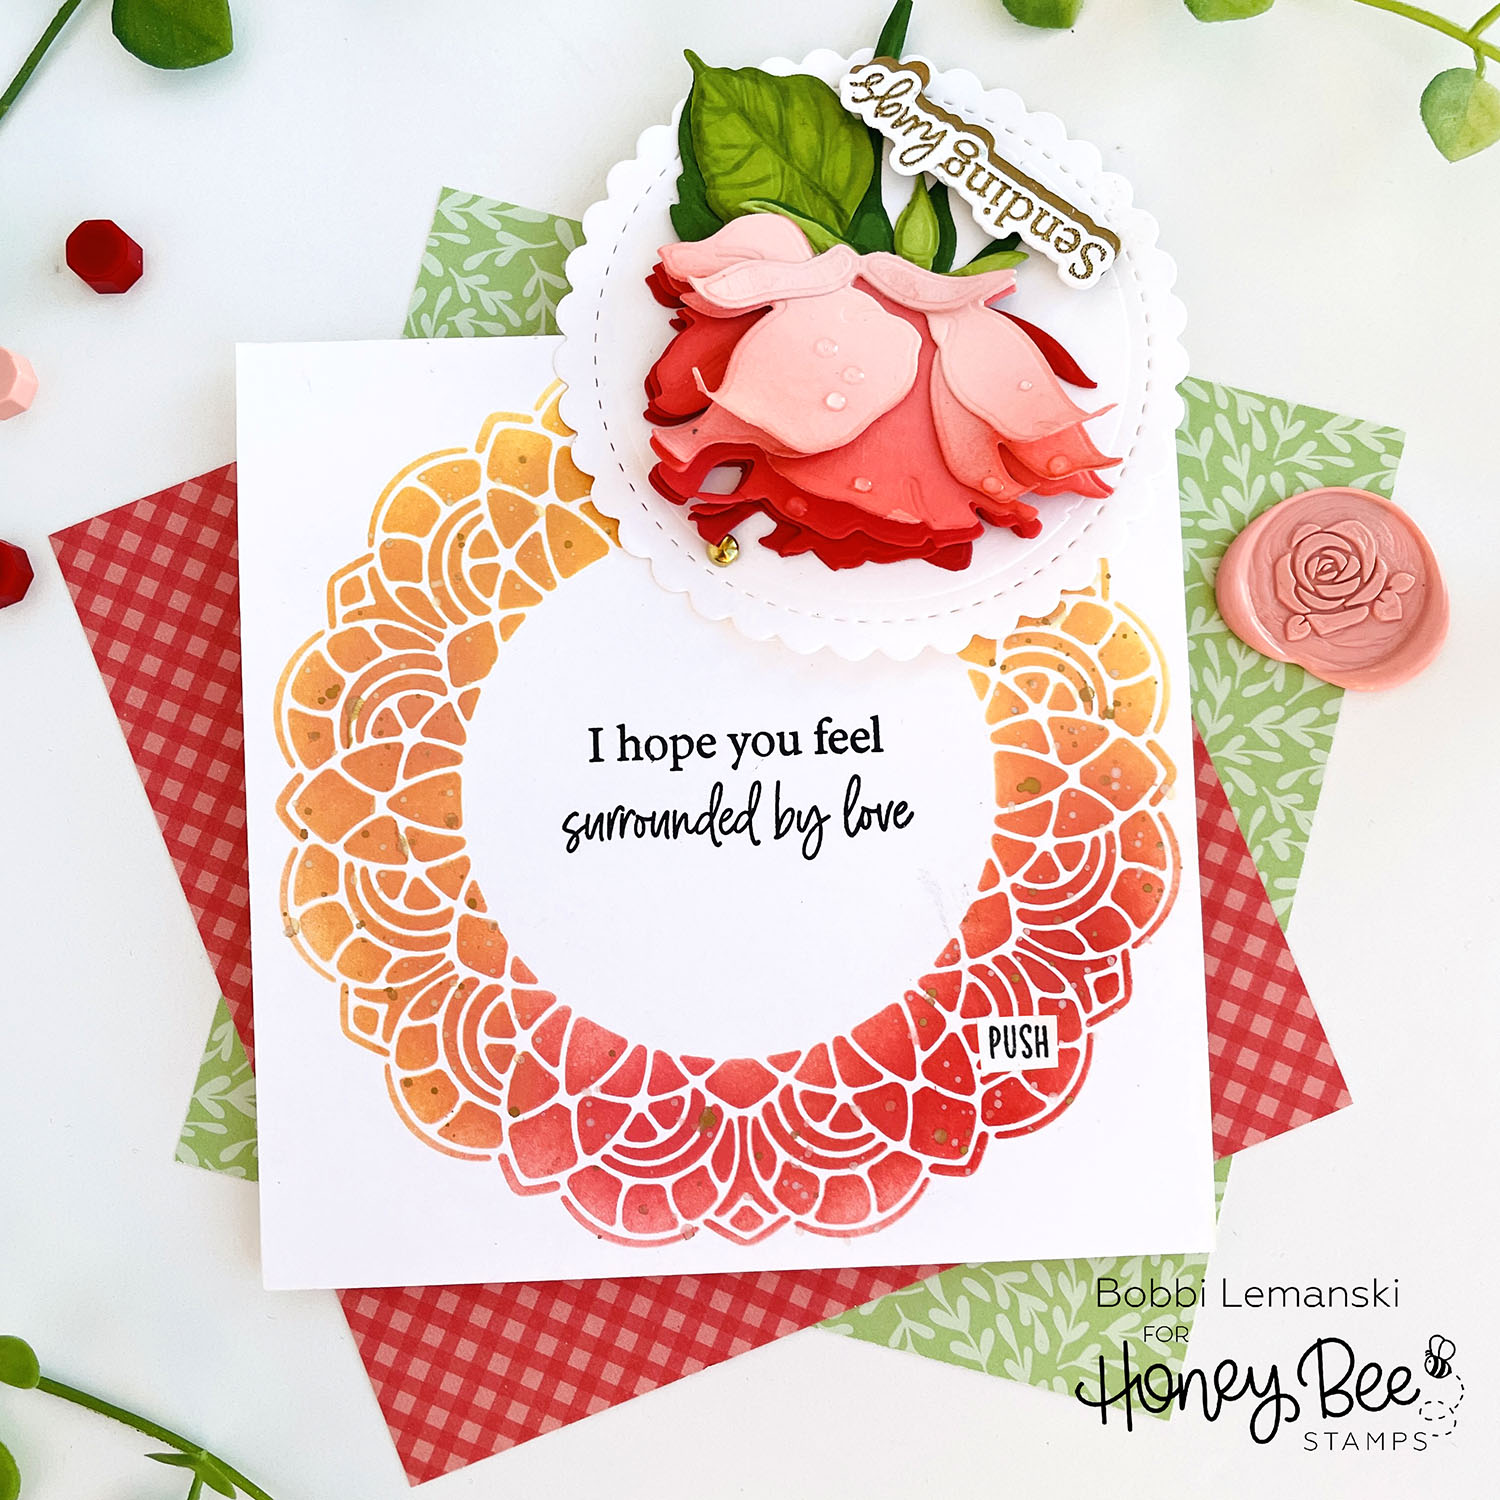
I stamped a phrase “I hope you feel surrounded by love” from the Rooting for You stamp set in the center of the doily design using Honey Bee’s Intense Black Ink. This will be the hidden message. I love that it is “surrounded” by this delicate design to fit the saying.
To create the hidden message, I die cut the middle size stitched scallop circle of the Stitched Scallop Circles dies out of Neenah Solar White cardstock and attached the rose, leaves and stem to the center of the die cut circle. I lined up the circle and card front panel to make sure the circles were stacked, and punched a small hole at the top of both. I added a mini gold brad with circular paper “washers” between layers (this helps the scallop circle to move with ease) and attached the circle, making sure to hide the stamped phrase. To ensure the recipient finds the message, I added the word, “push” next to the overhanging stem. A simple push of the stem reveals the message!
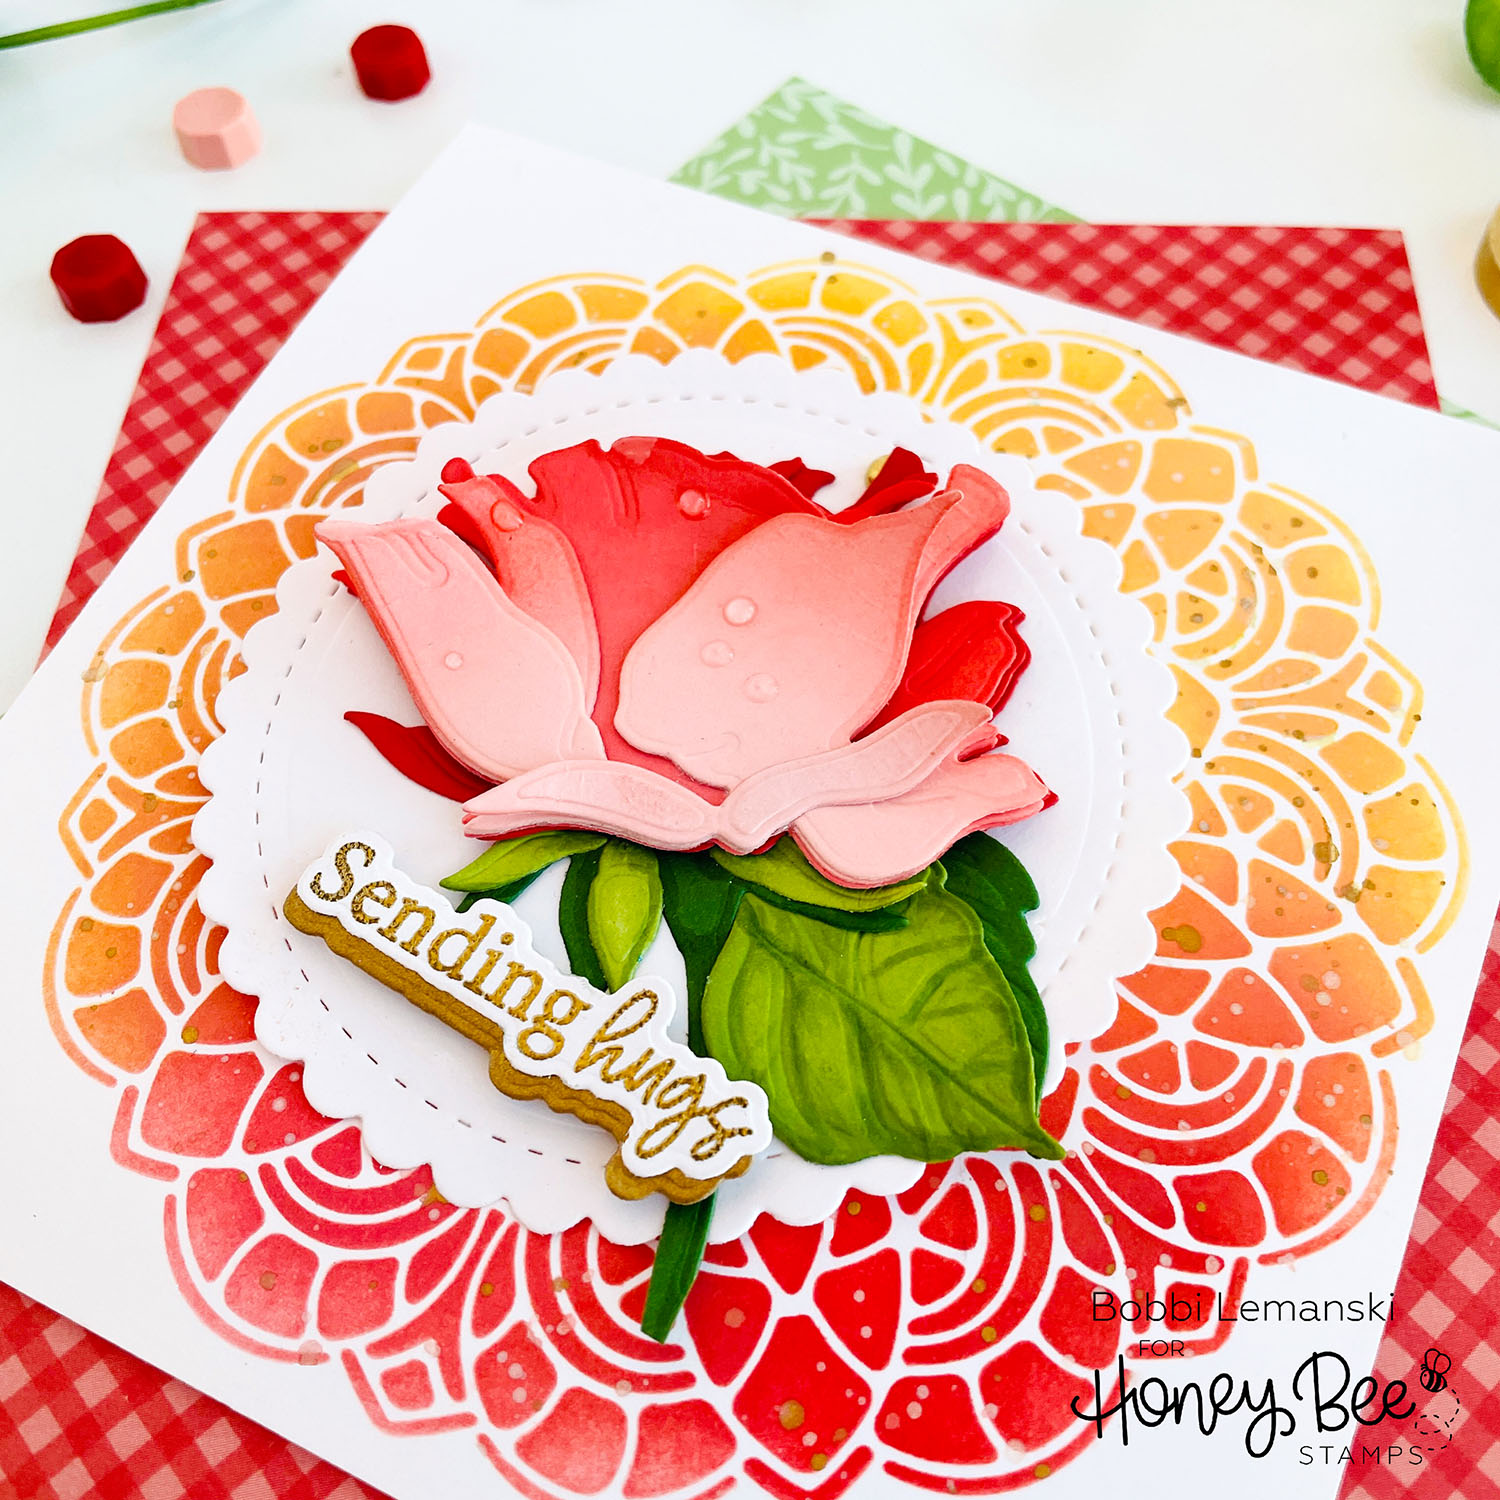
For the card front phrase, I stamped and embossed in gold, the “sending hugs“ phrase from the Rooting for You stamp set and die cut it using the coordinating die. I added a metallic gold die cut shadow to the phrase to make it stand out and attached the whole piece to the scallop circle, right below the rose. I used Scrapbook Adhesive foam tabs to attach it for dimension. Now my card has all the elements of the sketch, including the phrase.
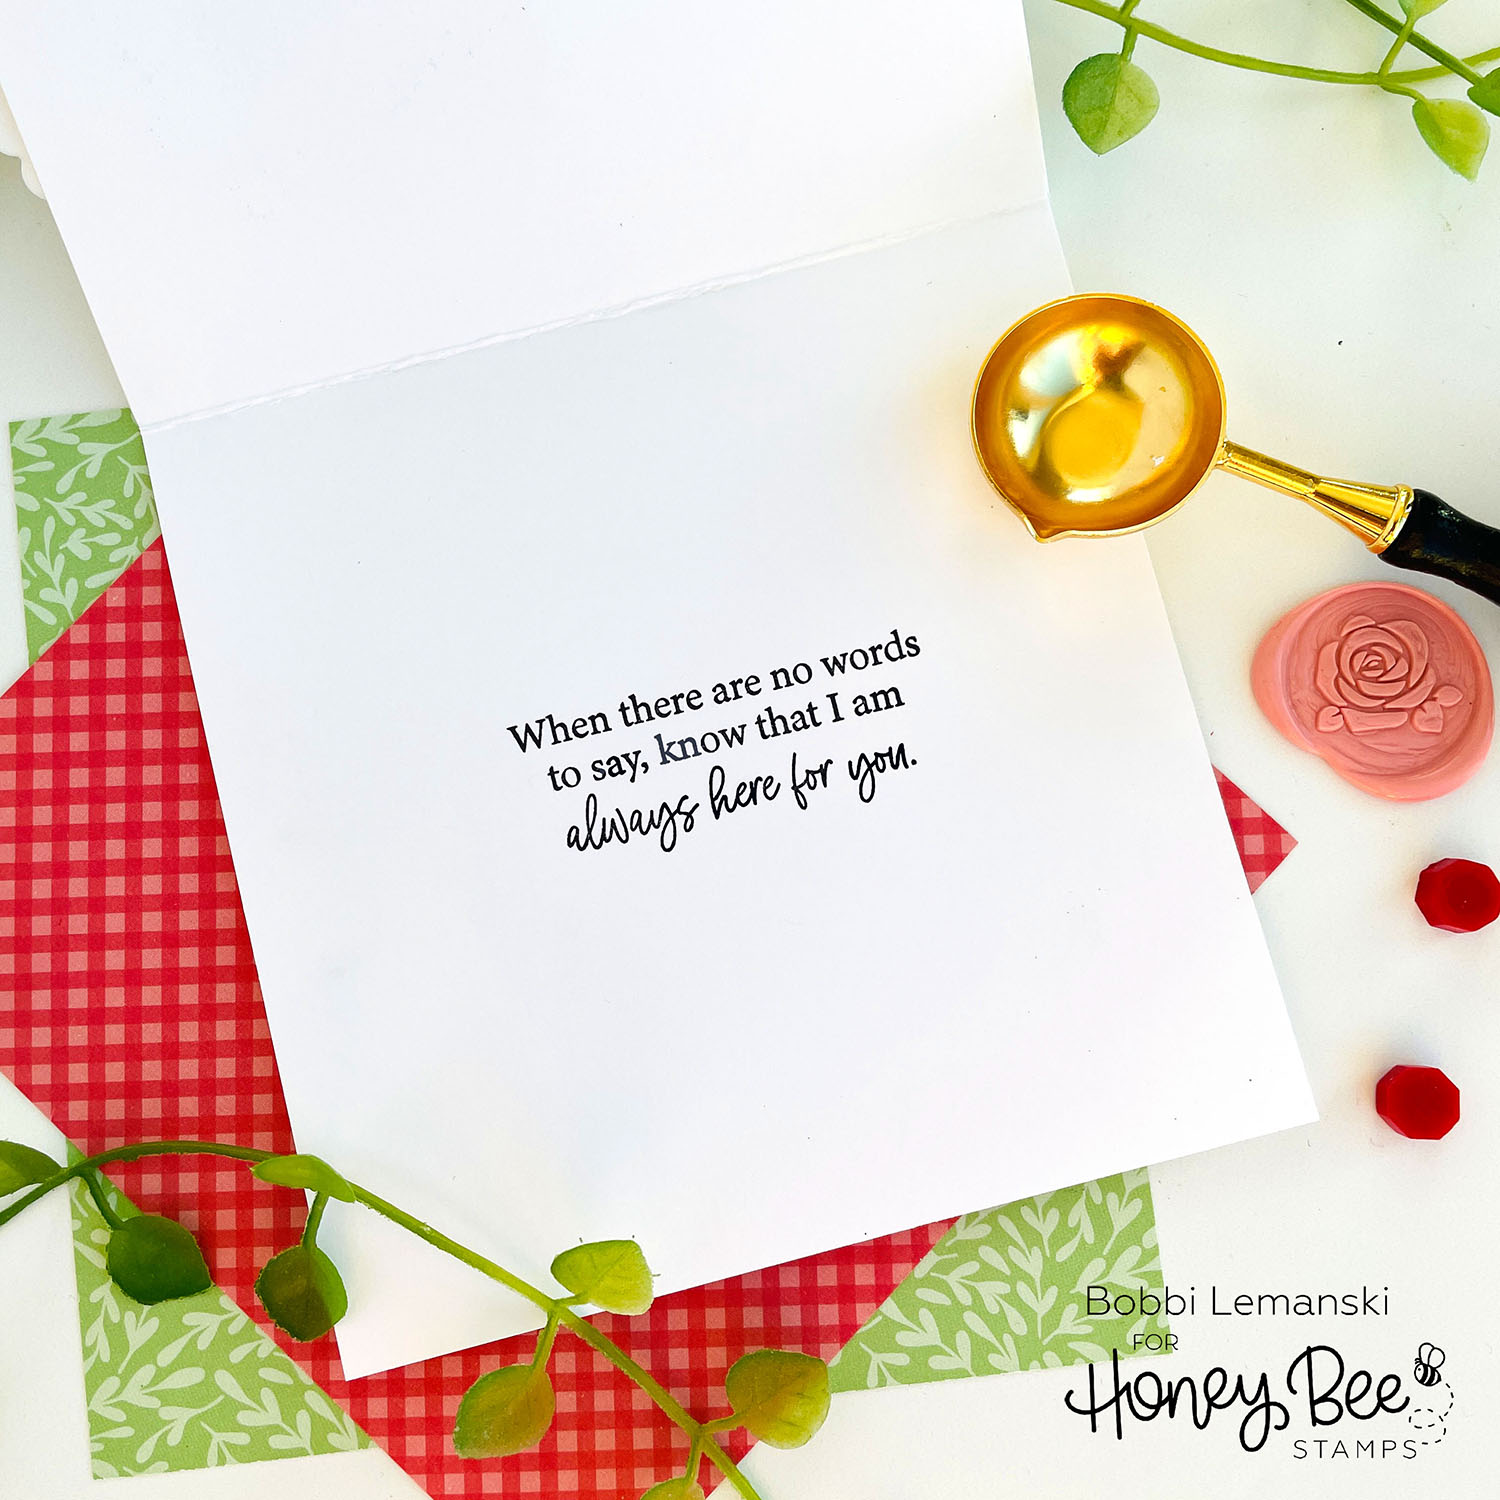
I stamped another phrase, “When there are no words…” from the Rooting for You stamp set inside the card base. I attached the card front to the base to complete this square card.
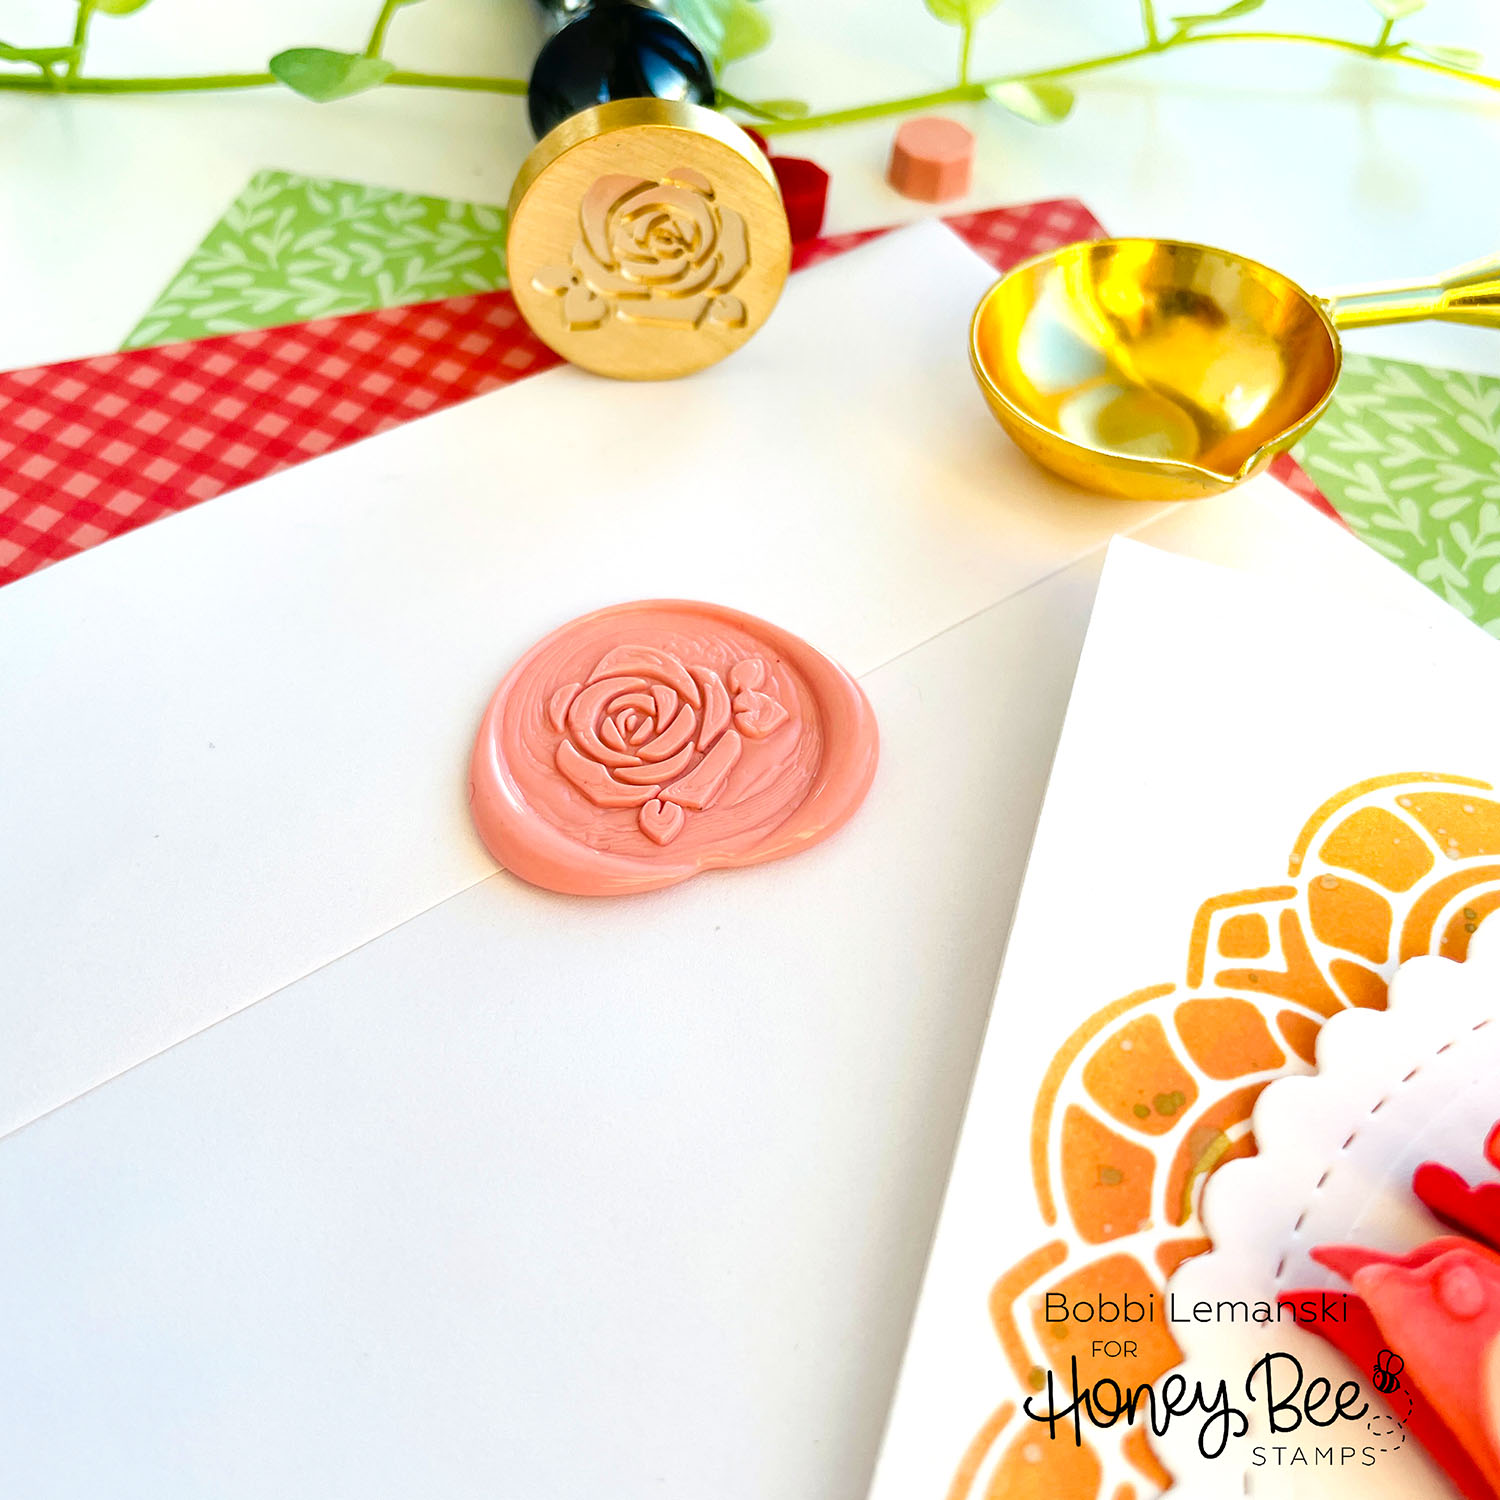
To “seal the deal,” I will create a wax seal (as shown) to add to the outer envelope flap when I am ready to send. I am using the new wax seal products included in the Sealed With Love Wax Kit Bundle. I melted three pink melts from the Honeycomb Wax Melts – Hugs & Kisses using my Wax Melting Spoon over a candle. I poured the wax out on my craft mat (Note: I will pour the wax directly on the envelope flap when I am ready to mail the card.) I stamped the rose design using the Wax stamper – Rose into the wax and waited a bit for it to set. The design is beautiful and the perfect unexpected and elevated touch to this rose card!
It’s time to make your square cards more hip!
I hope you give this hidden message idea a try. It’s an unexpected twist to the basic square card. It’s also a great way to conceal a personal or really gushy message like “I love you,” too! Try it on your really gushy valentines next month!
Thanks for stopping by today. If you want to see more ideas and inspiration from me, subscribe to my blog, BobbiHartDesign.com. I’ll send you updates on new posts! You can also find me on Instagram as @BobbiHartDesign and on Facebook as BobbiHartDesign. Love and Hugs, Bobbi


