
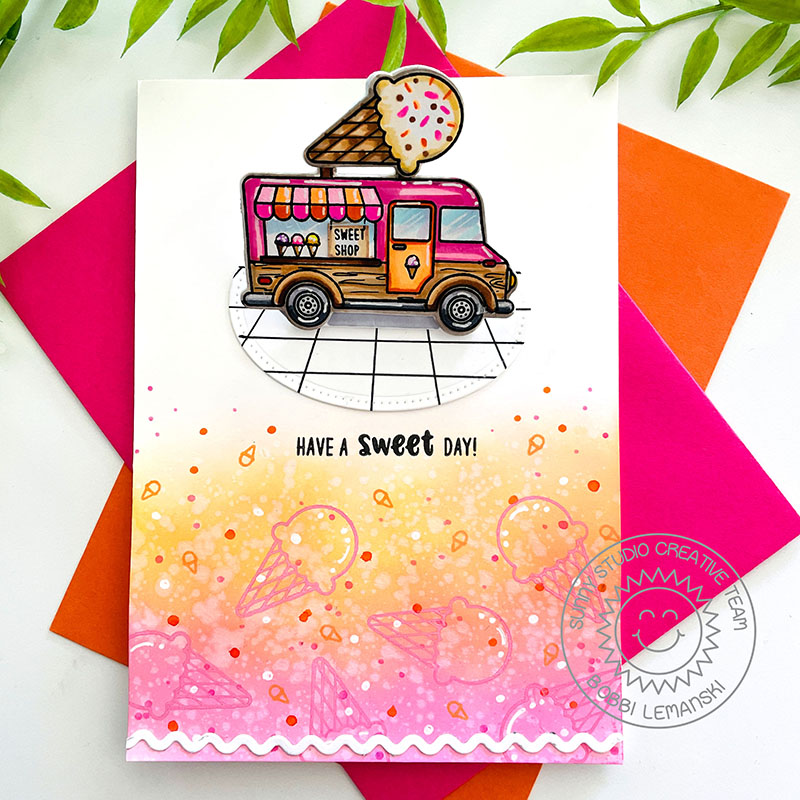
Hello friends. It’s Bobbi Lemanski sharing a card using a really cute stamp set from Sunny Studio Stamps called, Cruisin’ Cuisine stamp set and coordinating dies. My card features a pop-up truck on the card front for a little fun. It puts the truck in an upright position, on a concrete patio, ready to sell some sweet cream treats!

To make this 5″ X 7″ card, I used Neenah 80lb card stock for the card base, front panel, truck, cone and back support. I stamped the truck and cone using black ink and die cut the designs. I die cut another set of the two cuts out of white cardstock to finish the back side with clean white cardstock. (The back side shows when the truck is upright.) This extra backing also helps to make the truck more sturdy, too. The ice cream cone was glued to the top of the truck.
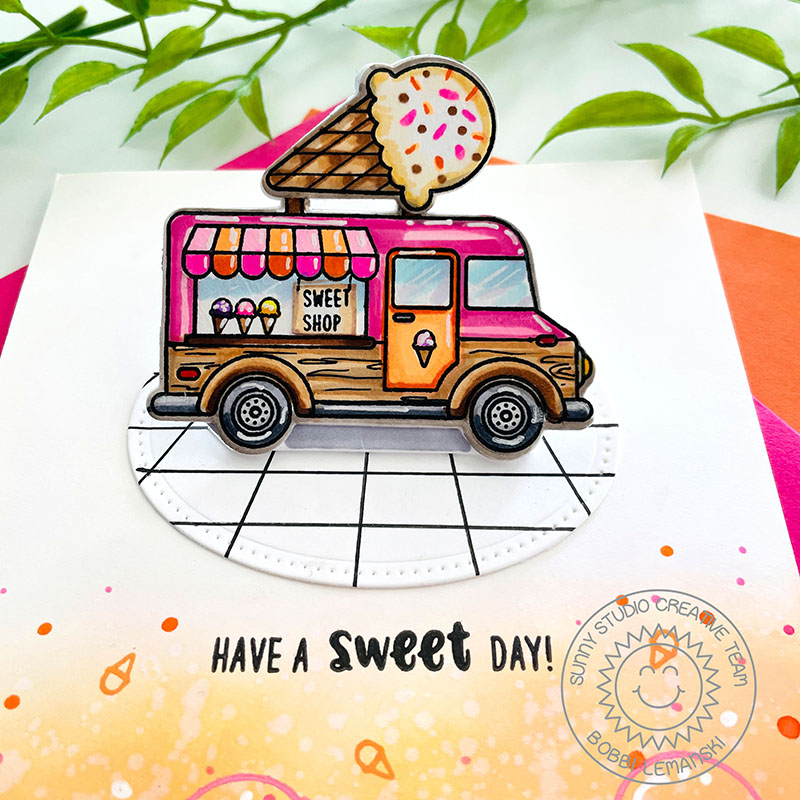
I colored the images using the following Copic Marker colors:
- Truck: YR69, FR01, RV55, RV02, E57, E55, E53, 100, C08, C05, C01, BV000, B00, W4
- Ice Cream Cone: E57, E55, E53, YR31, YR30, RV55, YR68, E47, W4
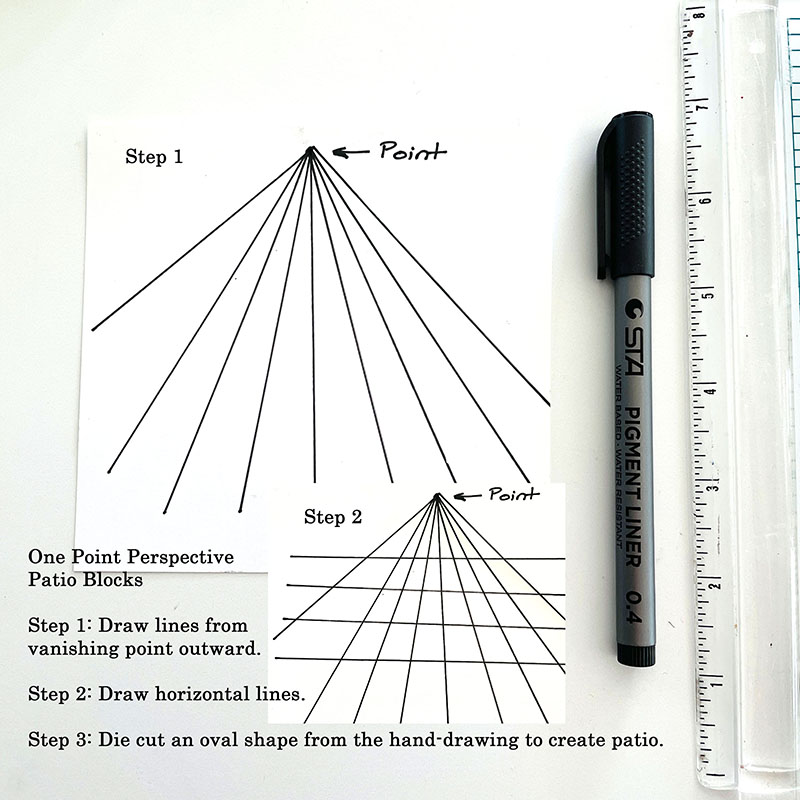
To make the concrete patio, I completed steps 1 and 2 (above) then die cut an oval shape from the hand-drawn block patio to place under the truck. This design is clean and simple and grounds the truck on the card. I kept it simple, in black and white, only. I like the contrast with the very colorful truck and cone.
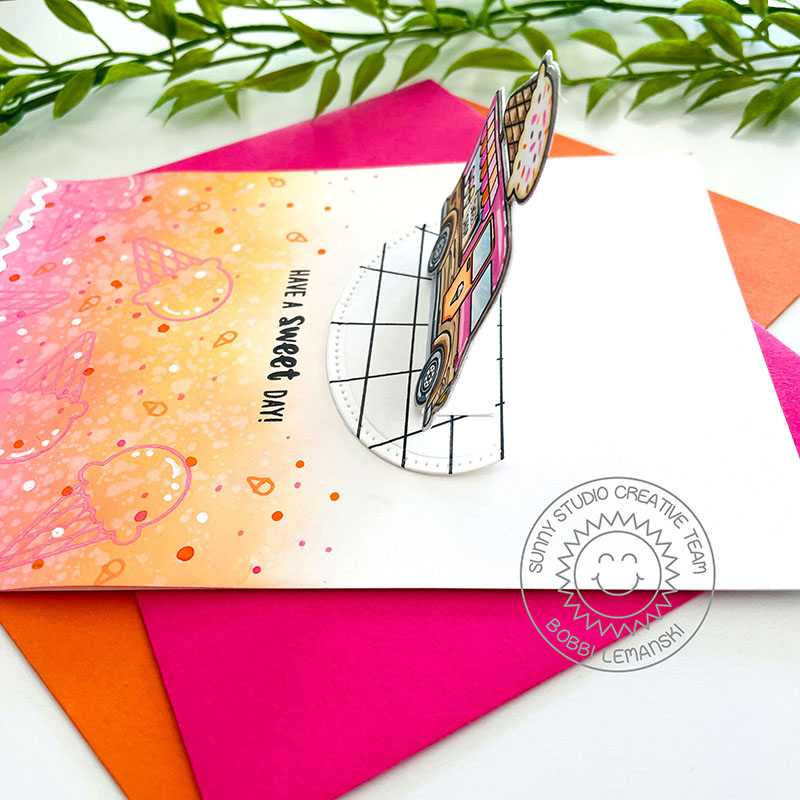
I cut the top off the oval and attached it to the card front. I created a 1.5″ wide support strip and scored it down the middle and attached 1/2 of the support to the back of the truck and the other 1/2 to the concrete oval. The truck naturally wants to spring up on the hinge, but it still folds flat down to tuck inside an envelope for mailing.
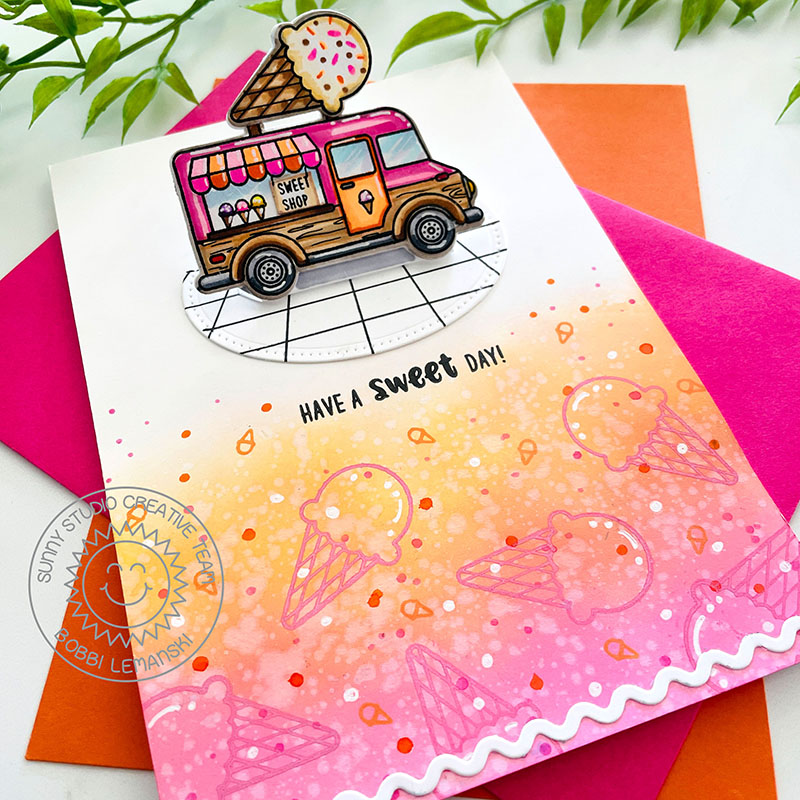
On the bottom of the card front, I sponged on Distress Oxide Ink in Kitch Flamingo and Carved Pumpkin. I splattered water over the ink and blotted it dry with a paper towel. I stamped the cone images over the top in Kitch Flamingo and Carved Pumpkin once it was dry. Next, I added dots using Copics in YR68, RV55 and a white gel pen. I stamped the phrase on the front in black. An Icing Border die design, cut from white cardstock, was added to the bottom. I attached the card front to the card base to complete the card.
Thanks for stopping by today. If you want to see more ideas and inspiration from me, subscribe to my blog, BobbiHartDesign.com. I’ll send you updates on new posts! You can also find me on Instagram as @BobbiHartDesign and on Facebook as BobbiHartDesign.


