
 Hi friends. I am participating in an Instagram hop to celebrate the new release, “Make It Merry” by Honey Bee Stamps. Hop along with us on Instagram for a chance to win prizes. Like, leave a comment and follow each designer on the hop and you could win one of TWO $50 Gift Cards to the Honey Bee Stamps store! You have until 11/5 to leave comments. Winners will be posted on the Honey Bee Stamps Instagram account.
For my hop project, I chose the following new sets to share for my project today:
Polar Pals stamp set and coordinating dies
Foil Script: Holiday Hot Foil Plate and Honey Cuts
I am also using the following products from prior releases:
Fancy Flakes A2 Cover Plate die
Pierced Fancy Flakes Cover Plate die
The featured project below is made from Neenah 80lb Solar White cardstock for the card base and card front panel. All of the black ink stamping was done using Honey Bee’s Bee Creative Intense Black Ink. I use Honey Bee Stamps Bee Creative Precision Glue for adhering my elements together. My card is 5″ X 7″ in size.
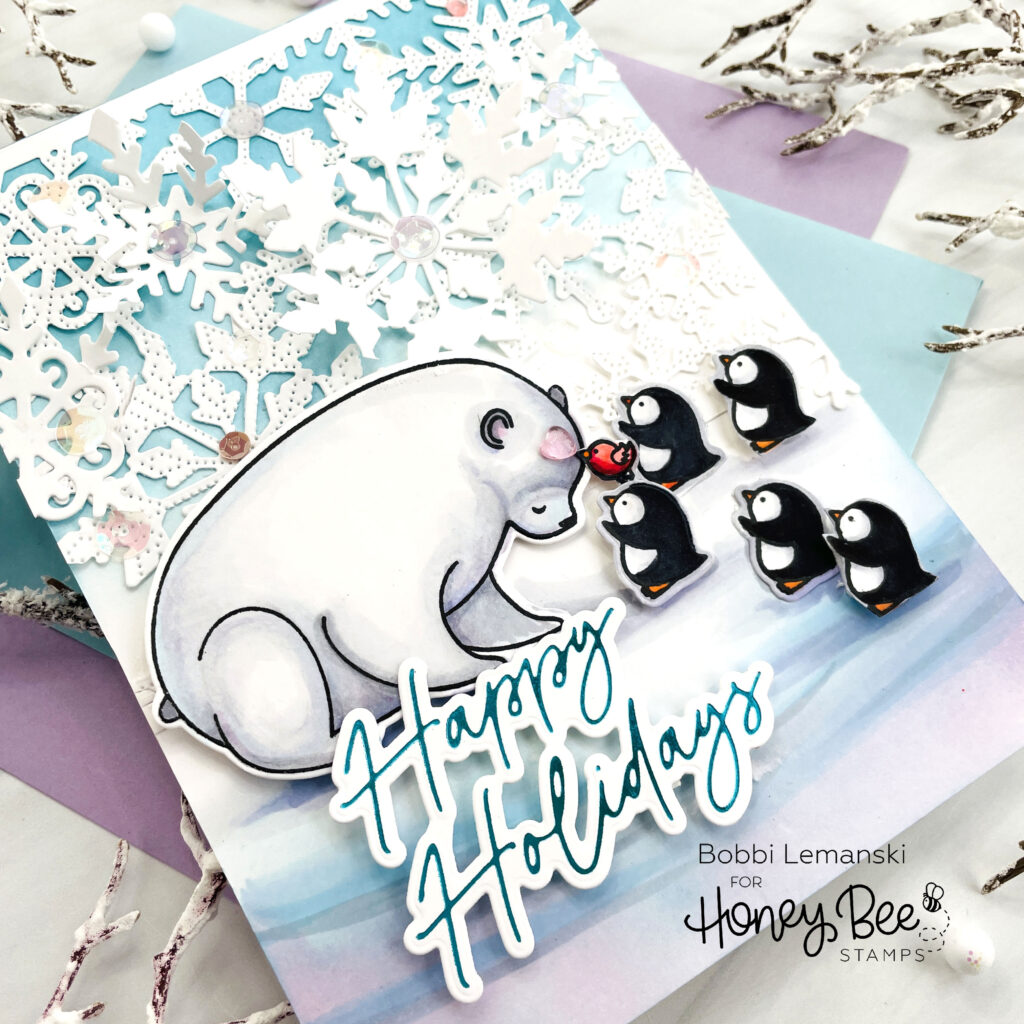
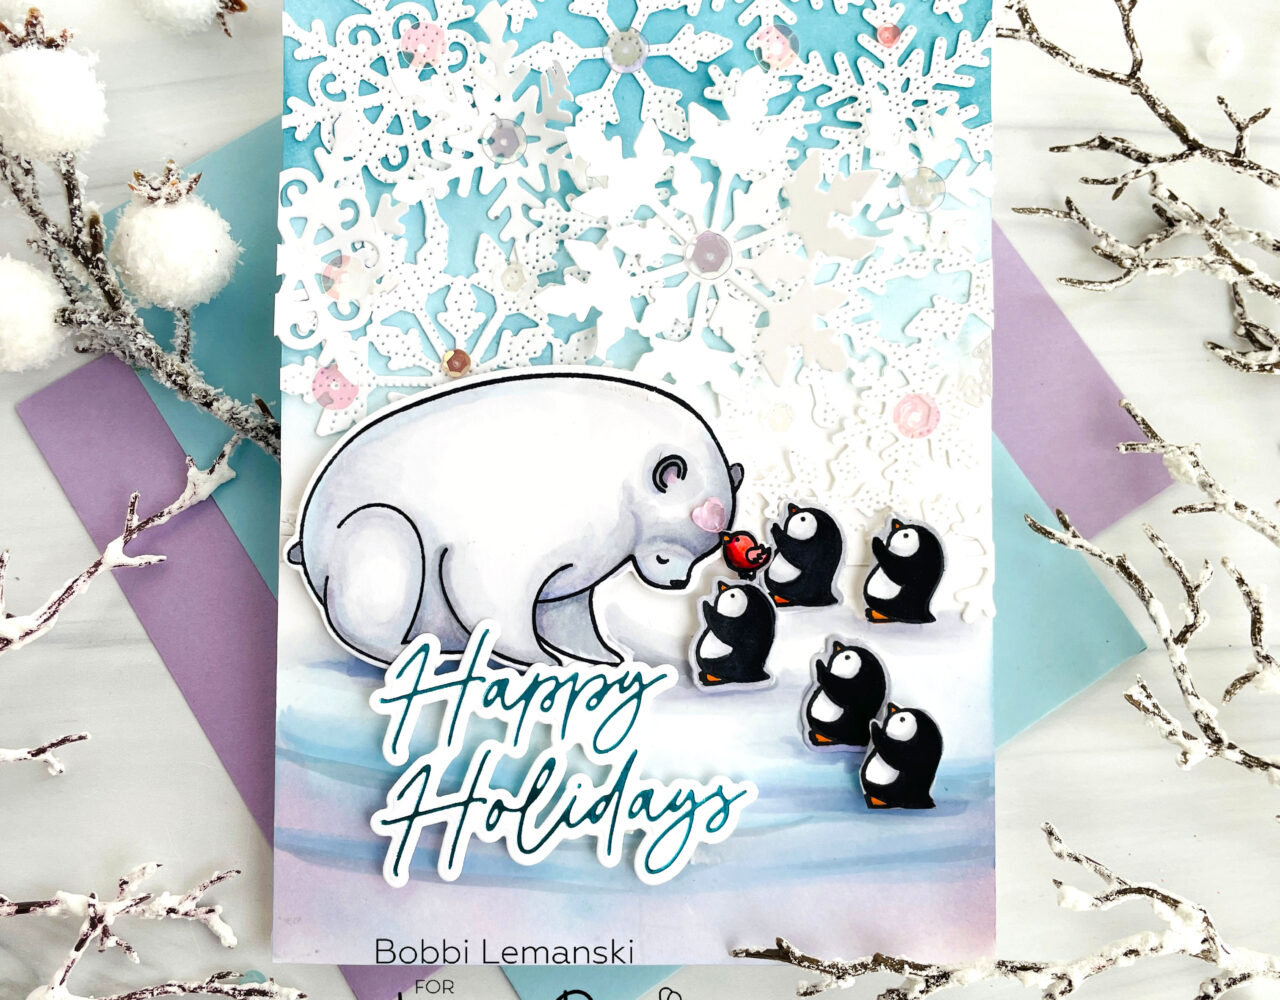
To make this A7-sized card, I stamped and colored in the animals. I used the following Copic colors for:
- Polar Bear and landscape: C3, C1, BV000, BV00, BV01, B000, B00
- Penguins: 100, C8, C7 C1, C00
- Bird: R89, R29, R14
I cut all the animals out using the coordinating dies and set them aside. I foiled the “Happy Holidays” sentiment in a teal foil using my Spellbinder Glimmer Hot Foil System and cut that out as well with its matching die.
I used the same colors listed above for the Polar bear to create some snowy landscape at the bottom of the card front panel. For the top, I used my Blender Brushes to blend on Tumbled Glass and Broken China Distress Oxide ink, belnding down about 3″ from the top. The middle stayed white.

I die cut the white snowflake layer using the Fancy Flakes A2 Cover Plate die and ran it through the machine with the the Pierced Fancy Flakes Cover Plate die. I layered the pierced flakes over the sponged top half (applying in a landscape orientation) and glued it in place using Bee Creative Precision Glue. The side edges were trimmed down to the 5″ panel width. The animals were set in place near the middle of the card. I used Scrapbook Adhesives .25 Foam Squares in white to attach the polar bear, two penguins and the foiled sentiment to make them stand out. The polar bear is sitting 5″ down from the top of the card for placement. Sequins glued on the snowflakes in iridescent pink and lavenders finished the front.
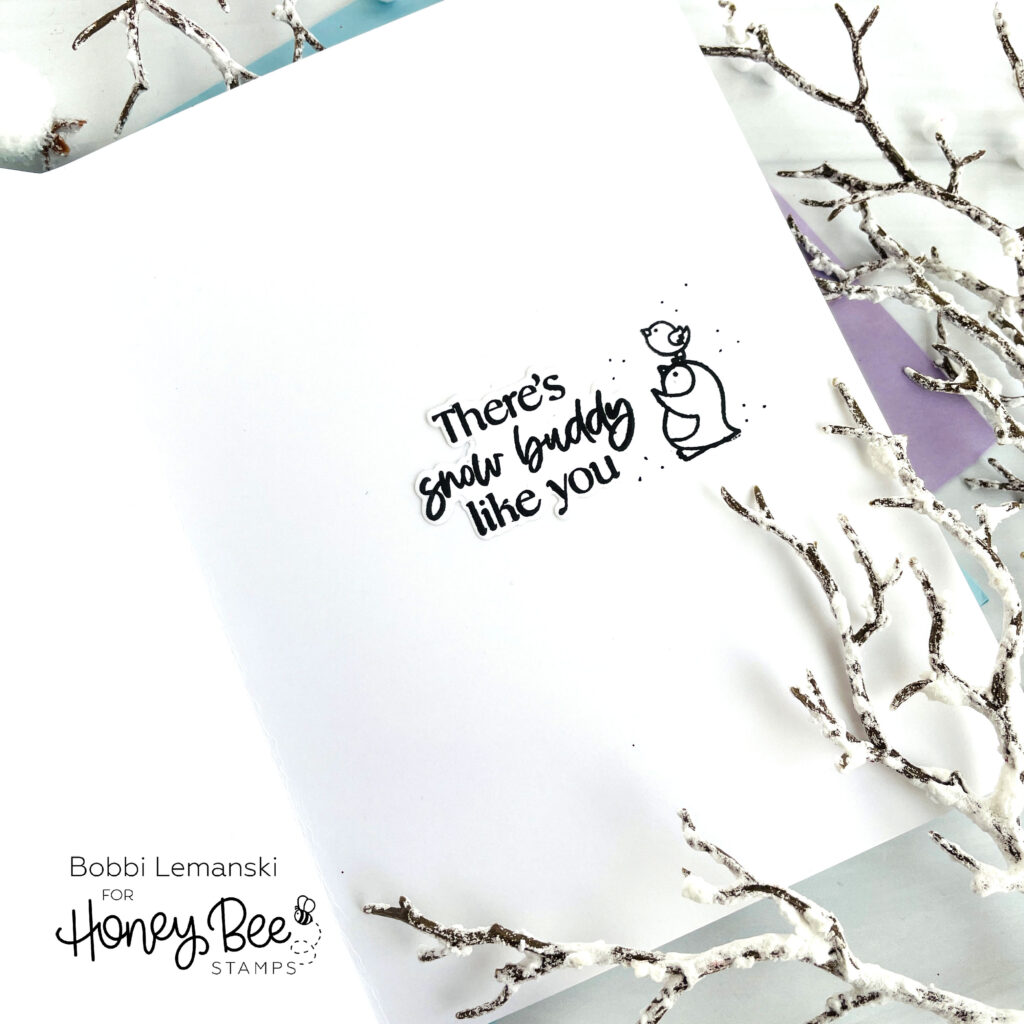
Inside the card, I used a sentiment from the Polar Pals stamp set. I stamped a penguin and bird to the side and added some black specks here and there to finish the inside.
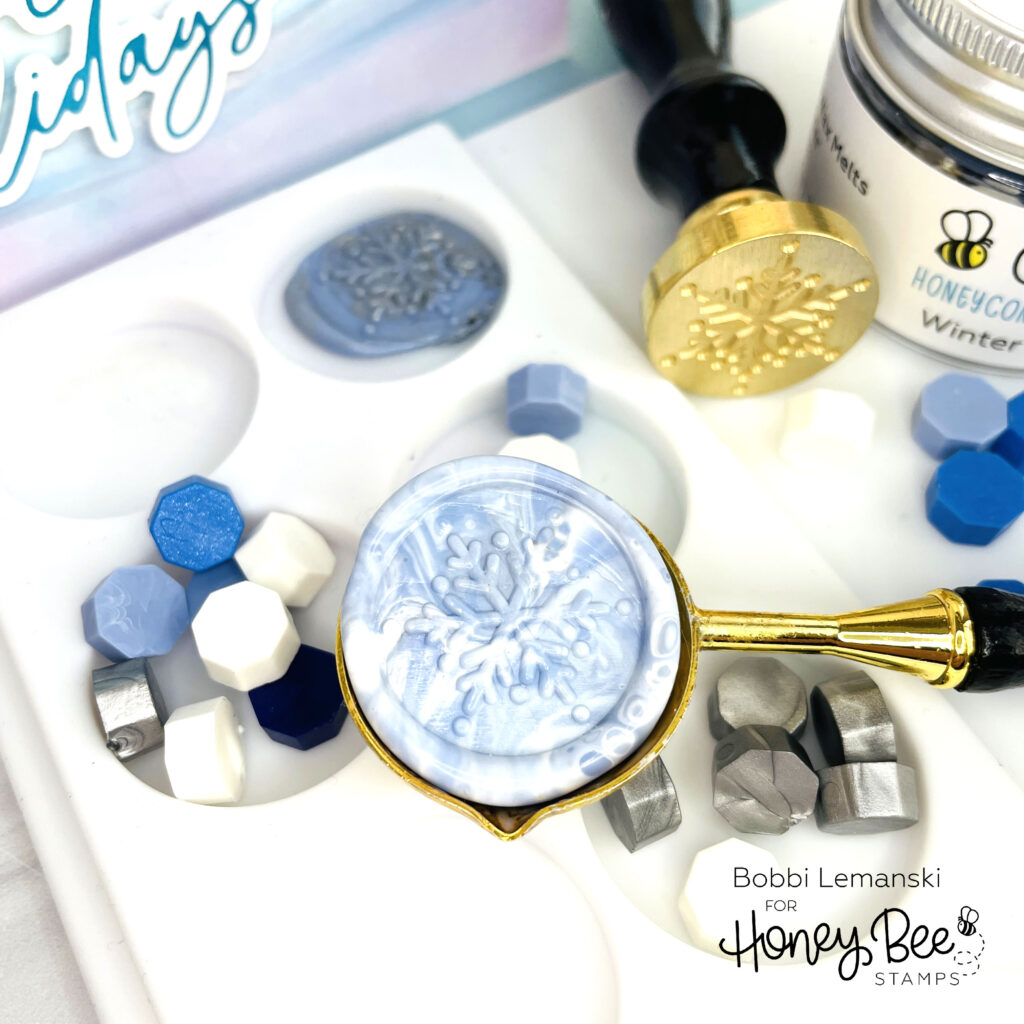
To seal my envelope, I created a matching snowflake wax seal using the Snowflake Wax Stamper and Winter Wonder Wax. You will want to make sure you have the spoon and this NEW Craft Mat that keeps the wax seal circular. The seals are so easy to pop out, too! I use four wax pellets to make one seal. For my snowflake, I used two white and two light blue to create the swirl design. I use my Wax Stirring tool to swirl the colors around before and after I pour the wax in the mold. This mat is also great for paint splattering and watercoloring! You can buy the whole wax seal bundle for the holidays here!
You can shop the entire Honey Bee Stamps Make It Merry release here. If you decide to place an order, please use the links in this post so that Honey Bee knows which ideas inspired you!
Thanks for stopping by today. If you want to see more ideas and inspiration from me, subscribe to my blog, BobbiHartDesign.com. I’ll send you updates on new posts! You can also find me on Instagram as @BobbiHartDesign and on Facebook as BobbiHartDesign.


