
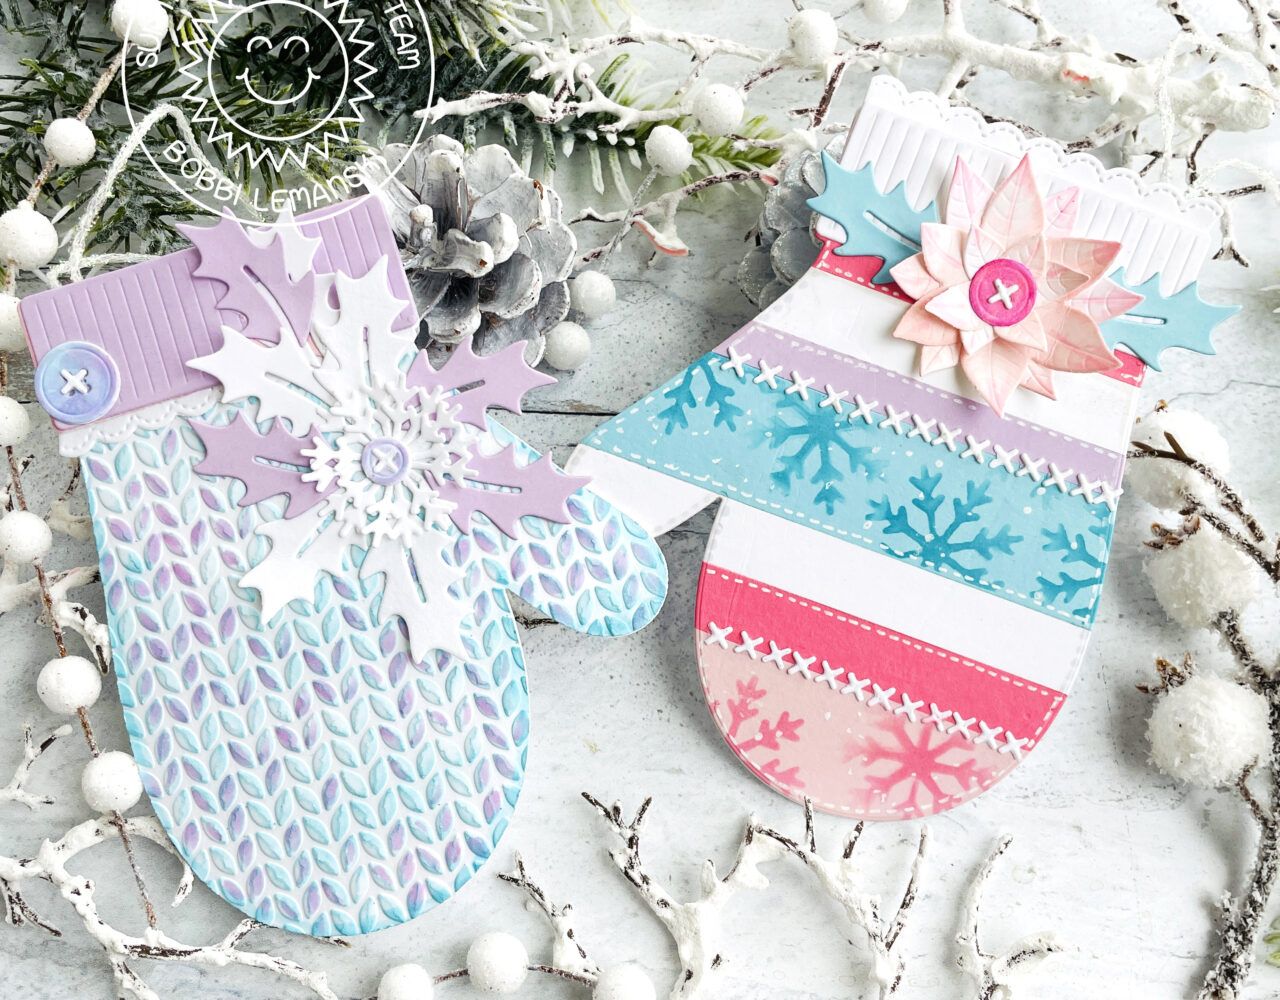
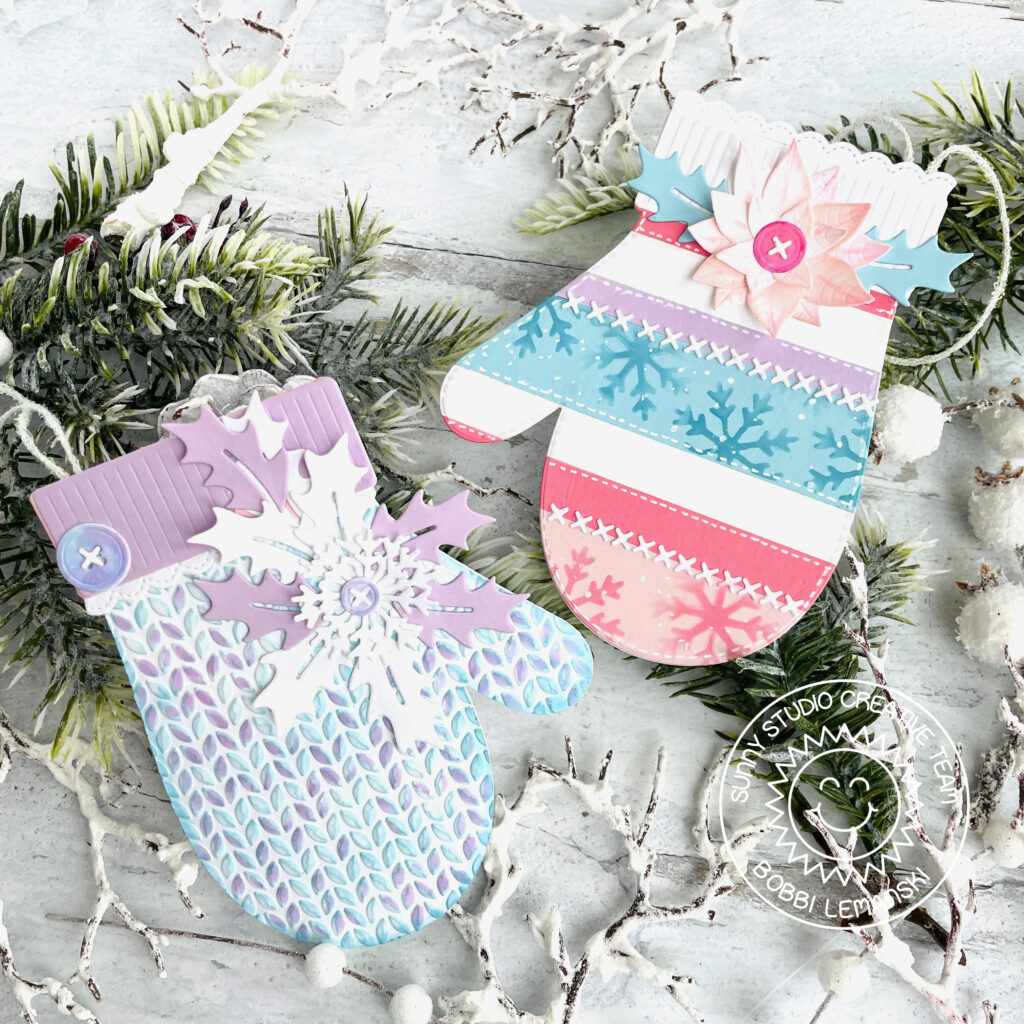
“This mitten belongs to…” Just add a name to these cute mitten gift tags and your gifts are in good “hands!” I’m using the new Woolen Mitten dies by Sunny Studio Stamps. This is such a cute die set. You get a large mitten base that can be used to make cards, gift tags, fireplace or tree garland, table or buffet name tags and more. There’s lots of accessories to add to the mitten, too. I made these two gift tags and I added a “to/from” on the back side using the Christmas Icon stamps.
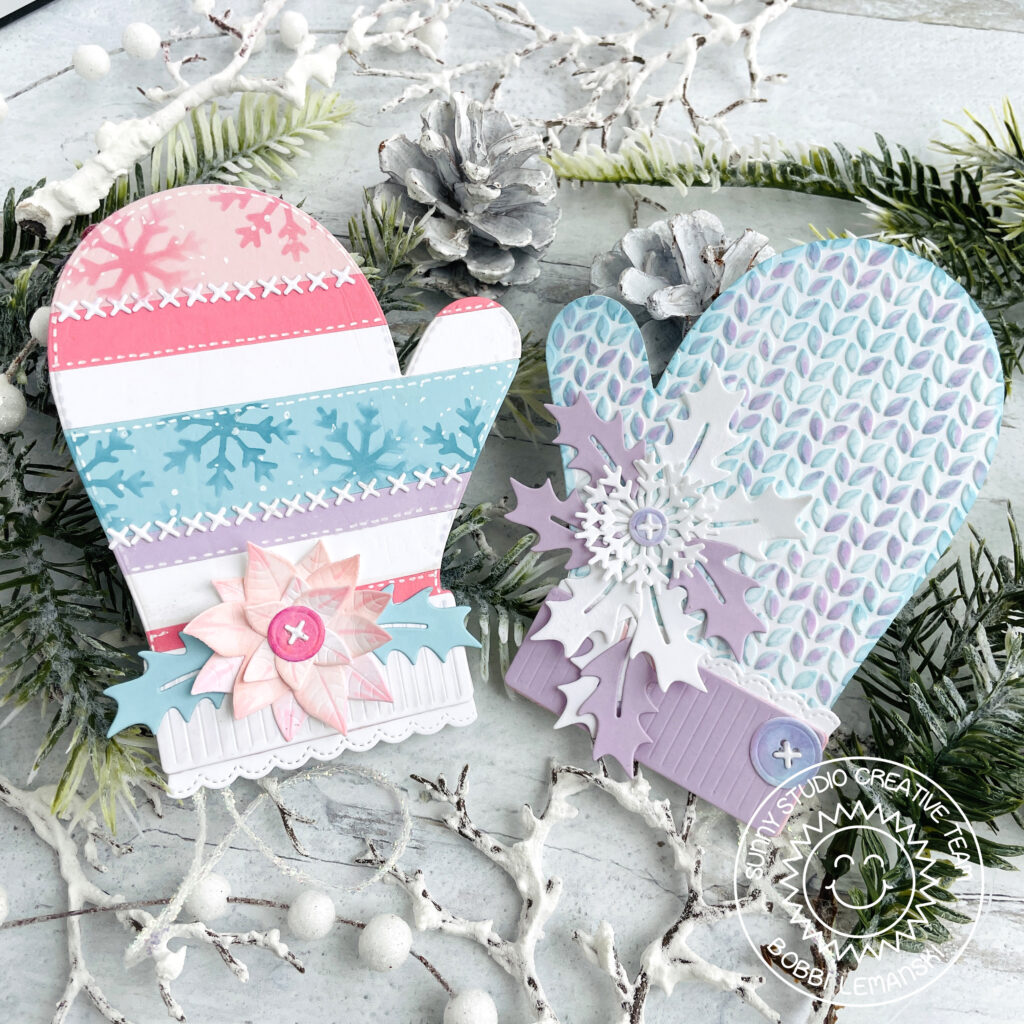
To make these mittens, I cut the mitten bases from 80lb Neenah Solar White cardstock. I like to cut two for my tags and attach the back panel at the end with a string sandwiched in between for a nice, finished, hanging tag. Most of the accessories for these tags are cut from white cardstock with the exception of the blue and lavender holly leaves, lavender knit band and the colored strips on the striped mitten.
Knitted Snowflake Mitten
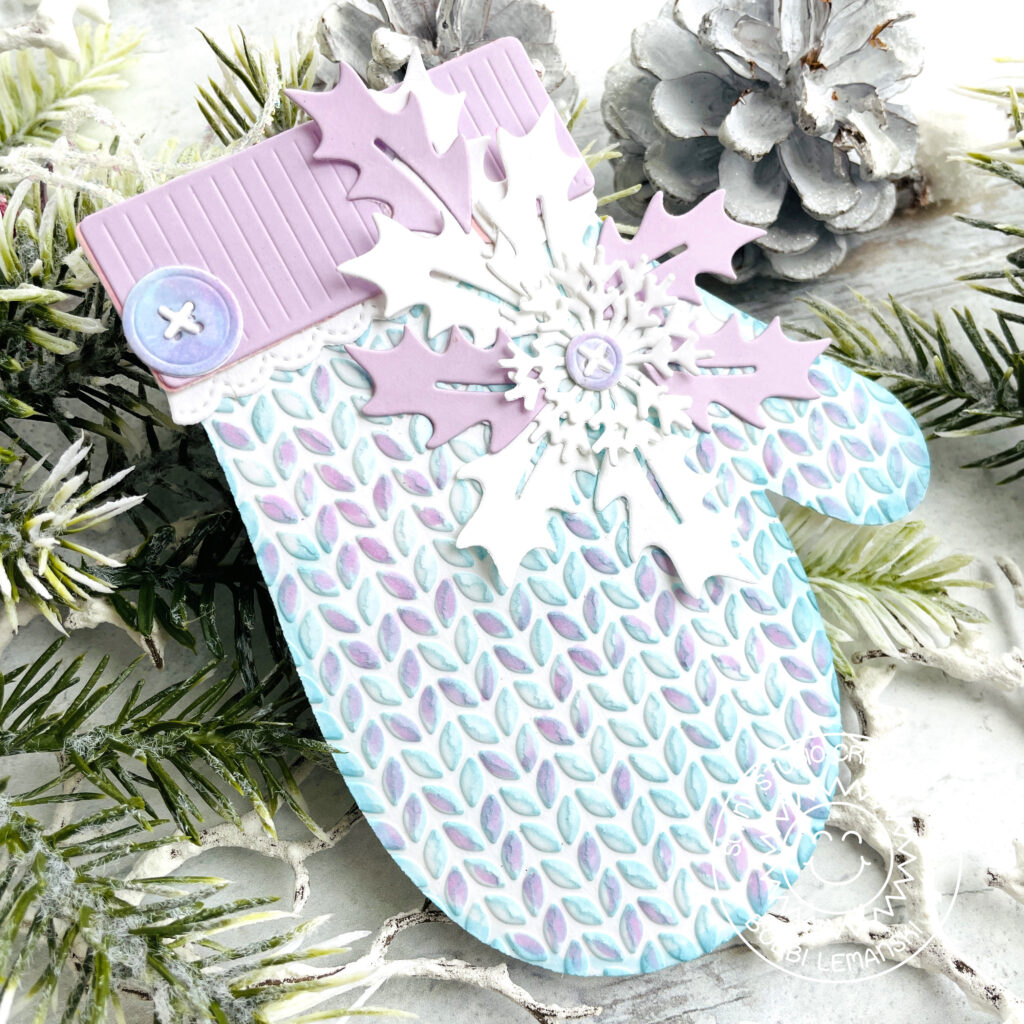
To make the first mitten, I cut the mitten base from white and ran it through my die cutting machine with the Cable Knit Embossing Folder. I love the texture achieved by doing this. I ink blended Ranger Distress Oxide Ink in Broken China to the textured base using a light hand.
TIP: I wanted to make the yarn look like it was a multi-color fiber variety so I used a Copic V01 marker to add lavender fibers to the blue inked, embossed design. Think of all the possibilities for creating unique yarns!
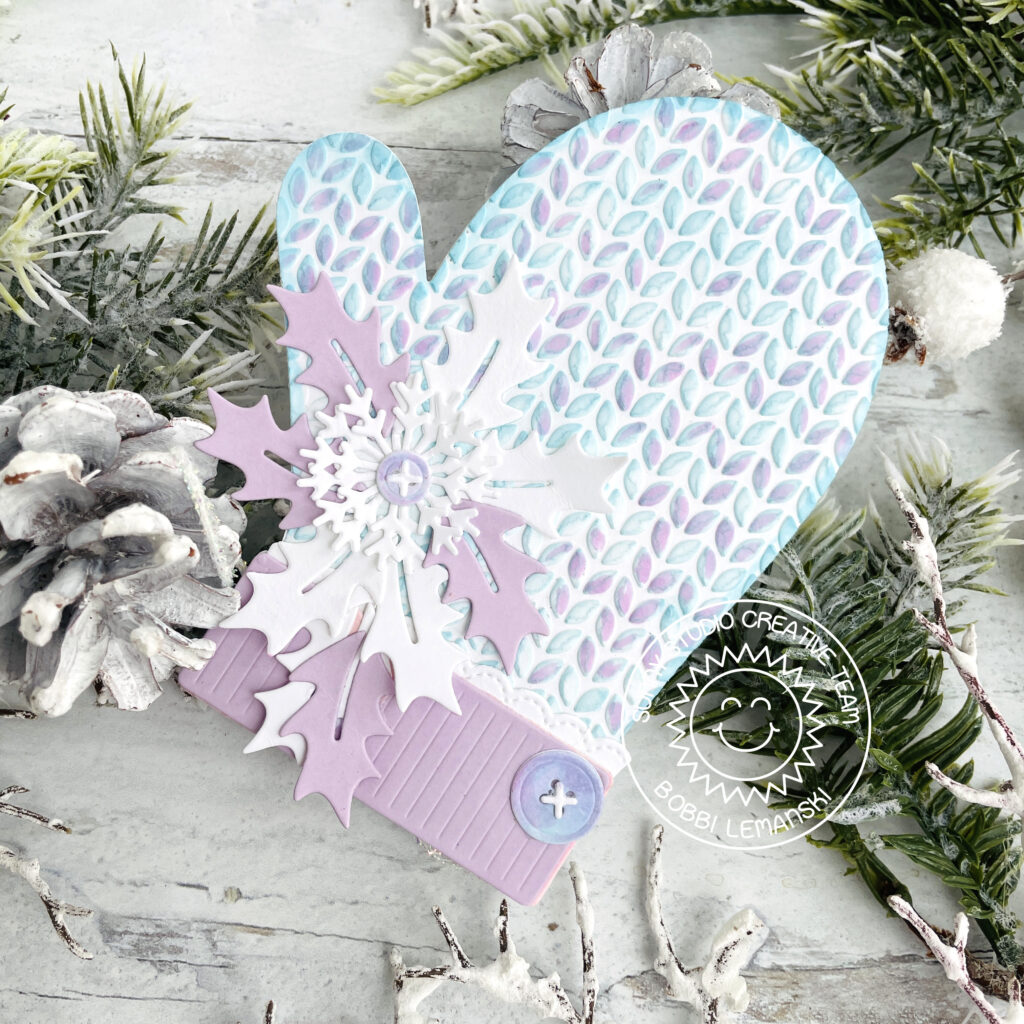
I added a lavender knit band, two cute marbleized buttons in blues and purples, thread, lace trim, a layered snowflake, and white and lavender holly leaves to the mitten front.
TIP: Create marbleized buttons by ink blending on multiple colors to the buttons. I used an ink blender and Distress Oxide Inks in Broken China, Milled Lavender and Spun Sugar for this look.
Once everything was assembled and glued in place, I attached a holiday string to the back of the front panel and then added the back panel to cover the string ends. I glued the front and back together and stamped a “to/from” on the back side to finish the tag.
Striped Poinsettia Mitten
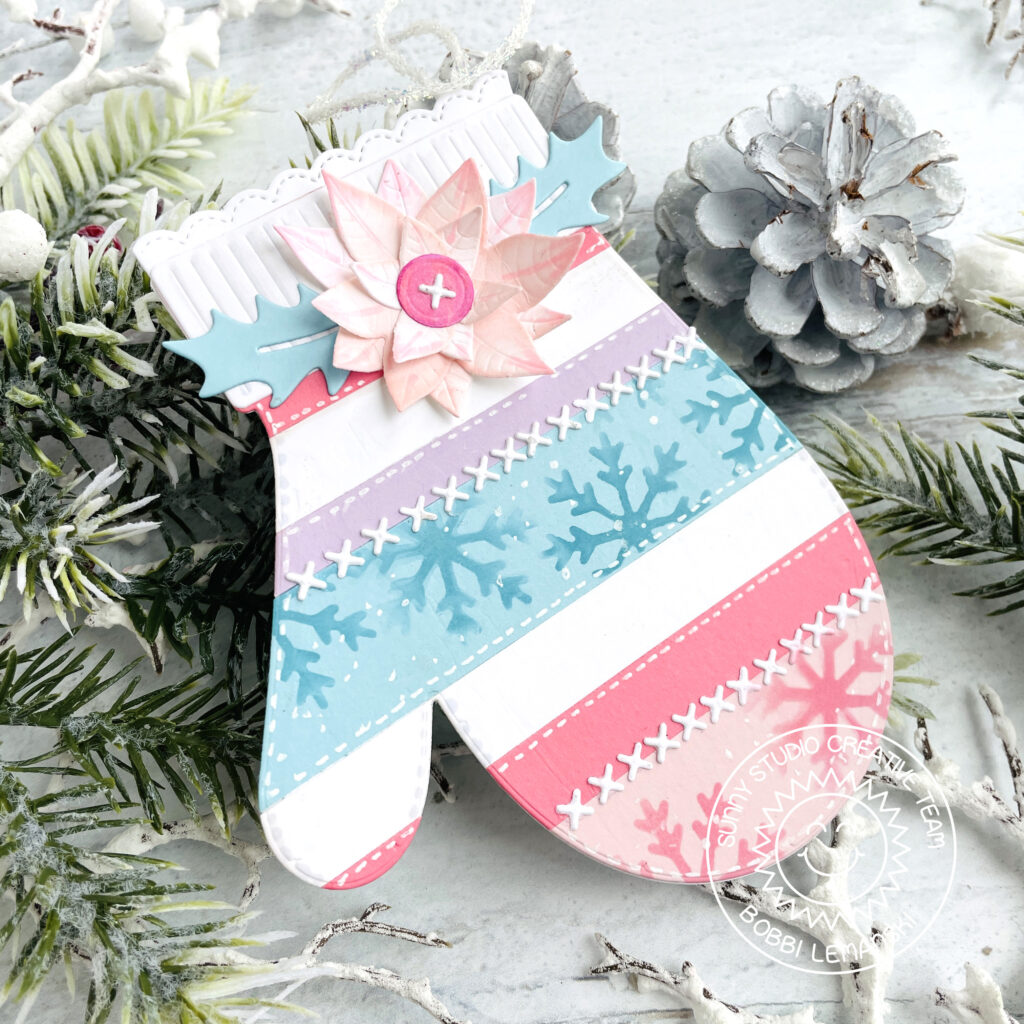
To create this striped mitten, I cut strips in various widths and attached them to a white piece of cardstock. I ran the striped sheet through my diecutting machine to make the mitten shape.
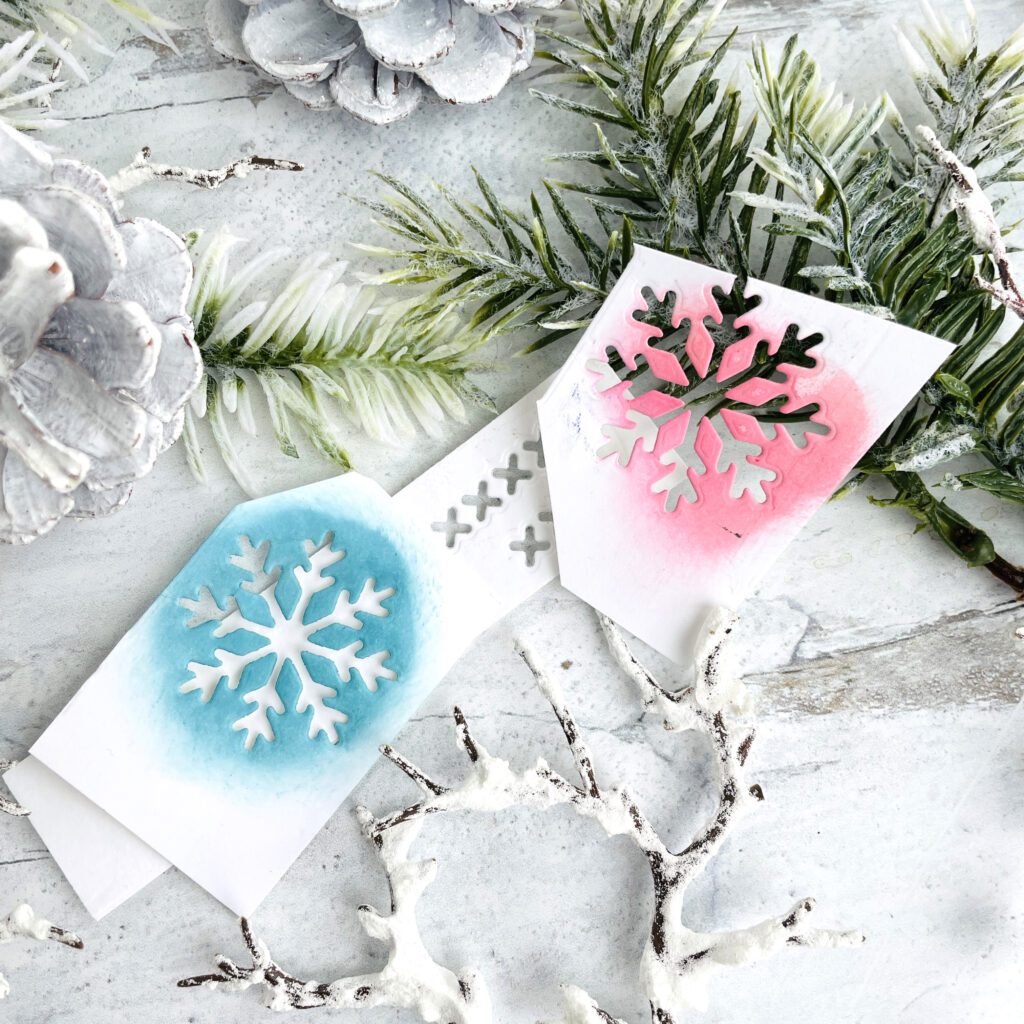
I stenciled on darker-shaded snowflakes to the blue and light pink wider stripes to make the mitten more interesting.
TIP: To make the snowflake design, use the scrap of the snowflake cut outs from the first mitten to create the stencil. I used Broken China and Picked Raspberry Distress Oxide Inks to stencil the design on the pink and blue wide stripes.
I used my white gel pen to add smaller snowflakes over the larger, stenciled ones for a fun pattern.
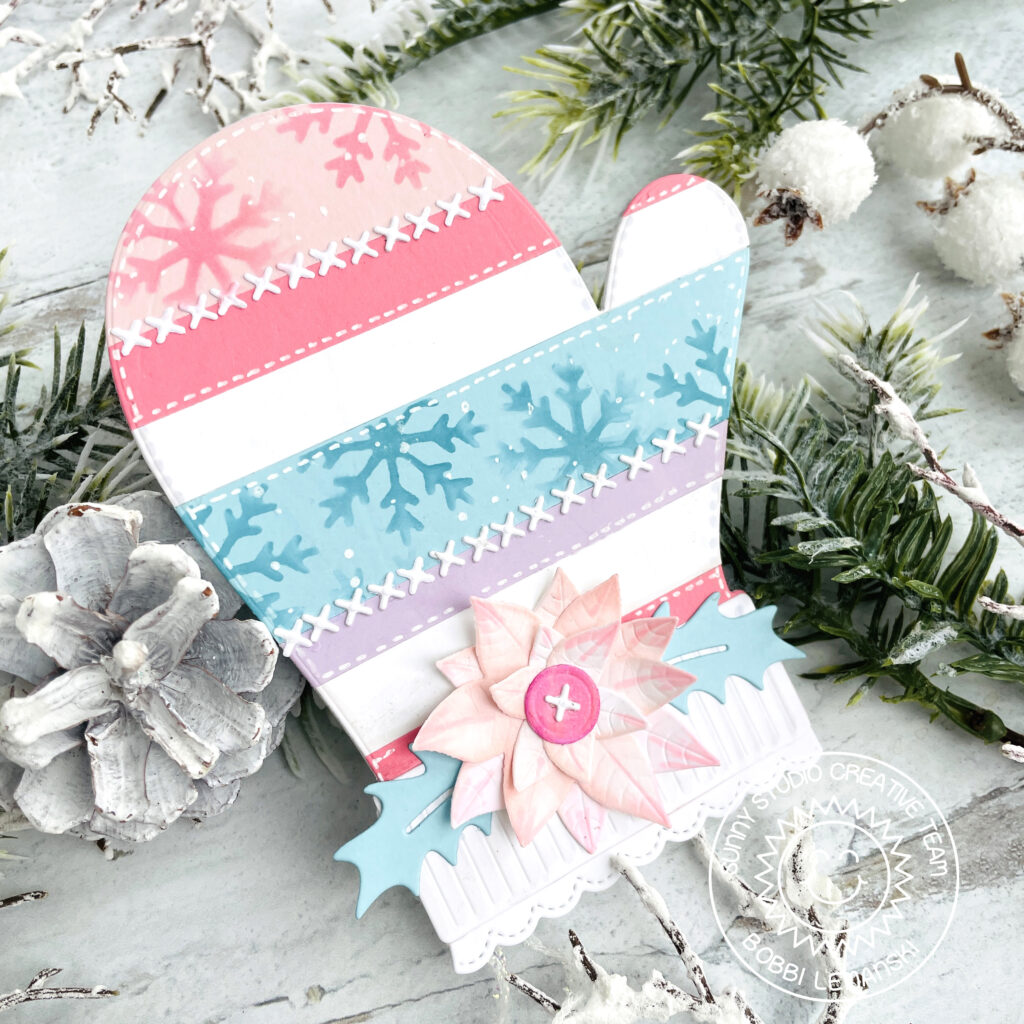
To finish this look, I added the ribbed cuff, lace edge, layered poinsettia, holly leaves, a button center with the threaded “X” and lots of extra stitching between the stripes. For the smaller stripes, I used my white Gelly Roll white gel pen to add faux stitching lines in white. Like the first mitten, I added an iridescent string to the back and attached a mitten back panel to conceal it.
Thanks for stopping by today. If you want to see more ideas and inspiration from me, subscribe to my blog, BobbiHartDesign.com. I’ll send you updates on new posts! You can also find me on Instagram as @BobbiHartDesign and on Facebook as BobbiHartDesign.
Bobbi Hartmann Lemanski,
Bobbi Hart♥ Design, Adding h♥art into every design


