
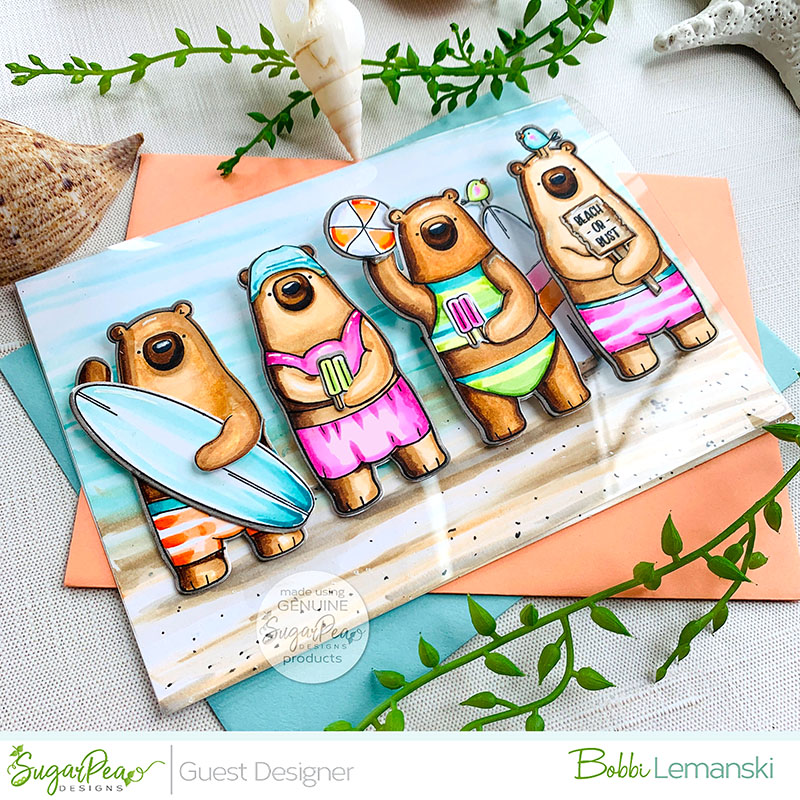
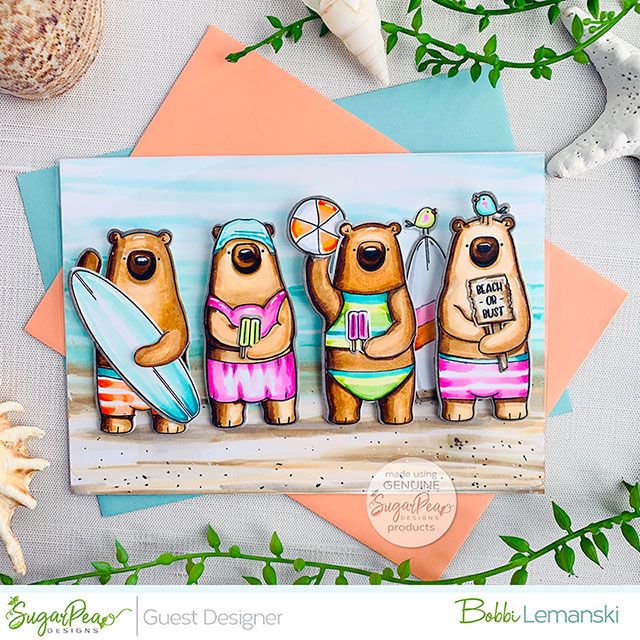
Hello, Sugar Pea friends! It’s Bobbi Lemanski (@BobbiHartDesign), back with my last card to share as the April guest designer for Sugar Pea Designs. Today, I’m sharing a birthday card for beach lovers. I love time at the beach and I’m ready to feel the sand and sea under my feet again. I invited the bears from Hey Winter and Hey Summer to go to the beach with me. With swimsuits on, they’re ready!
I’m using several products from Sugar Pea Designs including:
Hey Summer stamp set and coordinating SugarCut Hey Summer die set
Hey Winter stamp set and coordinating SugarCut Hey Winter die set
Greatest Hits stamp set (used for the “Happy Birthday” only)
Card Preparation
To make this 5” X 7” card, I started by cutting the following pieces of cardstock.
Card Panels
I use Neenah 80lb Solar White cardstock for the white pieces. Since I layer my panels, the 80lb weight is perfect for a sturdy card.
- Cut two card base panels: 5” X 7” from white cardstock for the back and interior panel.
- Cut one front panel: 6” X 7” from clear acetate and score 1” from the top edge of a 5” side. My acetate is sturdy and holds up well as a front panel. TIP: If you like this idea, purchase a sturdy thickness for this application.
Die Cut Pieces
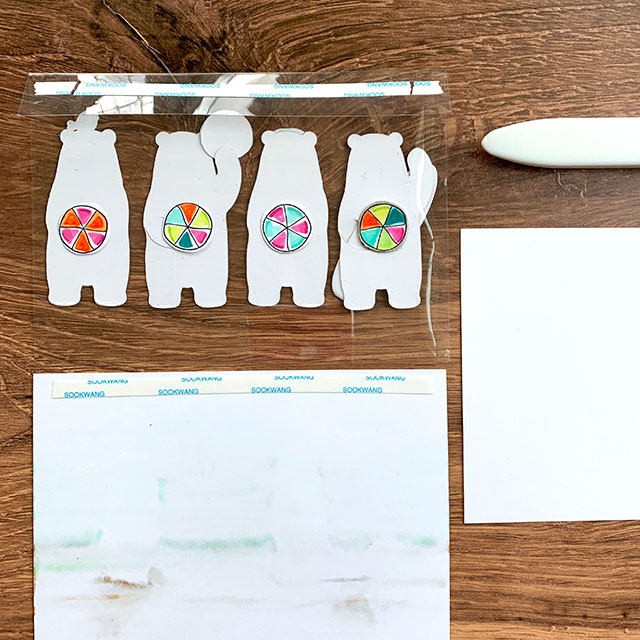
- Stamp and cut two each of the standing bears in each set – Hey Winter and Hey Summer for a total of four bears. Die cut plain white backs for each one.
- Stamp and cut six beach balls. Die cut one plain, white back for the one on the front cover.
- Stamp and die cut three surf boards. Die cut one plain, white back for the one on the front panel.
- Stamp and die cut both birds in the Hey Summer set. Die cut one plain, white back for the one on the front panel.
- Stamp and die cut two popsicle images.
Fussy Cut Pieces
- Stamp and fussy cut out one hat from the Hey Winter set. I used this for the swim cap, cutting off portions as shown.
- Hand draw a sign around a stamped phrase, “Beach or Bust” and fussy cut.
Card Construction
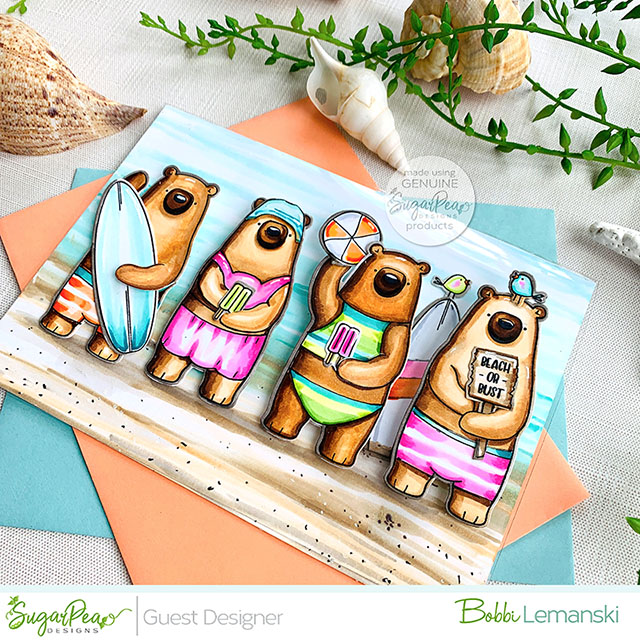
I colored all four bears, six beach balls, three surf boards, two birds, two popsicles, one swim cap and the sign as shown. I added white backs to the four bears, one surfboard, one beach ball and one bird that are attached to the front panel. Basically, anything attached to the front got a clean, white die cut backing. I added all the hand accessories and beach ball to finish the front panel.
The bears were attached to the clear acetate front panel in a row, spacing them evenly. I attached them using double-sided adhesive in the center areas of their bodies so that I could cover the adhesive with one beach ball on the inside for a clean, finished look. (See photo.)
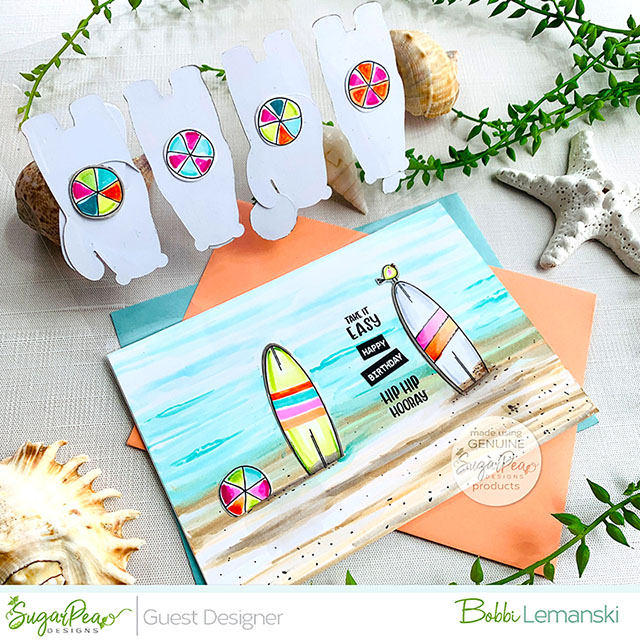
I colored the sand, water and sky background on the interior panel using Copic markers and added the surfboards, ball, and bird. I stamped and embossed “happy birthday” in white on black cardstock and attached inside. I stamped the phrases from the Hey Summer set above and below the happy birthday phrase. Notice that I positioned the phrases, beach ball and surfboard in areas that are covered up by a bear from the front panel. You don’t see them until the card is opened, creating an element of surprise.
Next, I added double-sided strip adhesive to the 1” section above the scored line on the clear acetate and on the back of the interior panel at the top and bottom. The photo above shows the three panels that make up the card.
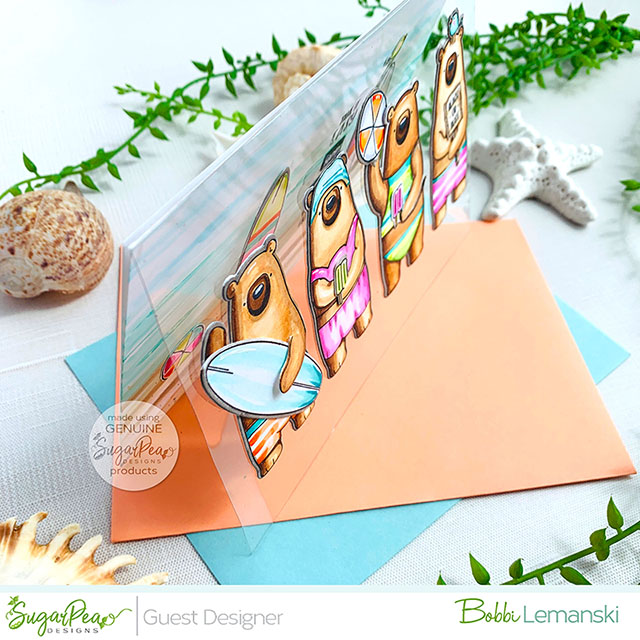
I layered the completed panels, sandwiching the 1” acetate section between the plain white back panel and the interior panel to conceal it. I used additional adhesive between the inside and back panel as needed. This card is complete! It lays flat and is ready to send in an A7-sized envelope.
If you like this card idea and decide to place an order, please use the links in this post. It lets Sugar Pea Designs know what inspired you! You can shop here!
Thanks for stopping by today. I’ll be back next week with another card to share here on the Sugar Pea Designs blog. In the meantime, if you want to see more ideas and inspiration from me, subscribe to my blog, BobbiHartDesign.com. I’ll send you updates on new posts! You can also find me on Instagram as @BobbiHartDesign and on Facebook as BobbiHartDesign.
Bobbi Hartmann Lemanski, Bobbi Hart♥ Design, Adding h♥art into every design.


