
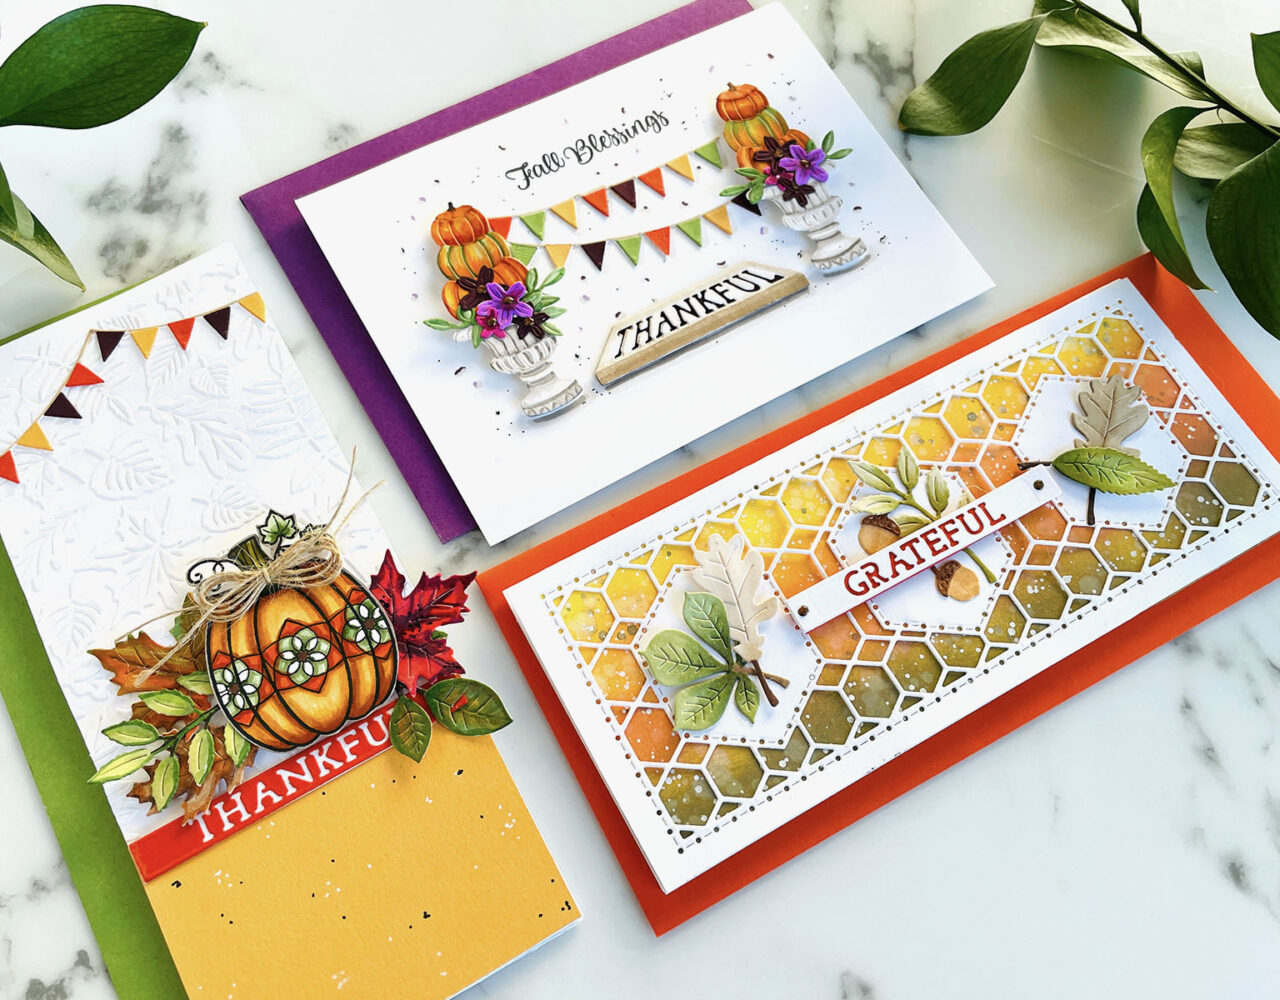
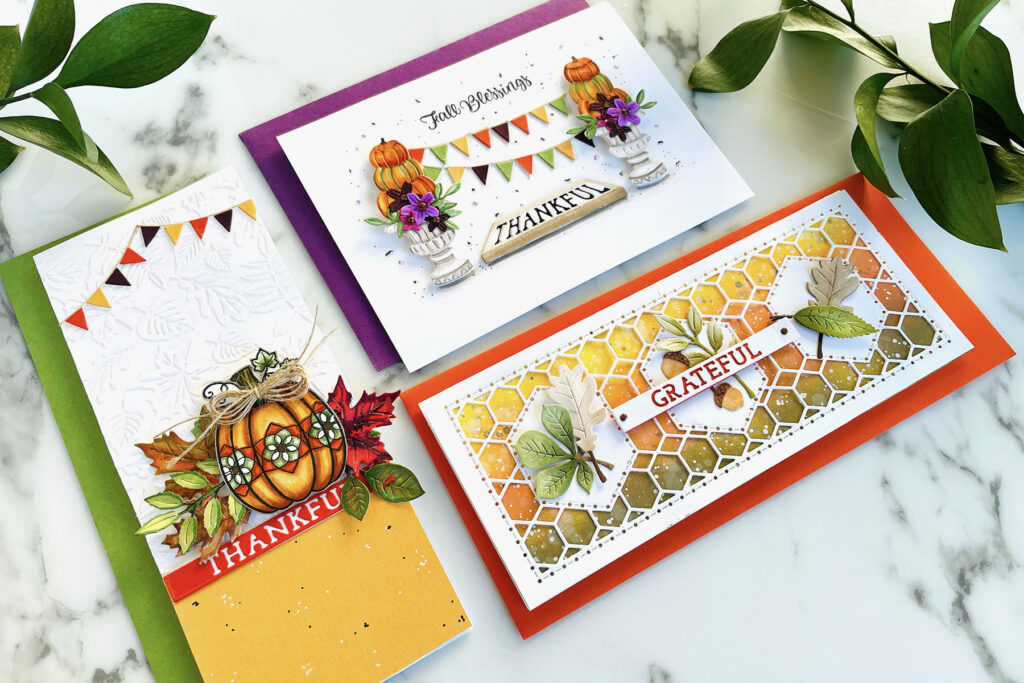
Hello, friends of Spellbinders! It’s Bobbi Lemanski (@BobbiHartDesign) here sharing some Fall looks for the upcoming season using the new Fall Traditions Collection by Spellbinders. I’ve got three cards to share that show the different ways you can use these coordinating fall products together to create one-of-a-kind looks.
All three cards use a mix of products to highlight the beauty of the fall season. I hope you feel the warmth of the colors and textures and see the beauty in these seasonal loves. ?
Card 1: Grateful Slimline Card
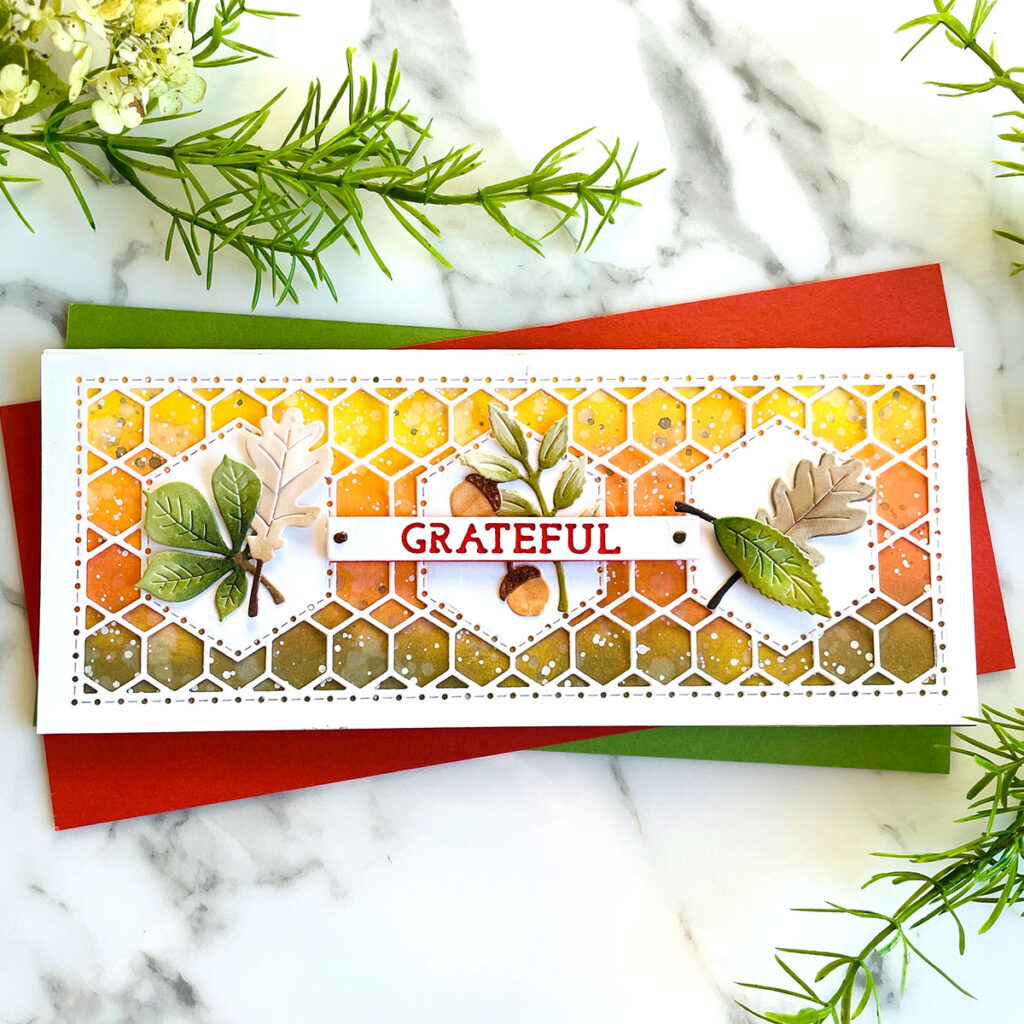
My first card is a slimline card measuring 8-1/2” wide X 3-1/2” tall. To make this card I completed the following steps:
- I created the background by blending Mustard Seed, Carved Pumpkin and Forest Moss Distressed Oxide inks.
- I splattered water on the inks before they dried to lift the ink and make the background splotchy.
- I also splattered Dr. Ph Marten’s Bleed Proof white paint and black watercolor.
- I die cut the overlay panel from white cardstock and adhered the two layers together.

- I die cut the autumn leaves from white cardstock and colored them in fall tones with Copic Markers using E49 (stems), E44 E43, E42, YG67, YG63, YG61, and YG03.
- I used E57 and E55 for the acorns from the Mini Fall Blooms.
- Leaves were added to all three hexagon sections as well as a couple of the acorns.
- I die cut the “grateful” word from white cardstock, backed it with a rust color strip and attached it to the center hexagon using foam tabs.
- I added dots of Bronze Pearl Pen to each side of the word strip to look like brads to complete this card.
Card 2: Fall Blessings A7 Card
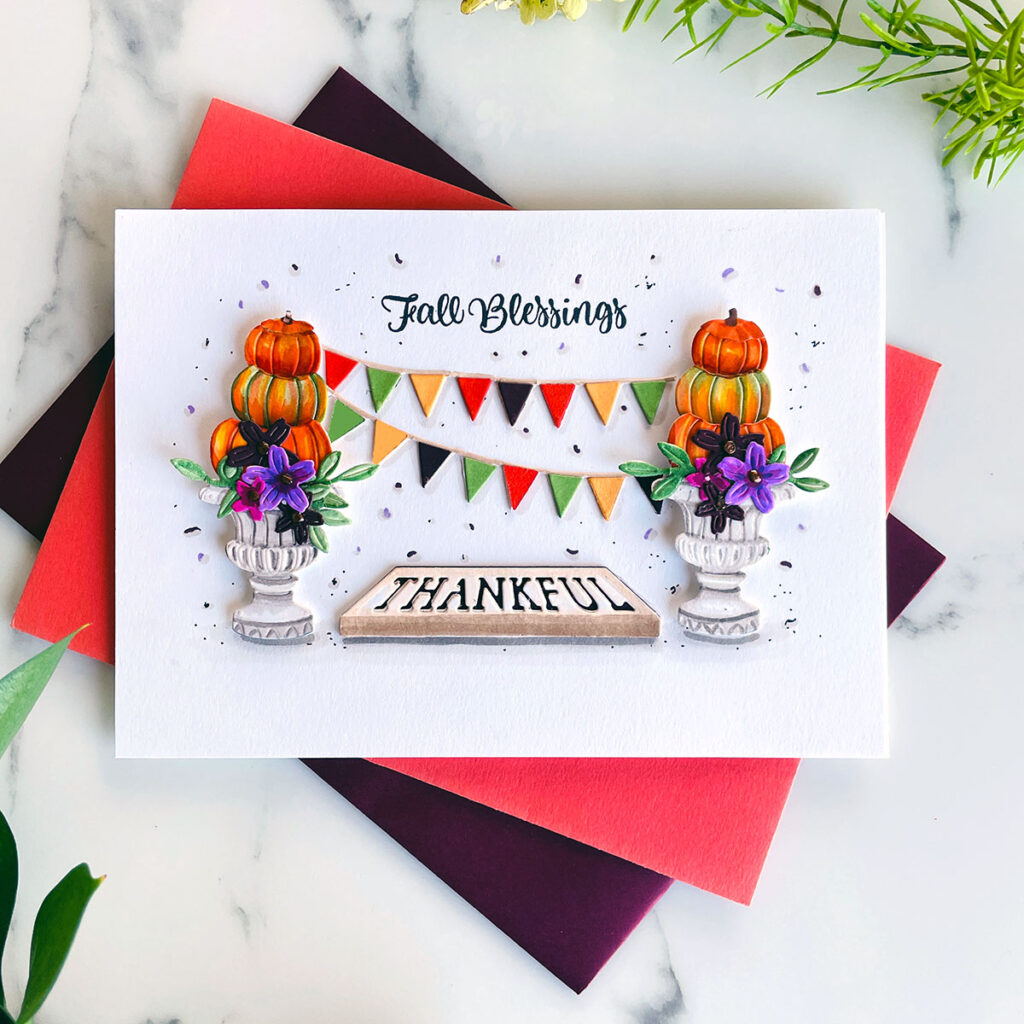
For this 5” X7” card, I used the Open House Thankful and Pumpkin Topiary sets to create this look. These products were designed to work with the Spellbinder’s door die sets, but since I didn’t have a door to use, I strung the banners between the topiaries instead. It’s a nod to a front door vignette, without the door. Here’s the steps:
- I created the pumpkin topiaries, the “thankful” front mat and pennant banners.
- To color the pumpkins, I used Copic colors : YR27, YR24, YR07, YR68, YG61, YG63, and E59 (for the stems.)
- I used warm grays to color the pedestal pots.
- For the door mat, I used E44, E43 and E42 to color the top layer and added a dark maroon cardstock to the back of the “thankful” letters.
- I stamped the “fall blessings” phrase from the Charming Pumpkins Clear stamp set at the top of the card.
- I added falling leaves to the background to complete this card.
Card 3: Thankful Slimline Card
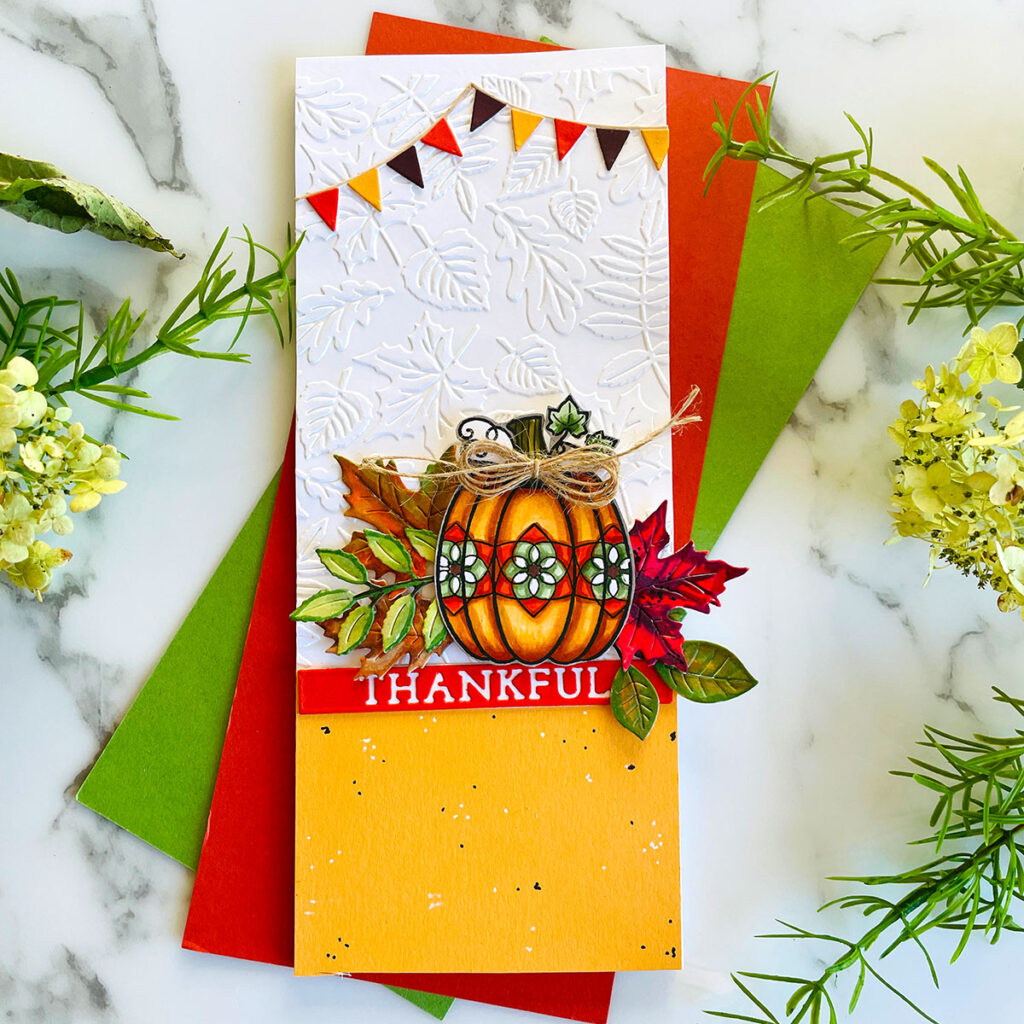
For my last card, layers of textures and colors make this card come to life,
- I stamped and colored the large pumpkin in the Charming Pumpkins Clear stamp set and fussy cut it out.
- I die cut the Autumn Leaves and layered them behind the pumpkin.
- I die cut the “thankful” word from a deep orange cardstock and layered white cardstock behind it.
- The banners were die cut and adhered together using cardstock in orange, gold and maroon. I colored the string using Copic E43.
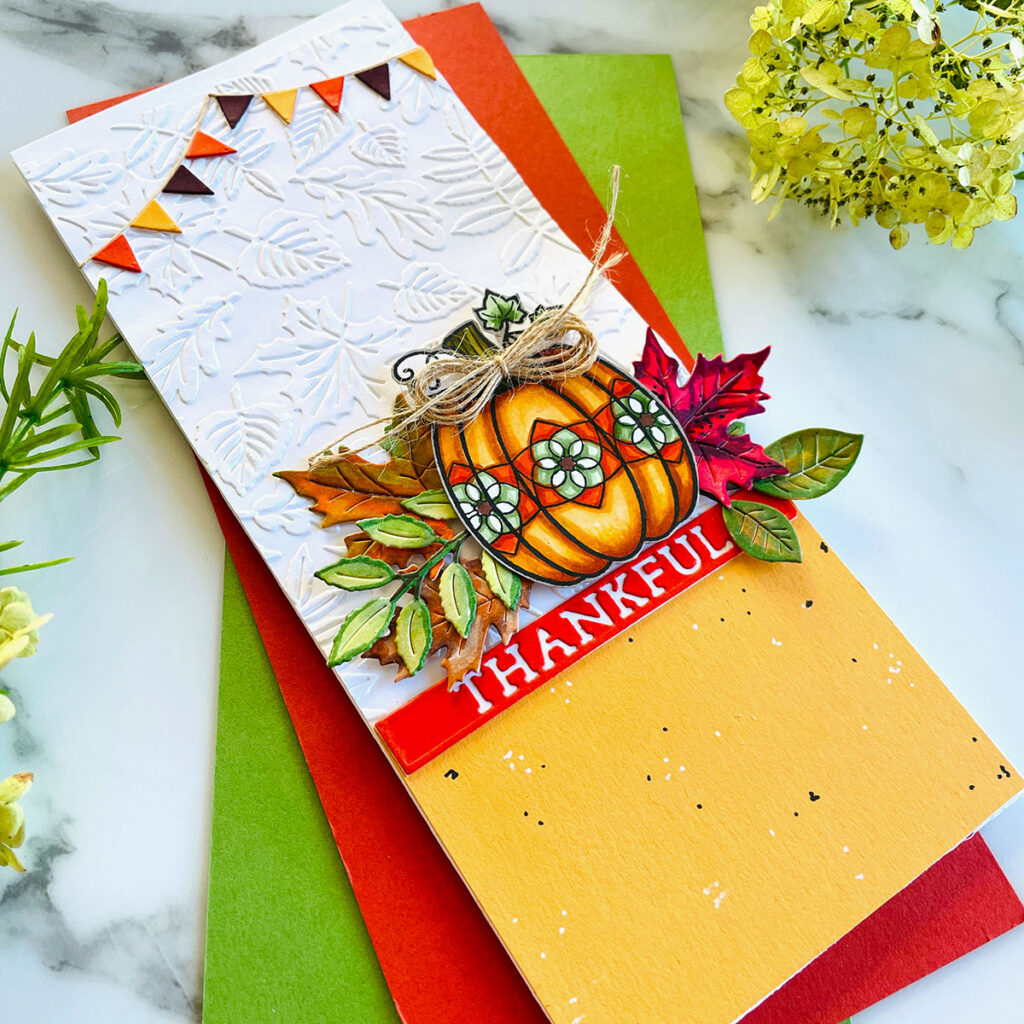
- I embossed white cardstock using the Falling Leaves Embossing Folder. I cut it down to 3-1/2” wide and added it to the top half of my slimline card base measuring 3-1/2” wide X 8-1/2” tall.
- The bottom half was covered with a light gold cardstock.
- I attached the “thankful” strip below the embossed section.
- I added the pumpkin and leaves above the sentiment strip.
- I added black and white specks/splatters on the bottom gold piece with a black marker and white gel pen.
- I attached the banner pieces at the top.
- I added a hemp twine bow to the pumpkin to finish the card.
Here’s a list of the Spellbinders supplies I used:
S1—32 Grateful Sentiment Steps, S2-321 Mini Fall Blooms, S2-322 Open House Thankful, S3-423 Open House Pumpkin Topiary, S2-1137 Autumn Leaves, SES-027 Falling Leaves Embossing Folder , STP-046 Charming Pumpkins Clear stamp set
Other products used: Black marker, white gel pen, Bee Creative Precision Glue, Pearl Pen in Bronze, Scrabbook Adhesives foam tabs and hemp twine.
You can shop the entire Spellbinders store here. If you decide to place an order, please use the links in this post so that Spellbinders knows which ideas inspired you!
Thanks for stopping by today. If you want to see more ideas and inspiration from me, subscribe to my blog, BobbiHartDesign.com. I’ll send you updates on new posts! You can also find me on Instagram as @BobbiHartDesign and on Facebook as BobbiHartDesign


I love all three. Fall is definitely my vibe! The pumpkin on the third card is a masterpiece. Lovely colors and it is perfectly background with the leaf embossing. Great job!