
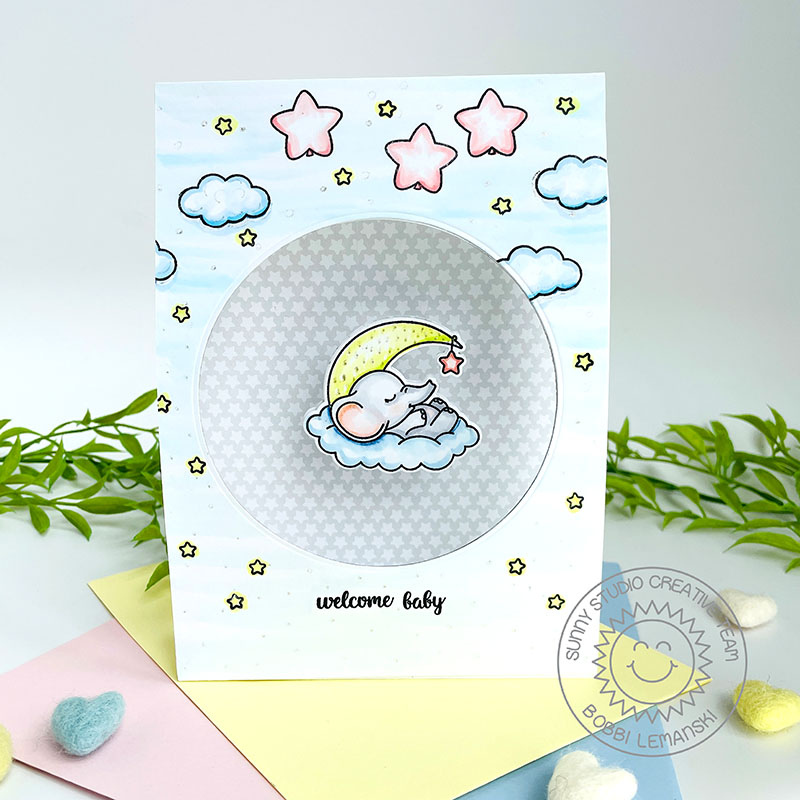
Hello friends! It’s Bobbi Lemanski here thrilled to be sharing my first card as a Sunny Studio Stamps Design Team member! I am using the new Baby Elephants stamp set and coordinating die set. I fell in love with the sweet baby elephant sleeping on the clouds, hanging from the moon, so I decided this cutie needed to be suspended in the sky on my card, too. The swinging motion makes this interactive card just a little more fun and lively to give the new parents!
How to Make this Card
Feature Image: To create the sweet feature image, I stamped and die cut the elephant image and backed it with two more plain white die cuts. Adding additional backing to the die cut image helps by (1) by adding weight to the hanging piece, (2) concealing any color bleeding from my Copic Markers, and (3) concealing between the layers, the invisible fish line used to suspend the image. I used two lines to suspend the image. I colored the image using Copics: C3, C1, R22, R0, YG00, YG000, B45, B41, and B21. I used my glitter pen to add some shimmery dots to the moon, too. I stamped the “welcome baby” phrase from the Baby Elephant set right below the opening. I attached two invisible strings between the top layer and the back layers using double sided tape. It’s ready to suspend.
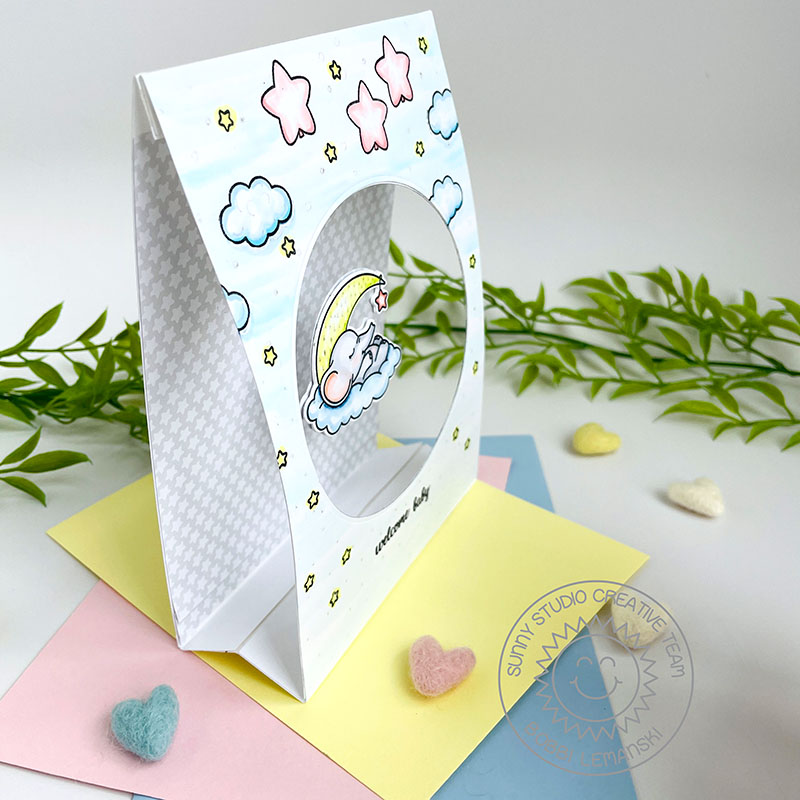
To house the feature image, I created a stand up card with a circular window opening in the front. I cut four pieces from Neenah 80lb cardstock as follows:
- Two pieces measuring 5″ wide X 8-1/2″ tall. Both were scored 1/2″ down from top edge and 1″ up from bottom edge.
- One piece measuring 5″ X 7″ in size. This will be the backing support for the front panel. It helps support the narrow sides around the window opening.
- One piece 5″ wide X 2″ tall. This will be used as the hinge, connecting the front and back panels at the bottom and providing additional support.
Back Panel: I cut a 5″ wide X 6″ tall piece of gray and white star pattern paper from the Subtle Grey Tones 6″ X 6″ paper pad and attached it to the back panel, positioning along the 1″ score line at the bottom. Only the bottom will show, not the top, so cover the bottom!
Front Panel: For the front panel, I layered the remaining two panels, positioning the smaller A7 piece between the scored lines of the larger piece, and die cut a 4″ circle in the middle. Since I’m coloring on the front, I wanted a backing to (1) conceal the color bleed from the front and (2) to provide extra support around the opening. I stamped clouds, star balloons and tiny stars in the sky on the larger panel and colored them in using Copic Markers: B000, B00, R22, R20, B45, B41, B21, and YG00. I also used my glitter pen to add a few smaller glittery stars on the front.
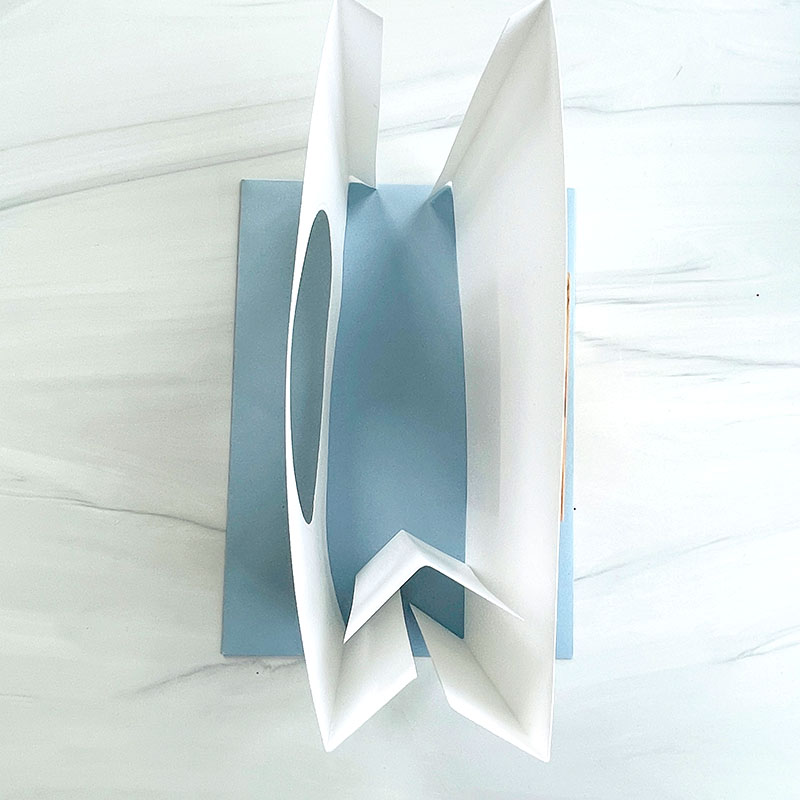
Card Assembly: To assemble the card, I used double sided tape to connect the top 1/2″ scored areas that were folded inward, tucking the invisible line that suspends the baby elephant image in between the folded sections. I also used the strong double-sided tape to attach the hinge piece on top of both of the bottom 1″ sections to make the folding bottom side. The hinge on top provides a nice, clean finish that shows, too.
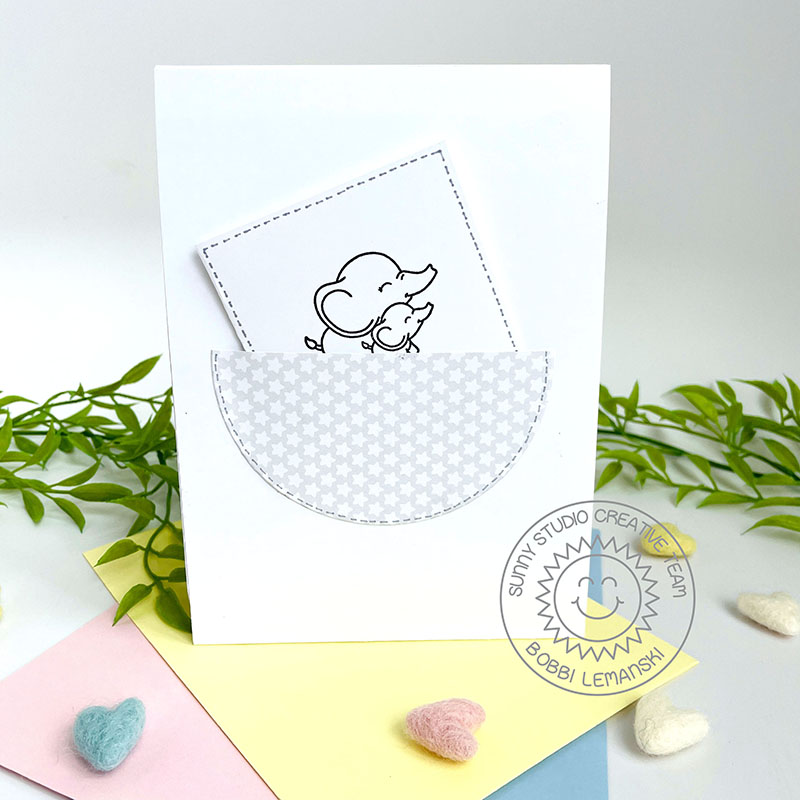
Back Pocket: This card still needs a spot to add a personal message, a signature and/or a gift card. To create a place for this, I made a quick little card that tucks inside a half circle pocket (made from more pattern paper) on the back of the card. I used the same 4″ circle die to cut the pocket. I simply cut the circle in half, drew faux black stitching lines around the pocket edge perimeter, and attached it to the back panel using glue around the perimeter.
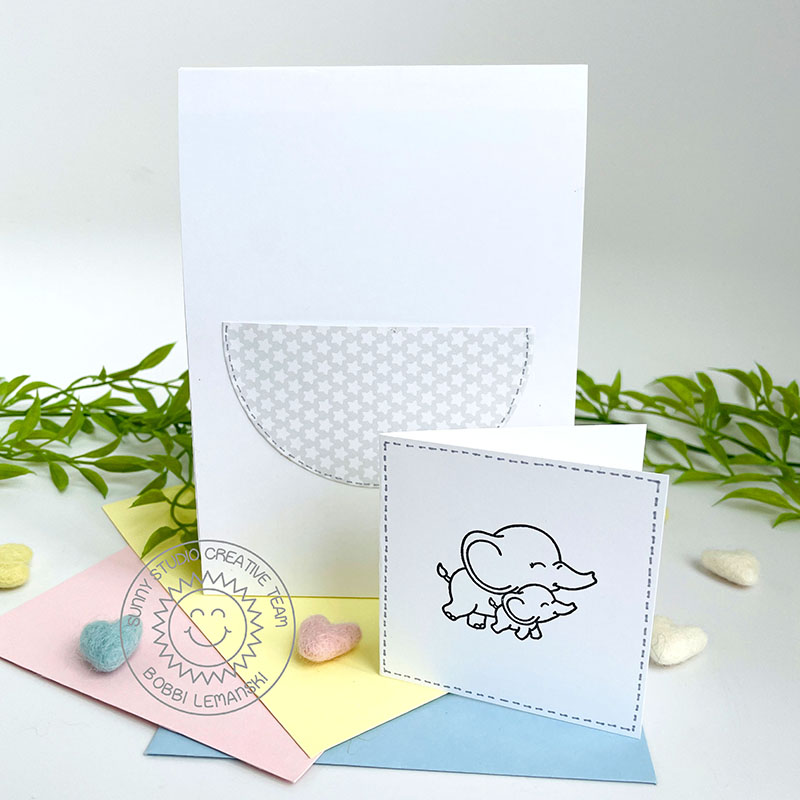
Notecard: For the little notecard, I cut a piece of white cardstock 6″ wide X 3″ tall and scored down the middle to make a 3″ square card. I stamped another image from the Baby Elephants stamp set on the front panel and added more faux stitching around the edges to match the pocket. This notecard tucks snugly in the pocket, much like a baby in a blanket!
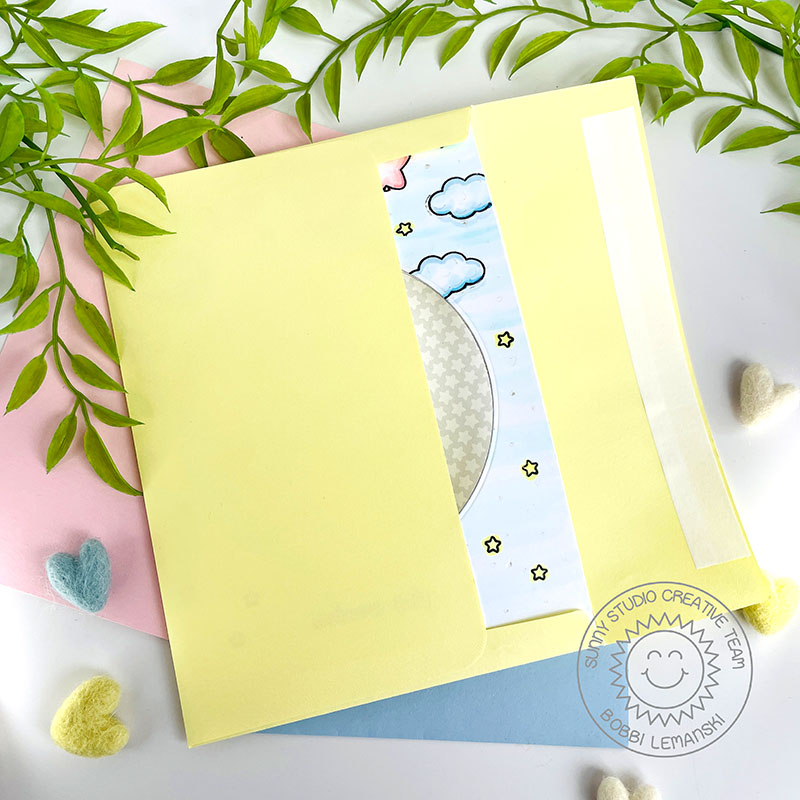
This card folds flat for mailing. It fits neatly inside a 5″ X 7″ (A7) envelope. I think parents will love the rocking motion of the baby elephant. I hope you give this card idea a try!
Thanks for stopping by today. If you want to see more ideas and inspiration from me, subscribe to my blog, BobbiHartDesign.com. I’ll send you updates on new posts! You can also find me on Instagram as @BobbiHartDesign and on Facebook as BobbiHartDesign.


