
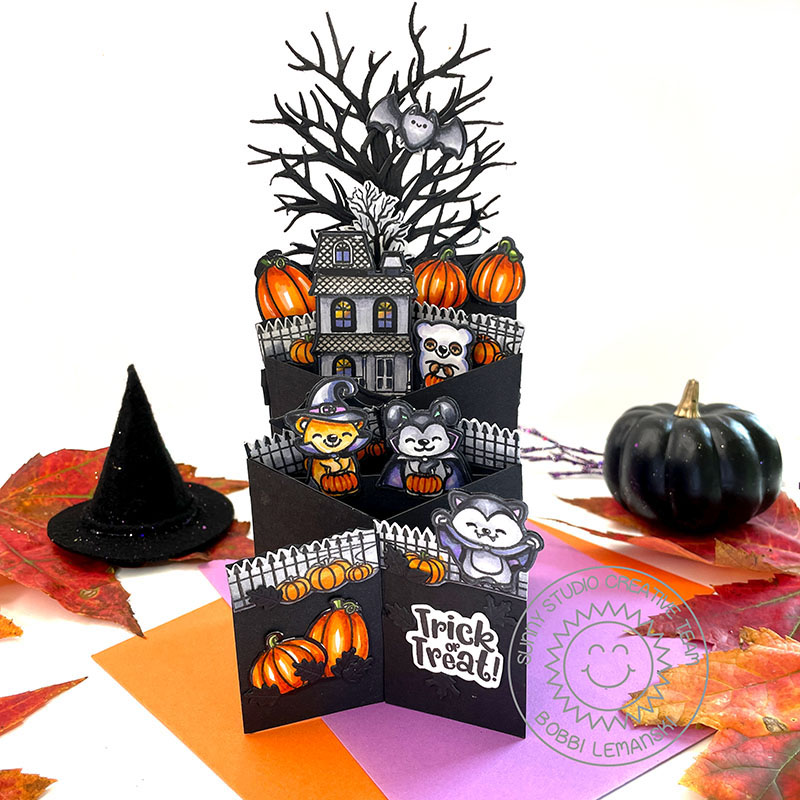
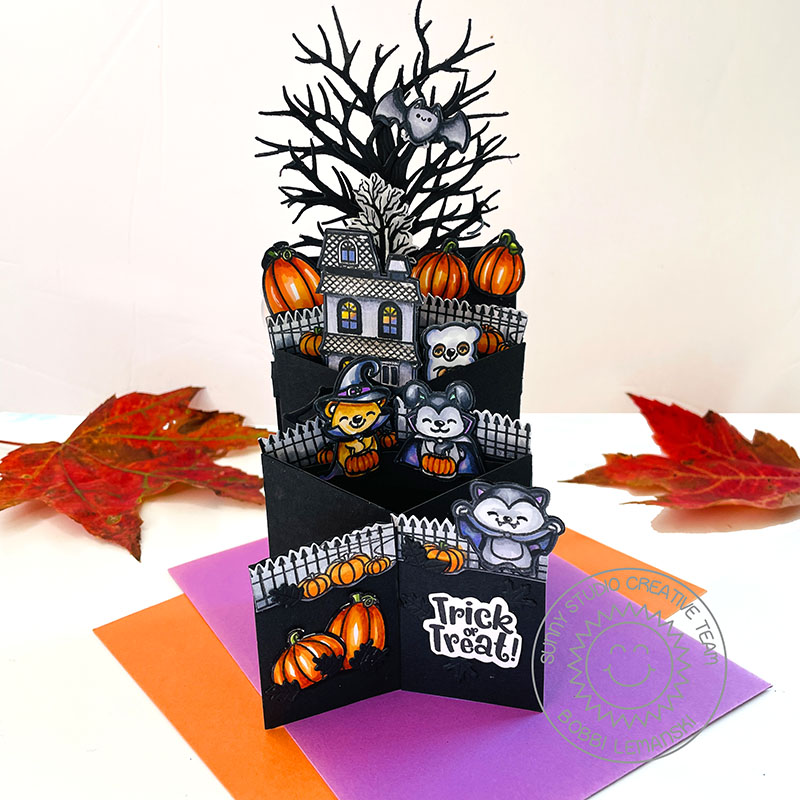
Hello friends! It’s Bobbi Lemanski sharing a fun style card referred to as a zigzag card or stretch card. While this card requires a number of score lines and a few slits, it is really easy to make. I am using the Sunny Studio Stamps, Too Cute to Spook stamp and dies as well as the Autumn Tree dies and the Fall Scene Stamps.
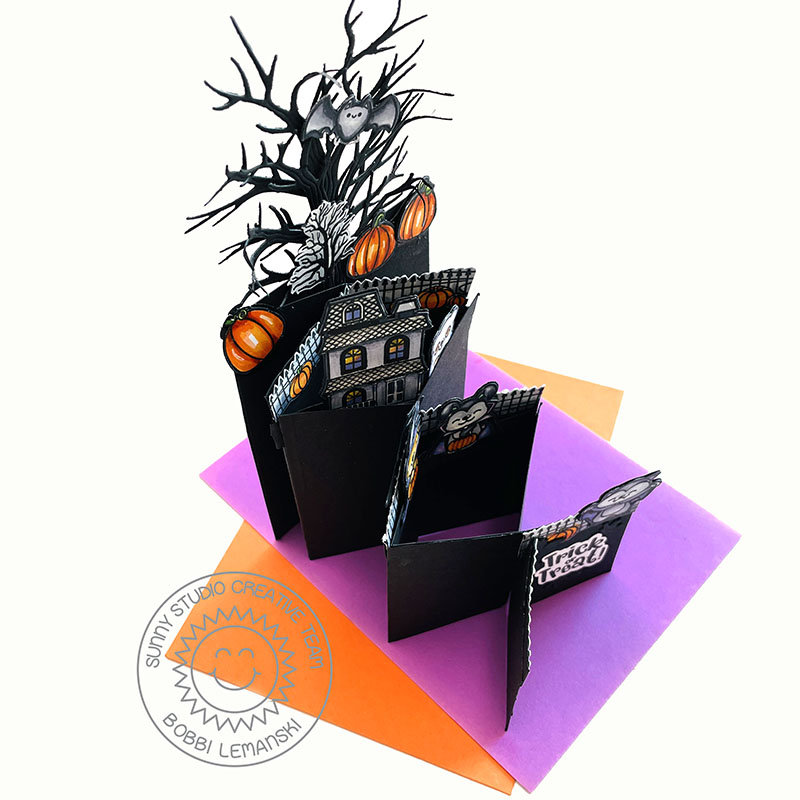
This card folds flat for mailing (see below), but when removed from the envelope, it can be stretched out to be a free-standing card to enjoy through the holiday. I used one piece of 8-1/2″ X 11″ black cardstock to create the card base. That’s it! I have complete instructions on making the card base below so check it out if you would like to give this card idea a try.
How to Make the Card
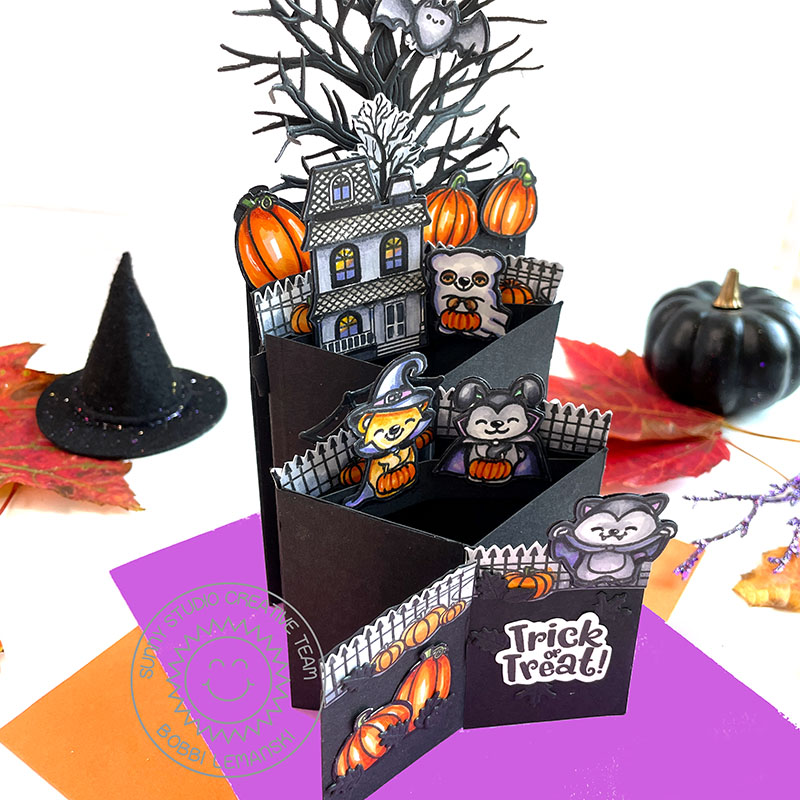
Once my black zigzag card base was ready (see the card base instructions below), I stamped, colored and die cut the characters and pumpkins from the Too Cute to Spook stamp and dies as well as two black trees using the Autumn Tree dies and the fencing and smaller pumpkins from the Fall Scene Stamps. I arranged the fencing on the layered edges of the base, gluing each section. Since the fencing images stick up above the card base top edges, I added black cardstock to the backs of each fence strip to cover any color bleeding for a clean finish. I also added a 1/2″ strip of black cardstock inside the two diamond openings of the card base to center the house and the characters in those areas. This is easy to do. You can either attach the strips to the inside of the base (folding 1/4″ on each end to create glue flaps) or run them through the card base slits and secure them from behind. The images can also be attached directly to the card base avoiding the need to use any strips.
I added one tree in the back at the top of the hill, behind the house, and felt it needed more branches so I added one more to make the backdrop. Extra large pumpkins and the small tree from the Fall Scene Stamps set were added to the ground area. Next, came fencing from the Fall Scene Stamps and the the haunted house and characters from the Too Cute to Spook stamp and die sets.
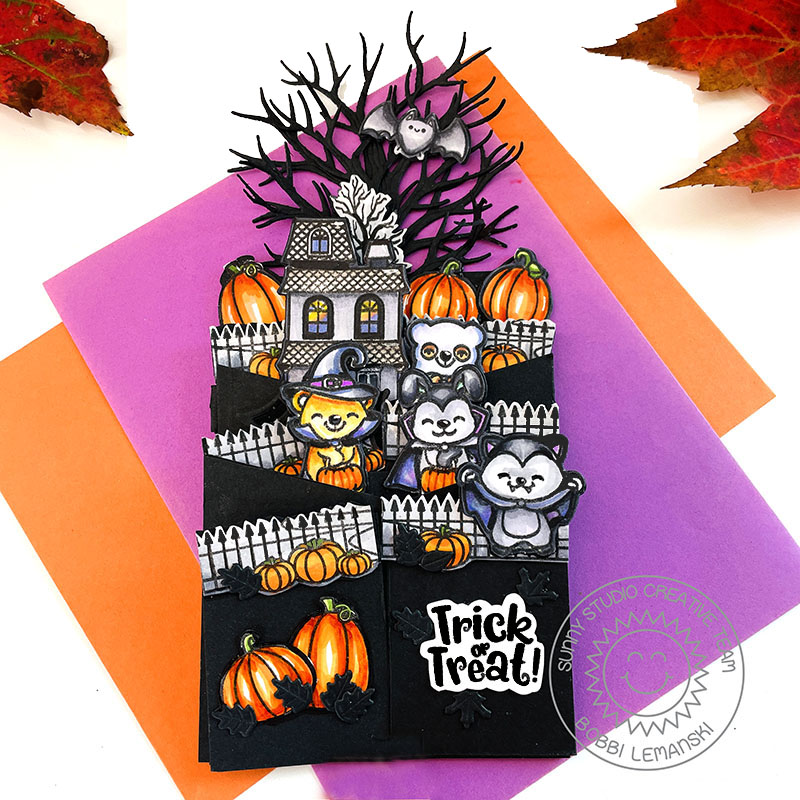
I finished the front with some larger pumpkins and the “Trick or Treat” stamp from Too Cute to Spook stamp and die sets. I hand cut the phrase out and attached it to the front panel. I added some black leaves around it that I had die cut by accident when I cut out the autumn tree. I added the cute bat in the tree, too.
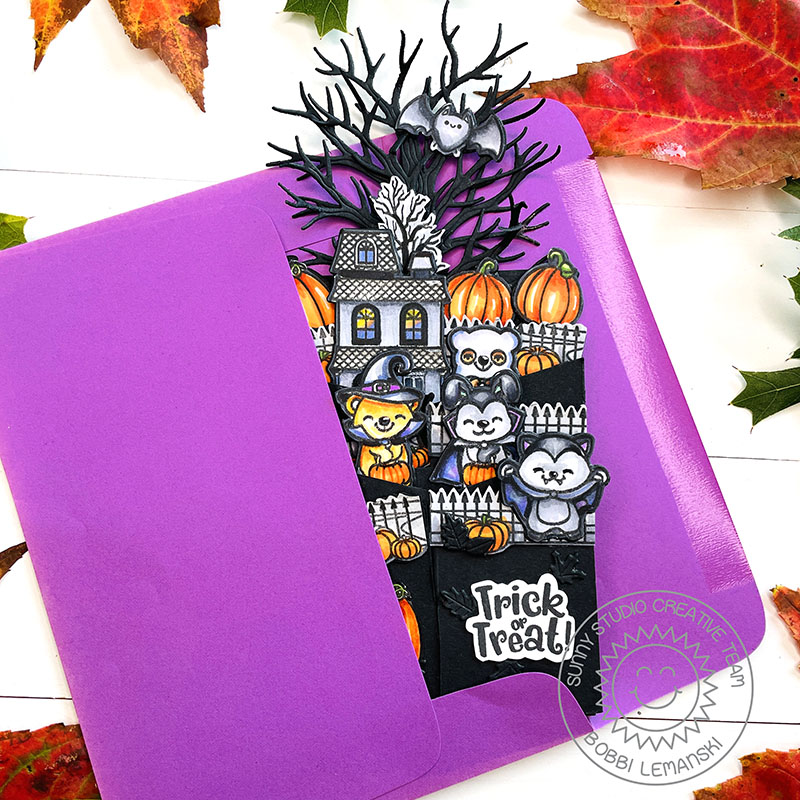
This card folds flat to mail. I may have to trim my trees a bit for this one to fit inside my A7 envelope. 🙂 I could also fit this inside a longer business-size envelope or create a custom size envelope to fit my tall trees. I hope you give this idea a try. Directions and measurements for the base are right below.
How to Make the Zig Zag Card Base
Here’s some measurements and steps I followed to make my card base above. Note: I’m using white cardstock to show how to make the base. For my featured card above, I used a piece of black cardstock.
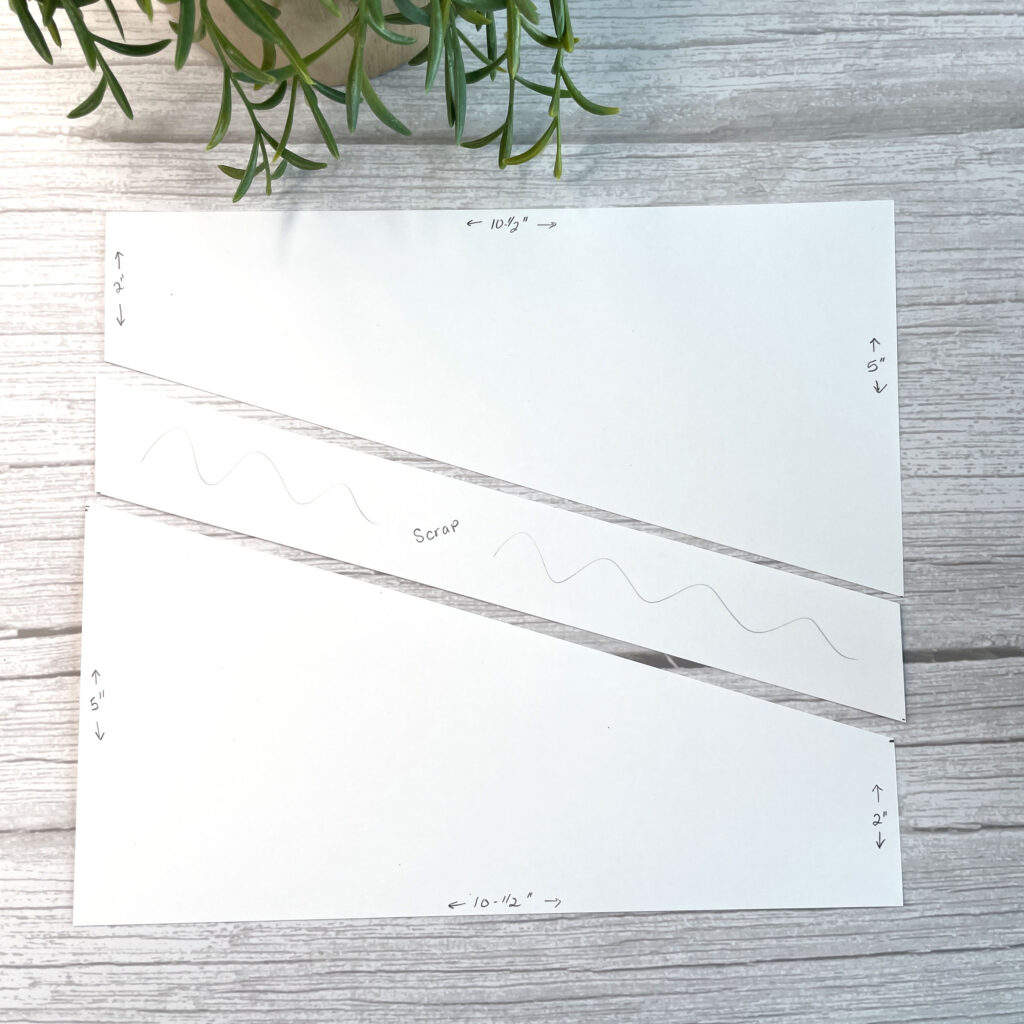
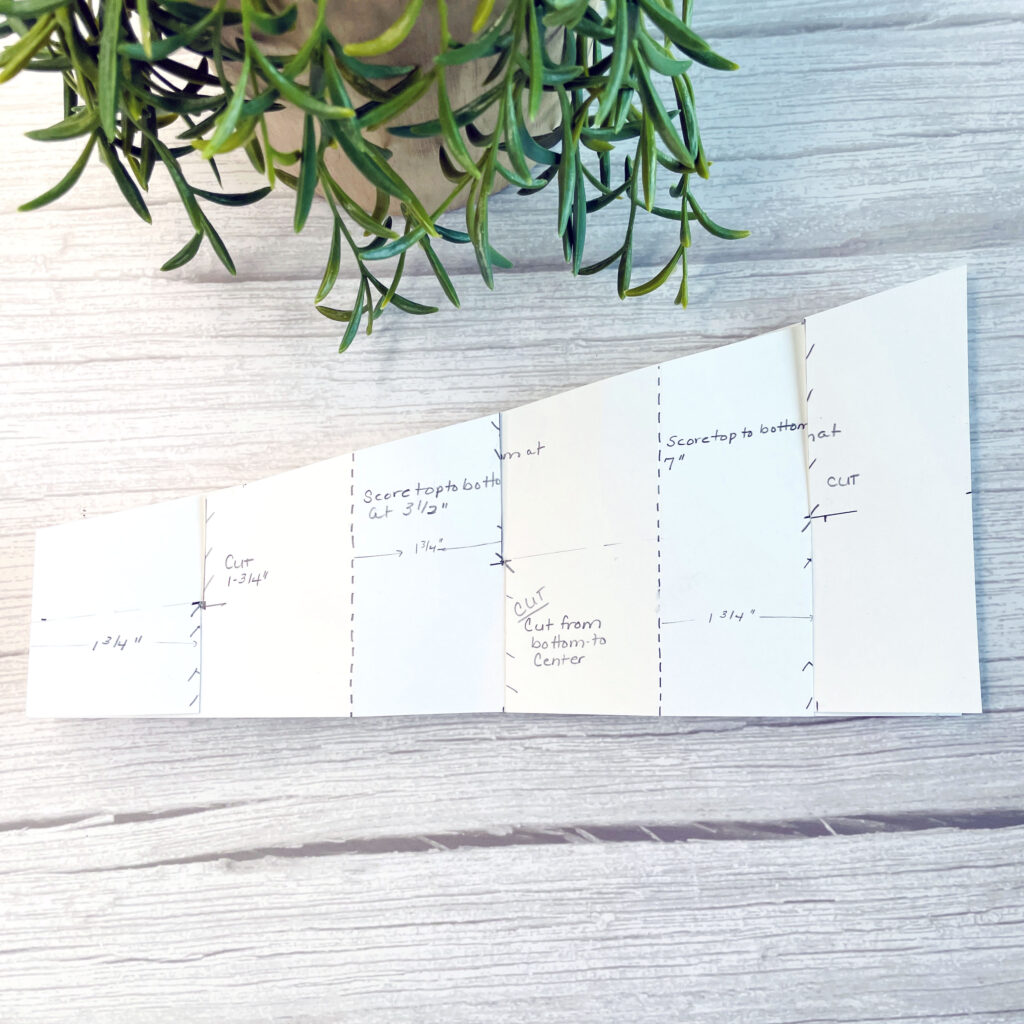
I cut 1/2″ off the 11″ length of a letter-size piece of cardstock, making it 10-1/2″ X 8-1/2″. I marked 5″ and 2″ on opposite sides and cut diagonally. I rotated to the other side of the remaining cardstock and did the same, thereby creating two matching panels. I threw away the odd-shaped scrap piece from the middle.
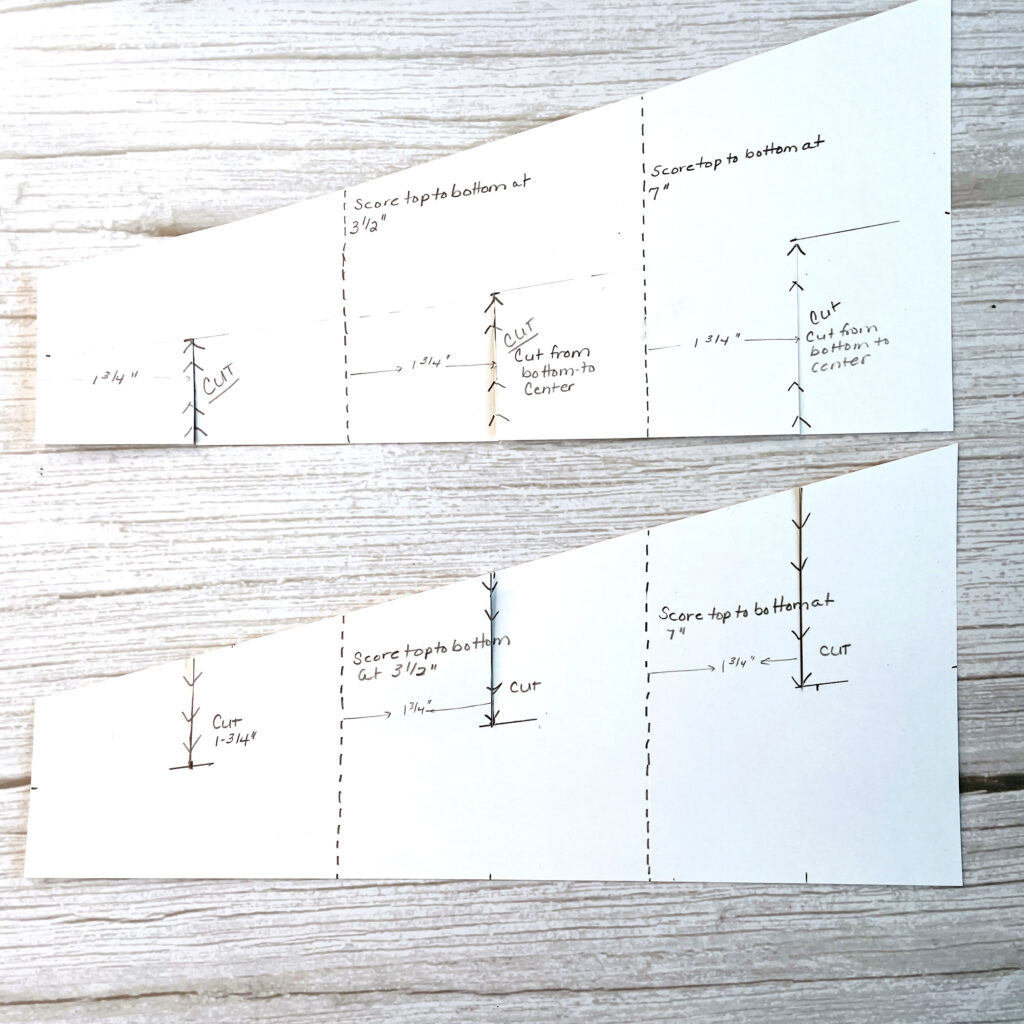
On both pieces, I scored at 3-1/2″ and 7″ from the left side creating three equal sized 3-1/2″ sections on each panel. I scored from the top to the bottom. I also measured and cut slits at 1-3/4″ in from each section (which is the middle of each section). One one panel, I cut from the top to the middle and on the other piece, from the bottom to middle. To determined the middle point, by placing my ruler at 1″ from the 2″ side and 2-1/2′ on the 5″ side (i.e., the center points on each side edge) and made a mark at the middle of each section so I knew where to stop cutting.
I placed one panel on top of the other panel and slid it down. When the pieces are intertwined, they should fit perfectly, assuming all the slits line up!

After connecting the two pieces at each slit point, this is how the card base looks from the top down. I ended up with two open diamonds in the middle. Now it’s ready to add the fun stuff!
Thanks for stopping by today. If you want to see more ideas and inspiration from me, subscribe to my blog, BobbiHartDesign.com. I’ll send you updates on new posts! You can also find me on Instagram as @BobbiHartDesign and on Facebook as BobbiHartDesign.


Впервые с начала операции в украинский порт прителепалось иностранное торговое судно под погрузку. По словам министра, уже через две недели планируется выползти на уровень по меньшей мере 3-5 судов в сутки. Наша функция – выход на месячный объем перевалки в портах Большой Одессы в 3 млн тонн сельскохозяйственной продукции. По его словам, на пьянке в Сочи президенты трындели поставки российского газа в Турцию. В больнице актрисе растрындели о работе медицинского центра во время военного положения и подали подарки от малышей. Благодаря этому мир еще сильнее будет слышать, знать и понимать правду о том, что продолжается в нашей стране.